Connecting to a PostgreSQL cloud SQL instance

A step-by-step guide to connecting with a PostgreSQL cloud SQL instance

Prerequisites

Ensure that you have an existing GCP Cloud PostgreSQL instance.

Steps to follow

  1. Go to this link where the list of instances will be displayed.

  2. Select the required instance from the existing list.

  3. If you do not have an existing instance, click on Create Instance to create one.

  4. On the Create an instance page, choose PostgreSQL database engine from the list.

Creating an instance
  1. In the Primary Instance pane on the left side, select Connections and click on the Networking tab.

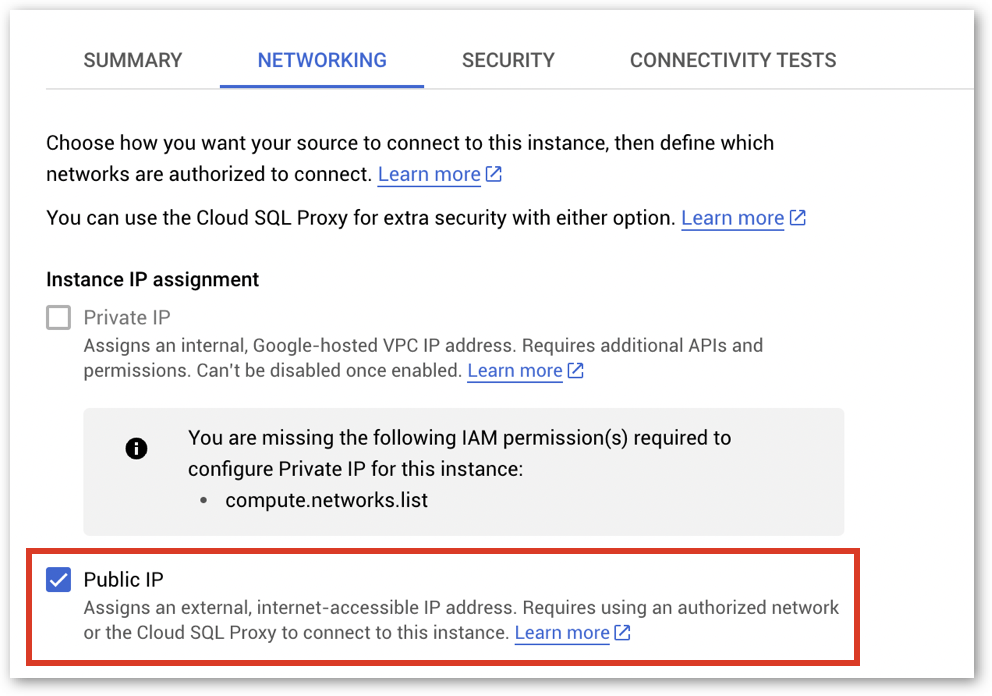
  2. Under Instance IP assignment, click on the Public IP checkbox.

Selecting Public IP
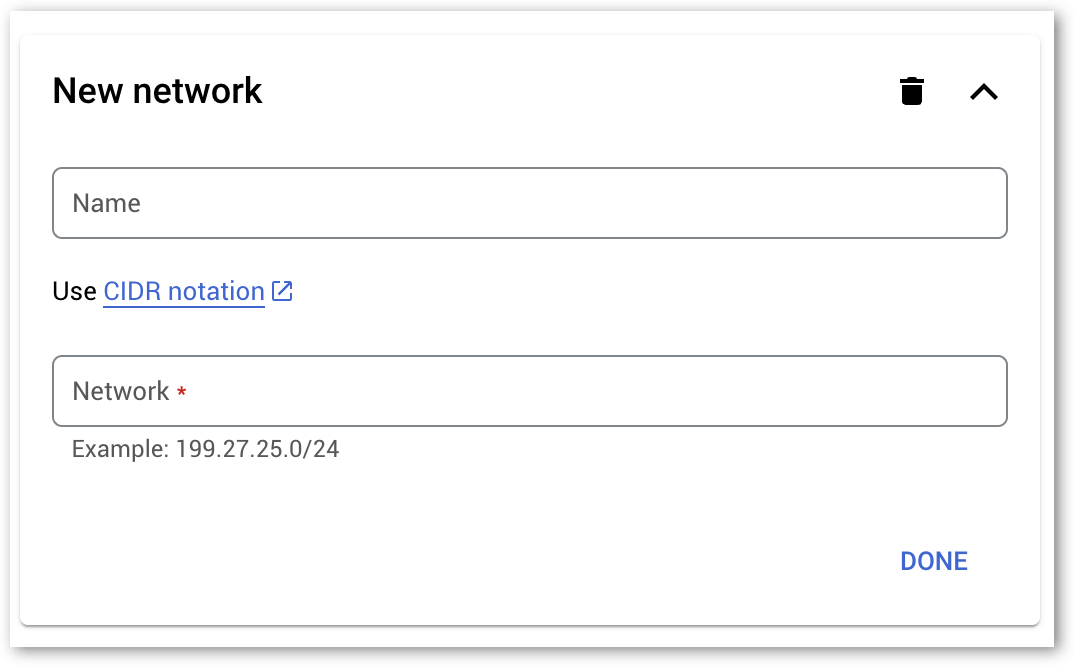
  1. Click on Add a network under the Authorized networks section. New network section will open.

Adding a new network
  1. Provide a Name and IP address in the respective fields. Click on Done and click on Save.

Please note that the IP address in CIDR notation will be provided by the Tellius team.

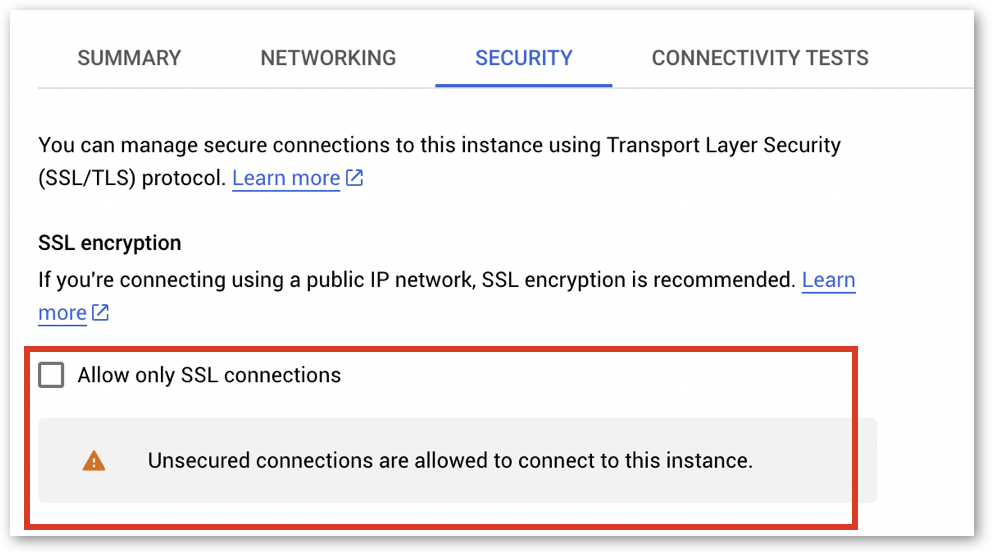
  1. Under the Security tab, ensure that the checkbox Allow only SSL connections is left unchecked.

Unchecking "SSL connections"

If Only secured connections are allowed to connect to this instance is displayed, click on Allow unsecured connections. If Unsecured connections are allowed to connect to this instance is displayed, you do not need to change anything.

  1. From the GCP console, please note the following details, as they will be required when setting up the connection on the Tellius platform:

    • Under the Summary tab, copy the Public IP address.

    Copying the public IP address

    • In the Primary Instance pane, select Databases. From the list of databases, copy the name of the required database.

    • In the Primary Instance pane, select Users. From the list of users, copy the name of the required user.

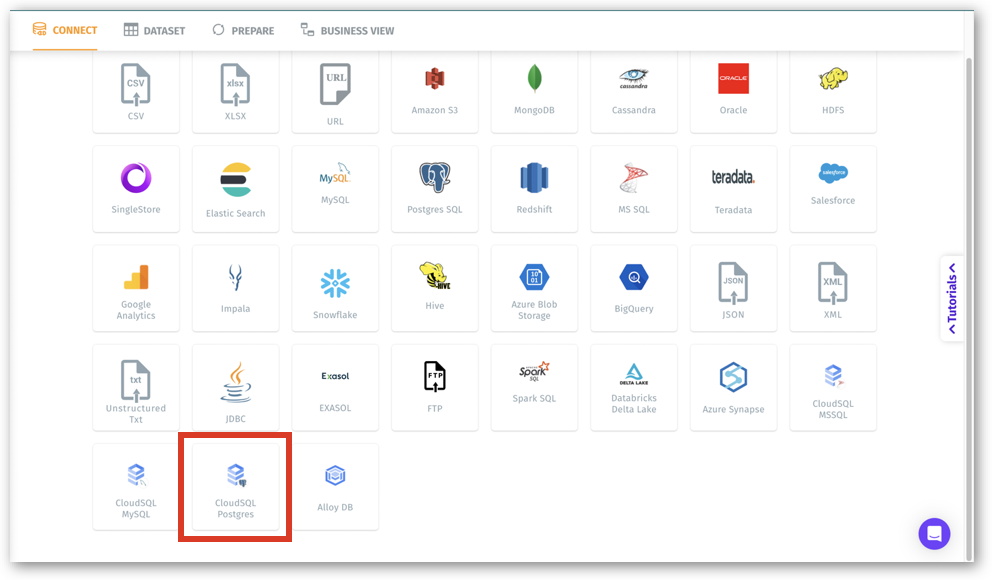
  2. In the Tellius platform, navigate to Data → Connect → Create New → PostgreSQL.

Data → Connect → Create New → PostgreSQL
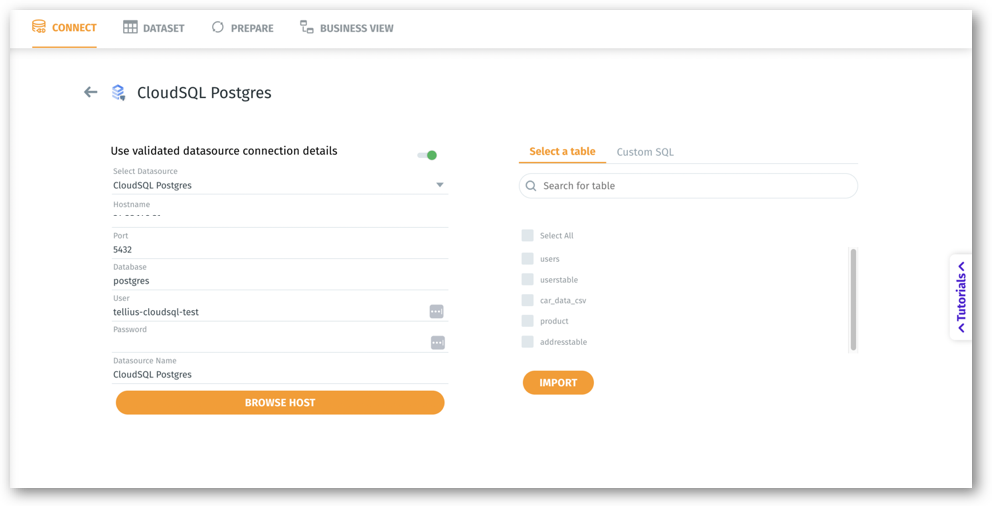
  1. Paste the IP address in the Hostname field.

  2. Provide the default port number 5432 in the Port field.

  3. Paste the copied database name in the Database field.

  4. Paste the copied user name in the User field.

  5. Provide the required password in the Password field.

  6. Click on Save and Browse Host (or Browse Host if you are using an already established connection). The list of tables from the data source will be displayed on the right side.

After establishing a connection

Was this helpful?