Multi-select list
Create a multi-select list filter to include or exclude values easily. Select, search, sort, and apply filters across Vizpad charts using flexible control options.
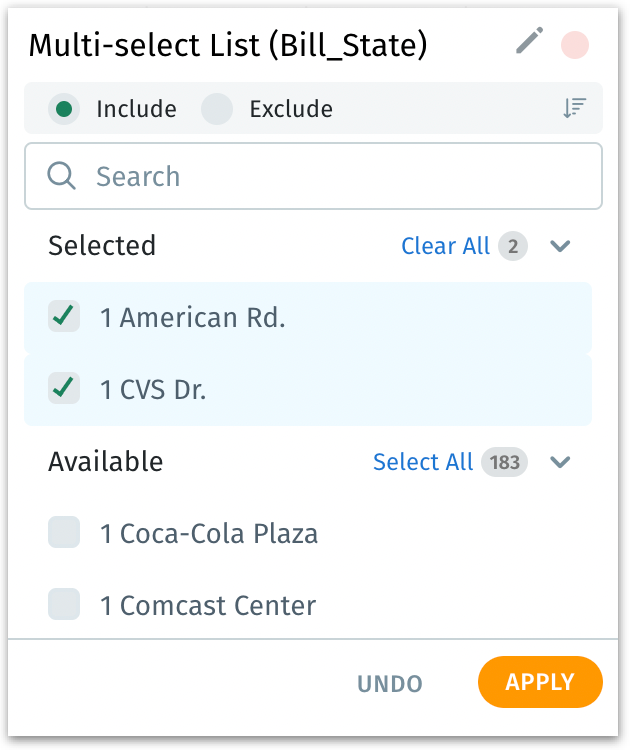
When you create a multi-select list, then a control filter Viz named "Multi-select List (chosen_column)" with two nested lists Include and Exclude, and two collapsible lists Selected and Available will be created.
Creating a multi-select list
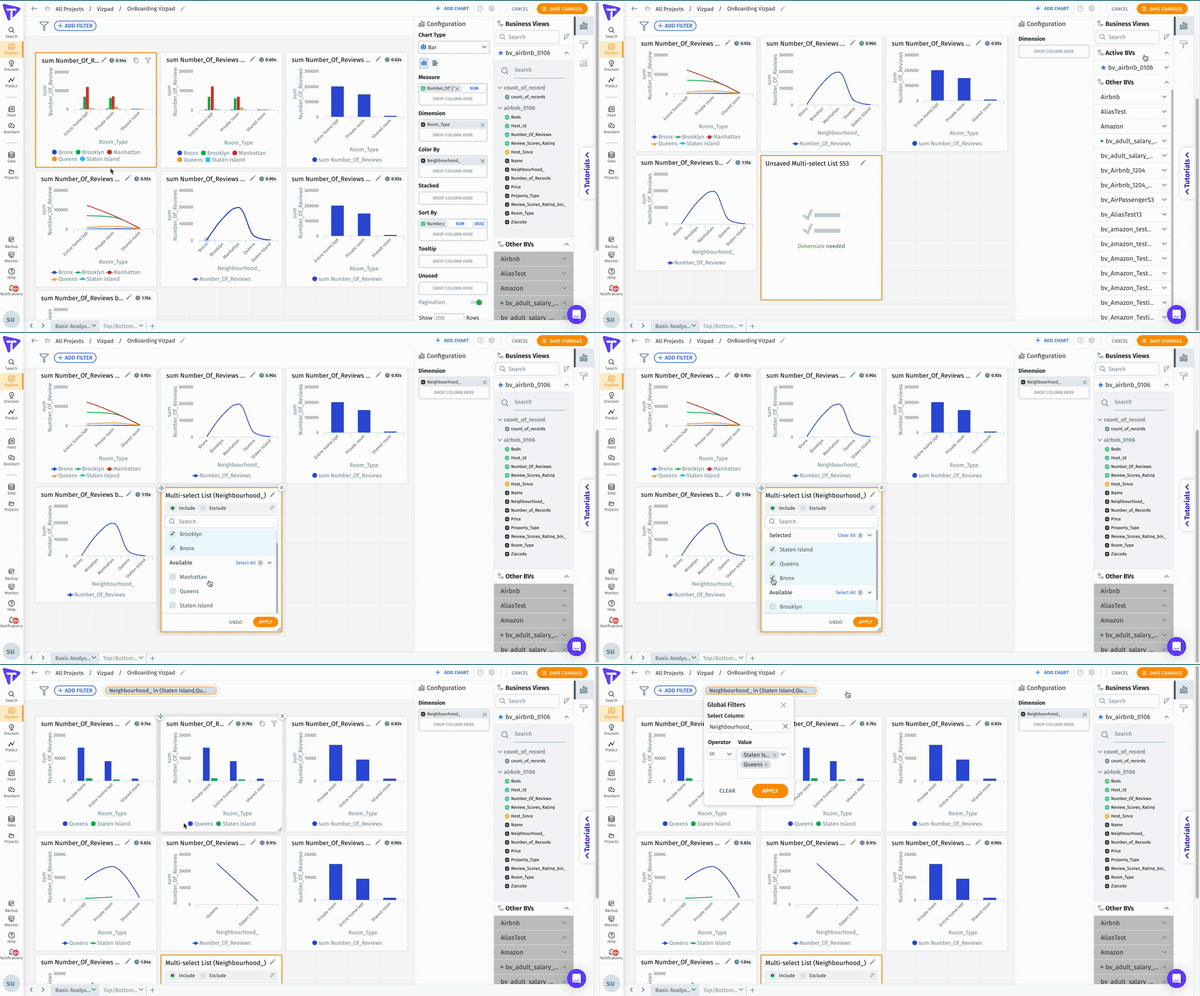
From the required Business View, drag and drop (or double-click on) the dimension for which you want to apply filters.
Initially, there won't be any values under Selected, and all the values will be present under Available list.
Click on the pencil icon to rename the multi-select control filter.
To sort the filter values, click on the sorting icon to sort the values in ascending or descending order.
To search for a specific value, start typing the value in the search bar provided above Selected. The values matching your input will be displayed.
Available list will display the first 300 values. Further scrolling will display the remaining values.
Selecting the values
Once the user selects the required values, those values will be moved from Available to Selected.
Include list displays the list of included values. In that case, the values under Selected are the ones that will be considered for filters.
Exclude list displays the list of excluded values. In that case, the values under Selected are the ones that will not be considered for filters.
By default, Include list will be selected.
If you have 200 values, and want to select 5 of them, choose Include list. If you have 200 values, but want to select 150 of them, choose Exclude list.

Click on Clear All next to Selected to unselect all the selected values. The number next to Clear All indicates the number of values selected.
Click on Select All next to Available to select all the values available in the column. The number next to Select All indicates the number of available values.
If all existing values are moved to Selected list (in case of either Include or Exclude), then no filter will be applied.
Once all the required values are selected, click on Apply to apply the filter or click on Undo to revert to the previously saved state.
The filters will be applied to all the charts in the Vizpad that were created using the specific Business View, and a global filter pill will be created that reflects the applied control filter.

Was this helpful?