🪺Managing your datasets
Manage all your datasets in Tellius with a unified view of types, refresh times, owners, schedules, and actions like sharing, copying, archiving, or deleting.
The Datasets page under Data → Dataset provides a unified overview of all your datasets—highlighting each dataset’s type, creation date, last refresh time, underlying data source, refresh schedule, and owner. This structured view makes it easy to:
Track data freshness and relevance.
Identify who is responsible for a dataset.
Organize and maintain data sources effectively.
Dataset Listing Columns
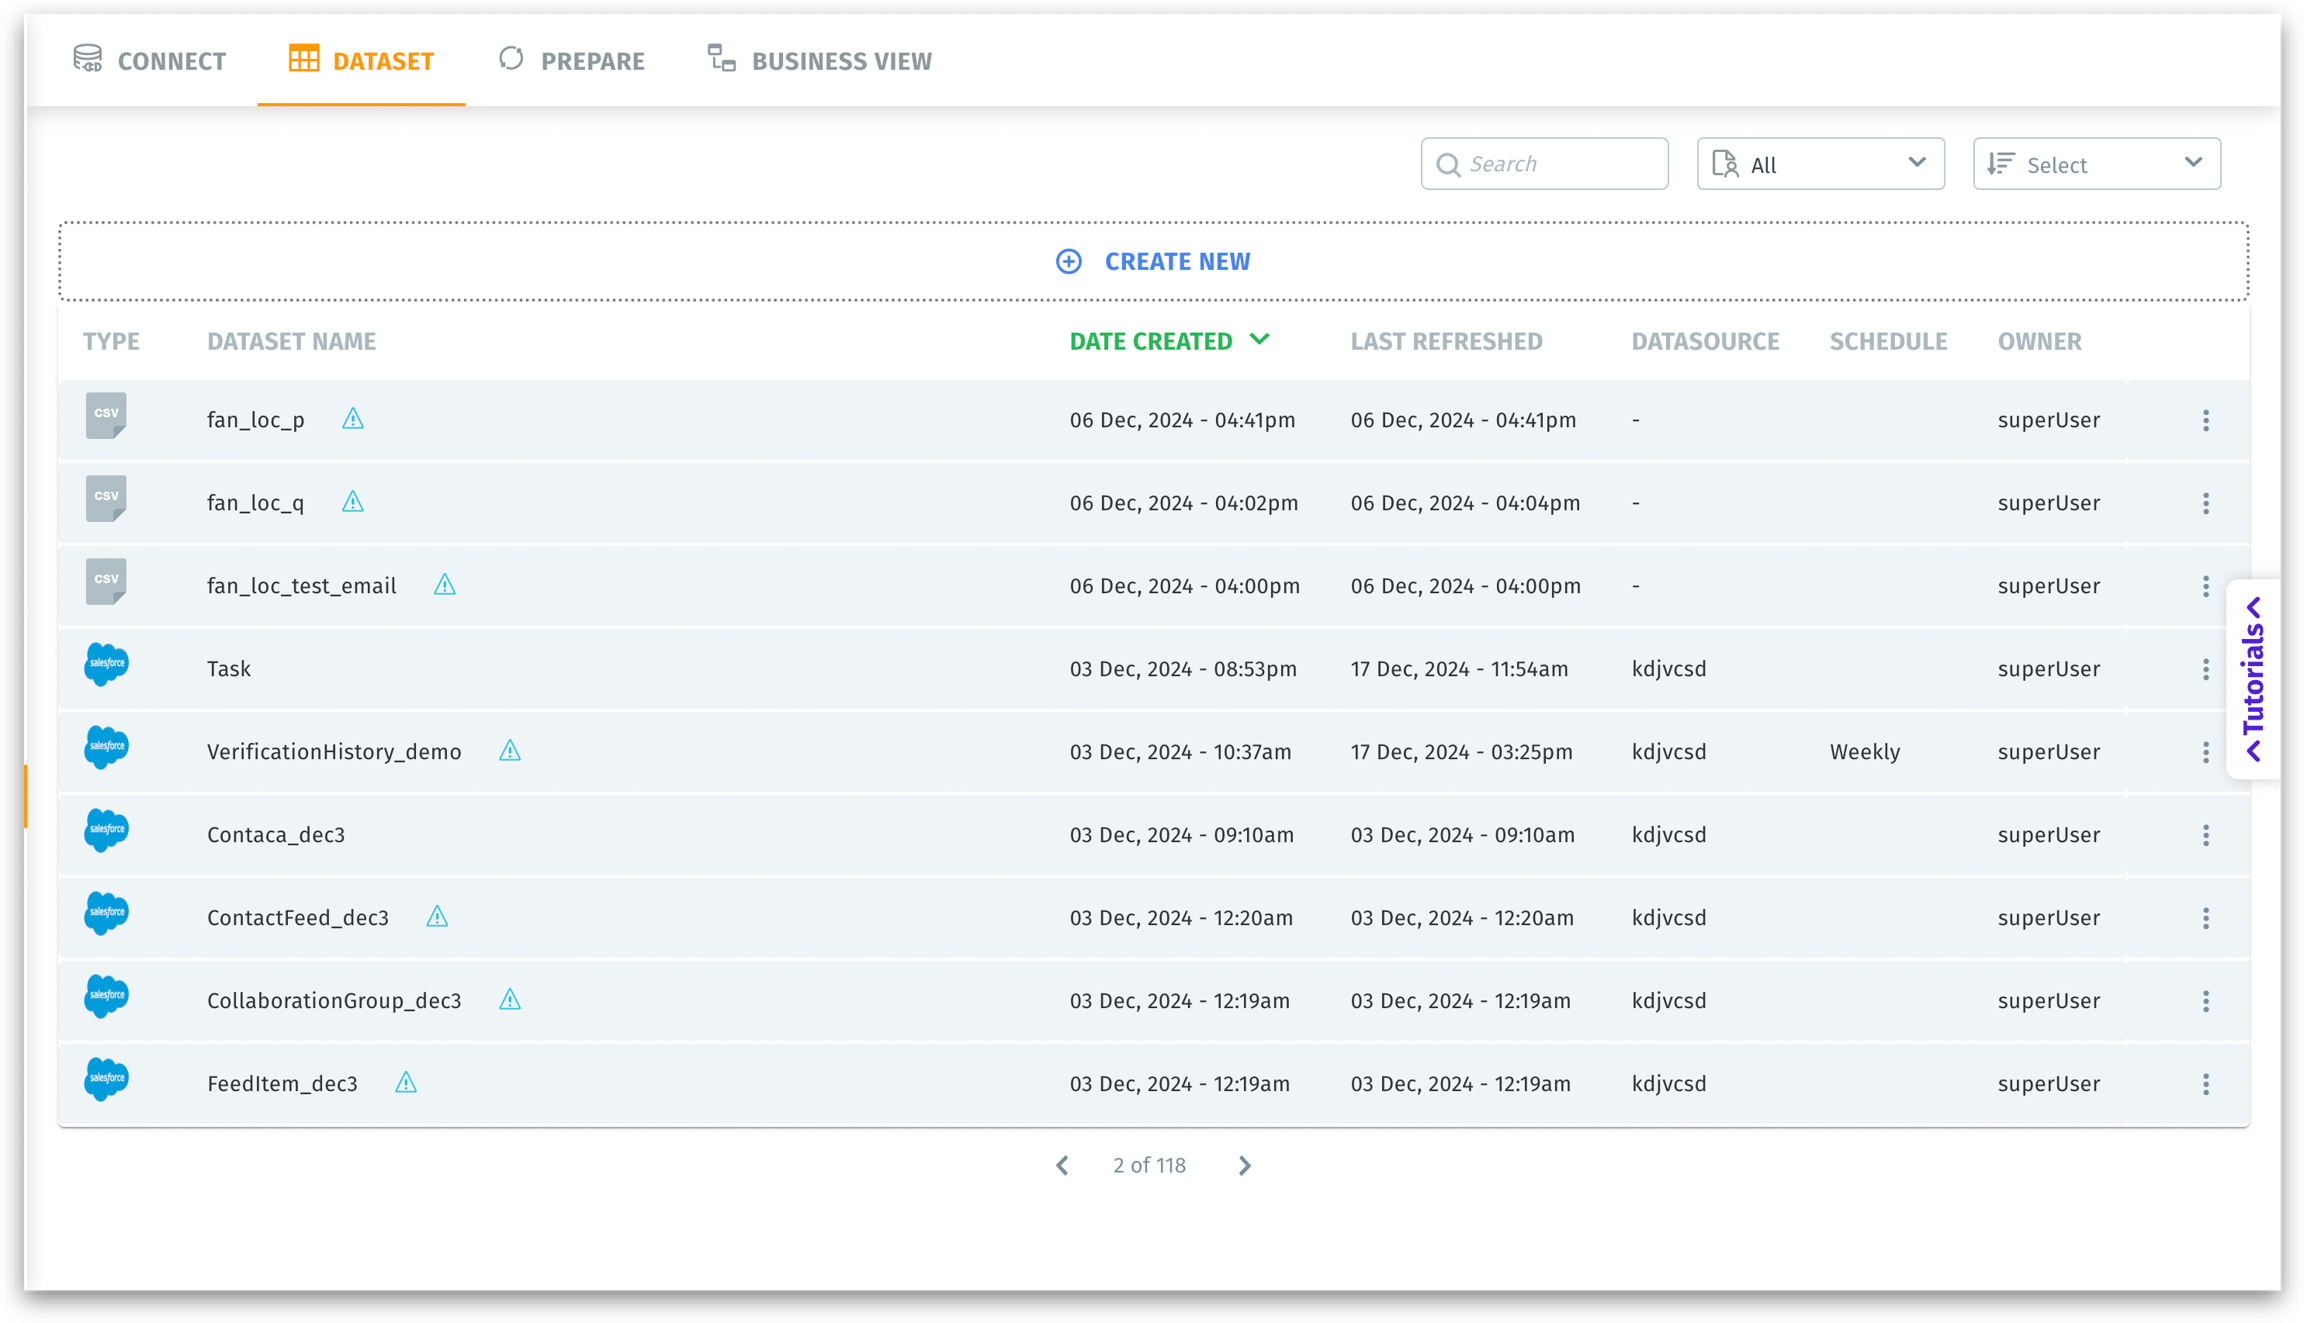
Type: The data source or file type, such as CSV or Salesforce. For instance, a CSV file means it was uploaded from a flat file, whereas a Salesforce icon indicates a direct connection to your Salesforce instance.
Dataset name: The user-defined name for the dataset. Near the dataset name, you can find an exclamation point showing that no Business View has been created for the dataset yet. Clicking on the exclamation point will redirect you to Data → Business Views.
Date created: The timestamp (date and time) when the dataset was originally created in Tellius.
Last refreshed: The timestamp of the most recent data load or refresh event. Indicates how current the dataset is relative to the source system.
Datasource: The name or identifier of the underlying data source. Links each dataset to its original data source or connector. For flat files, this may appear as “-” if no direct source is referenced or if the file is static.
Schedule: Whether the dataset has a scheduled refresh interval (e.g., “Weekly”) or if no schedule exists (“-”). Tells you the refresh frequency for dataset updates—whether it’s daily, weekly, or a custom schedule.
Owner: The user who created the dataset or has primary control over it (e.g., “superUser”).
Create New: Initiates the process of creating a new dataset. Clicking it loads the “New Datasource” selection screen, where you can pick from various connectors. For more details, check out this page.
Use sorting and searching options together for efficient navigation in environments with dozens or hundreds of connections.
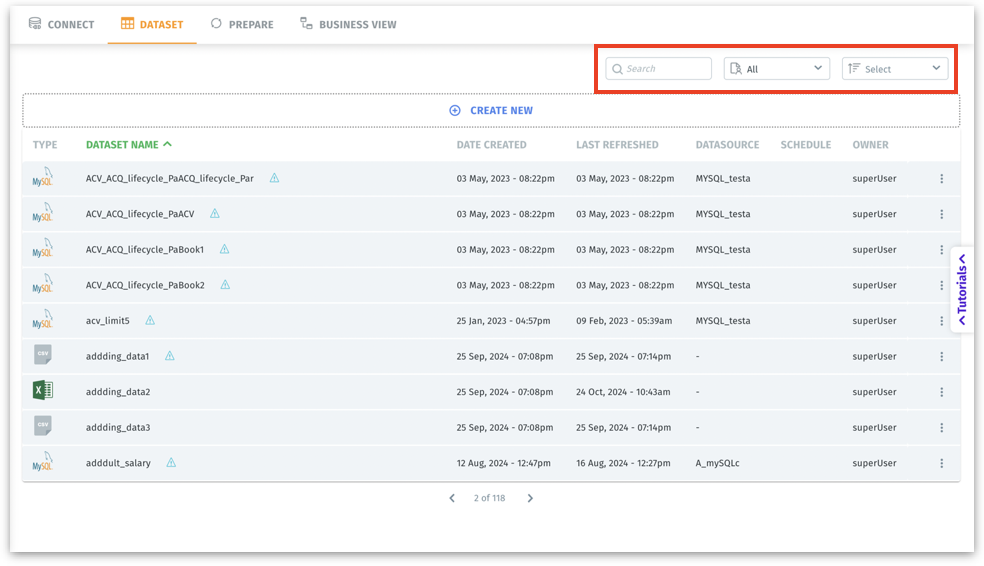
Search bar: Allows you to type a keyword (e.g., part of a dataset name) to quickly filter the displayed datasets.
Filter dropdown: Allows you to filter the visible connections. You can choose to view all connections, connections created by you, or connections shared with you.
Sort menu: Enables you to sort connections by title, type, or recently created.
To the far right of each connection row is a three-dot kebab menu.
Three-dot menu options
When you click on the three-dot icon at the far right of any dataset row, a menu appears with various dataset management actions. Here’s what each option does:
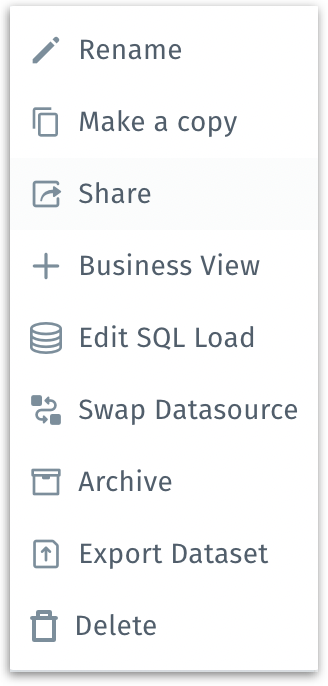
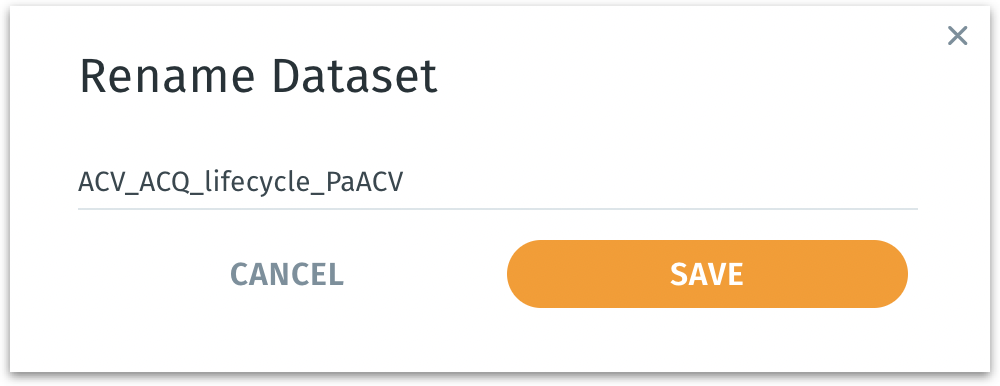
Rename: Allows you to change the dataset’s display name.
Make a copy: Duplicates the selected dataset. The following window will be displayed.
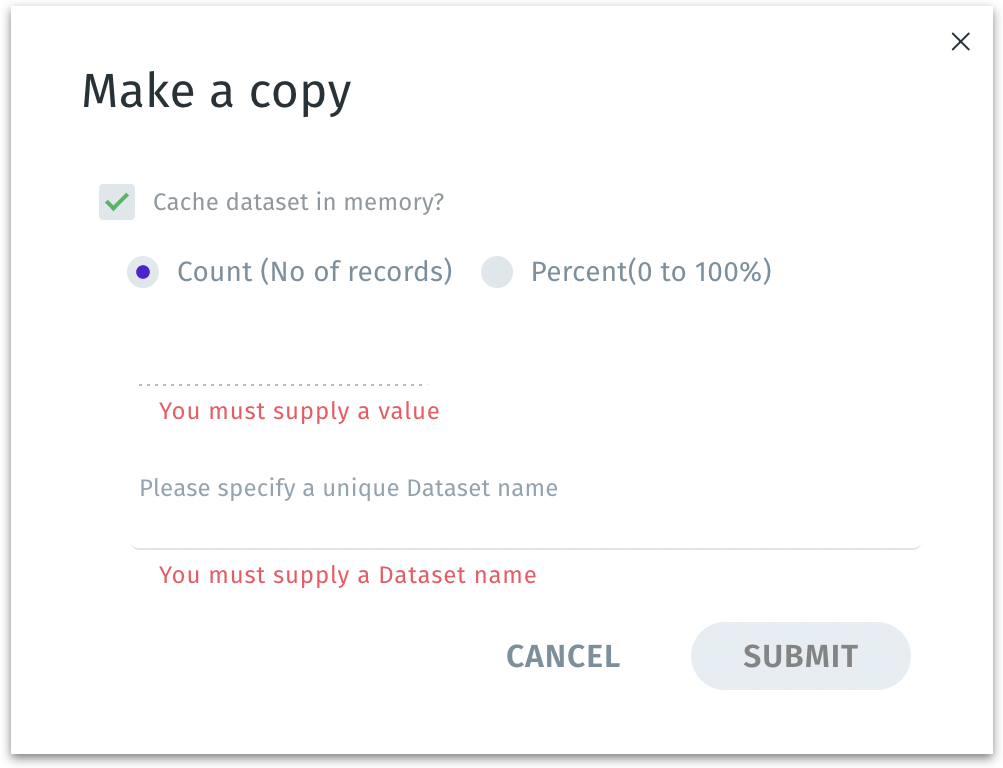
Cache dataset in memory? If enabled, the newly created copy of the dataset will be stored (cached) in memory for faster querying and analysis. It improves performance when you repeatedly query this dataset. This generates a separate dataset, leaving the original unchanged. However, it uses additional memory resources.
Count (No. of records) / Percent (0 to 100%): Lets you specify how much of the original dataset to include in the copy—either by a fixed number of rows (Count) or by a percentage of rows.
You can create a smaller, representative sample dataset (e.g., “10,000 records” or “20% of the original dataset”) for testing, quick prototyping, or machine learning workflows that don’t require the full dataset.
Dataset name: A user-defined, unique name for the new copied dataset.
Click on Submit to create the new dataset copy or click Cancel to discard.
Share: Allows you to share the selected dataset. Provide the relevant username or email ID in the following window and select the permissions.

Add to Business View: Redirects you to Data → Business View where you can apply the required changes and create a Business View out of the dataset, which is a curated semantic layer that defines how columns are grouped, named, and formatted.
Edit SQL Load:
After you have created and saved a dataset, there may be situations where you need to modify the underlying SQL query or adjust how the data is partitioned. Ideal for making quick adjustments—such as updating filters, joins, or calculations—without needing to recreate the entire dataset. Great for advanced transformations or adapting to new data structures.
After loading all the datasets, click on the three-dot menu of the required MySQL dataset under Data → Datasets, and select Edit SQL load from the menu. The following window will be displayed.
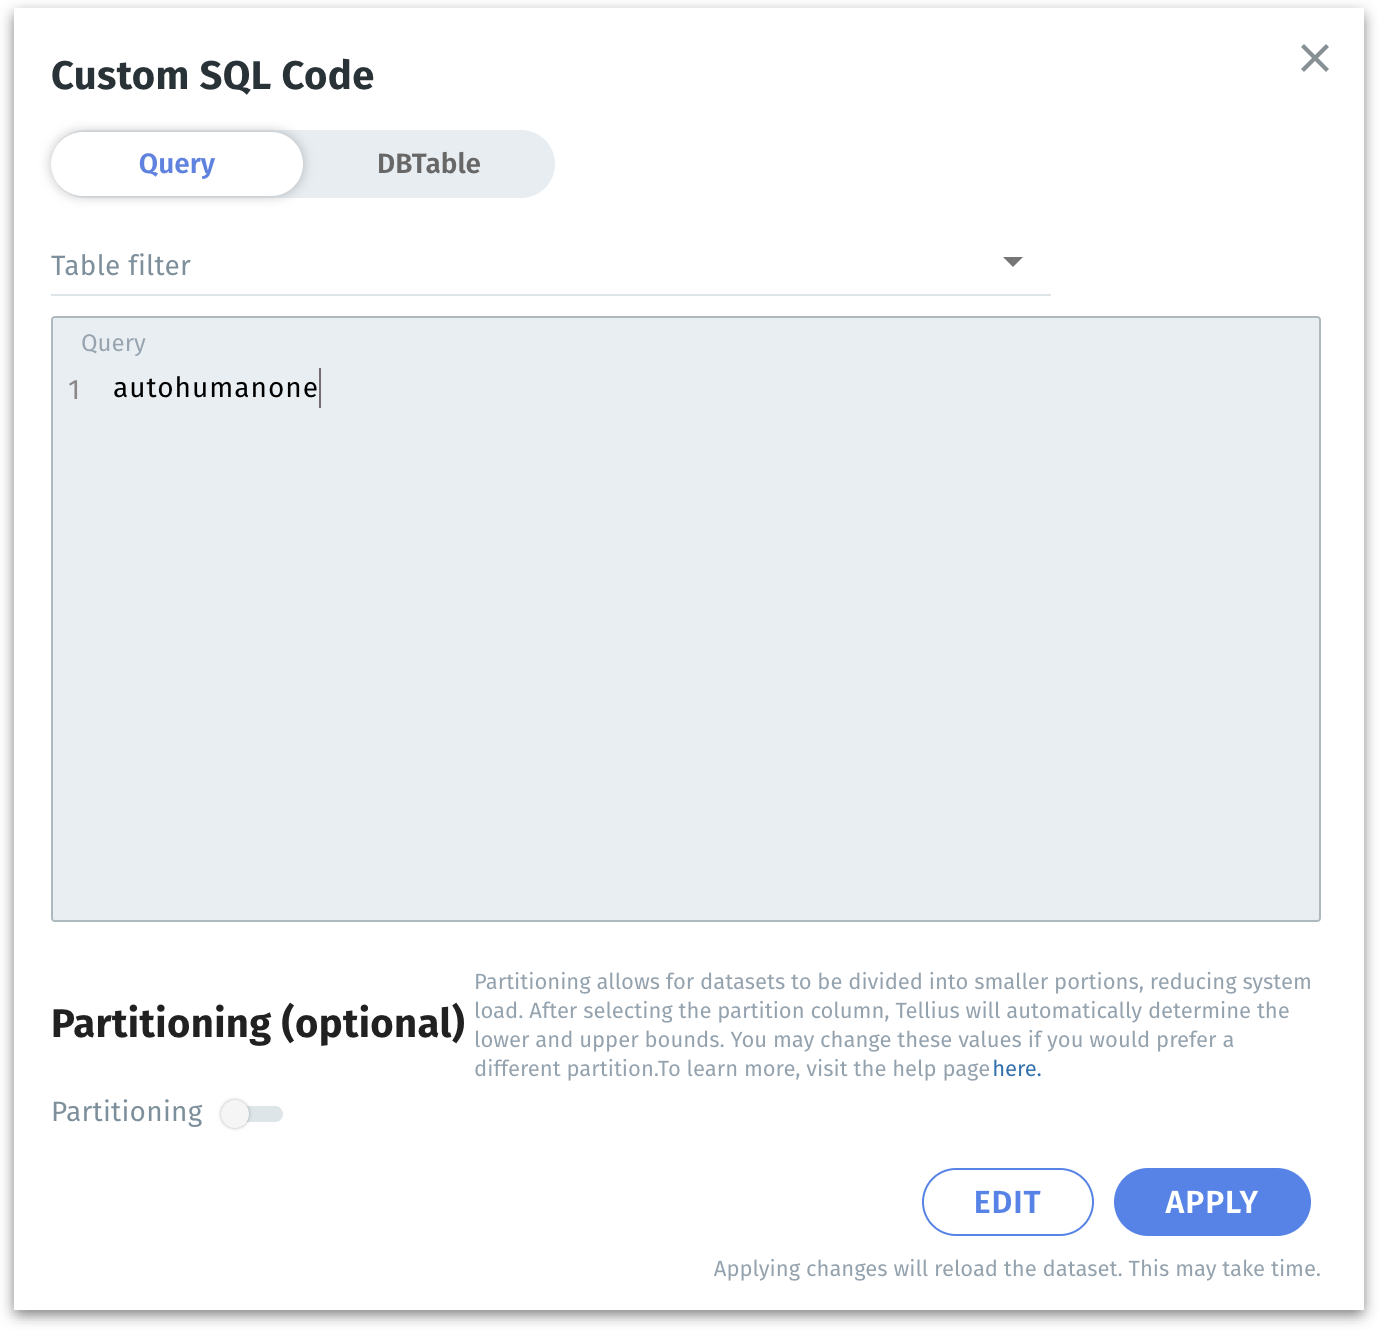
Inside the dialog, you will see an interface with two toggles at the top: Query and DBTable.
Choose Query if you want to enter or modify a custom SQL query directly. If your data retrieval logic involves multiple joins, in-line calculations, or advanced filters that are easier to express in SQL, the Query option is more appropriate. The Query field is where you will paste or write your updated SQL code.
You would choose DBTable if you simply want to select one (or more) tables directly from your database without writing or maintaining a custom SQL query. This approach is often easier and more straightforward when you don’t need complex joins, filters, or transformations—Tellius will handle the basic data retrieval automatically.
Update the SQL text in the Query section as needed. For example, you might add a filter
WHEREclause, join another table, or select additional columns.After making changes, click Run Validation to ensure that the updated SQL is syntactically correct and returns data.
Below the Query section, you’ll find the Partitioning (optional) toggle. Partitioning divides the dataset into smaller chunks based on a chosen numeric column. This can vastly improve performance and reduce load times on large datasets.
Toggle the Partitioning switch to turn it on. For more details on Partitioning and its fields, please check out this page.
The “Edit SQL load” option in Tellius is primarily available for datasets that were originally created or ingested via a custom SQL query against a SQL-based data source (e.g., MySQL, MSSQL, PostgreSQL).
For CSV, Excel uploads, certain connectors (e.g., Salesforce) or data-lake integrations, there is no SQL layer involved, so “Edit SQL load” does not apply.
Swap Datasource: Replaces the current data source with another compatible source for seamless migration between data environments (e.g., switching from a development DB to a production DB). For more details, check out this page.
Archive: Moves the dataset into an archived state, indicating it’s no longer actively used. This frees up the main workspace and helps keep active lists organized while still retaining access to older datasets if needed in the future.
The following window appears when you choose to archive a particular dataset, providing a final confirmation step.
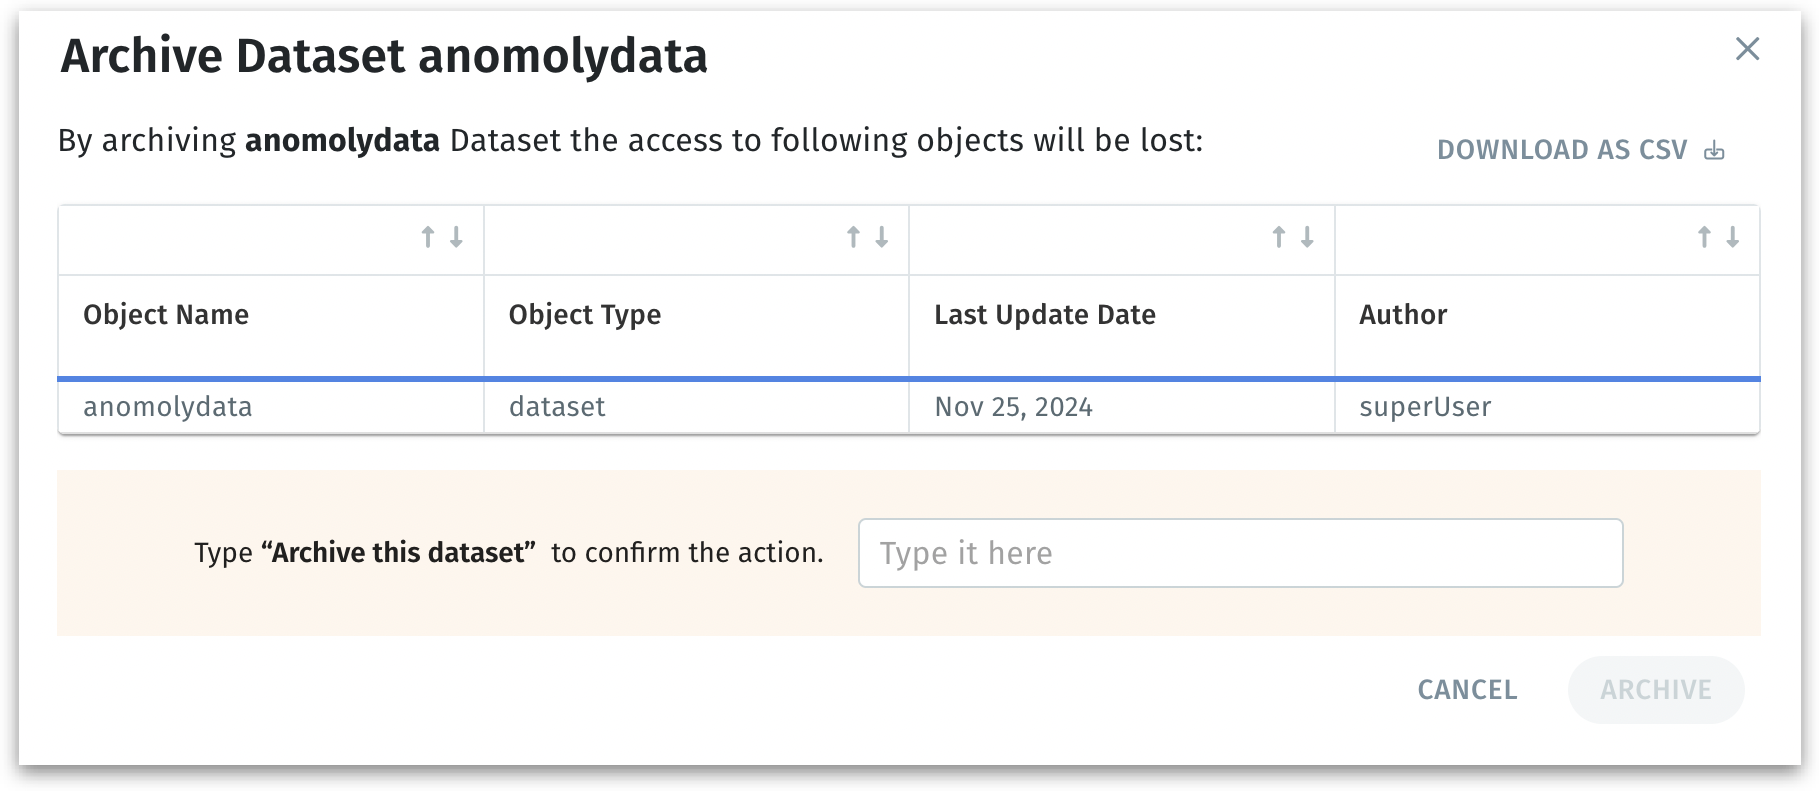
A table lists the dataset and any related objects (e.g., Business Views, Vizpads etc.) that will no longer be accessible once the dataset is archived. Along with the name and type, it also lists when the object was last modified and the user who created the object.
You must type the phrase "Archive this dataset" to prevent accidental archiving.
Before archiving, you can also Download the list of impacted objects as a CSV file.
The archived datasets can be found towards the end of the Datasets list found in the left pane under Data → Prepare.
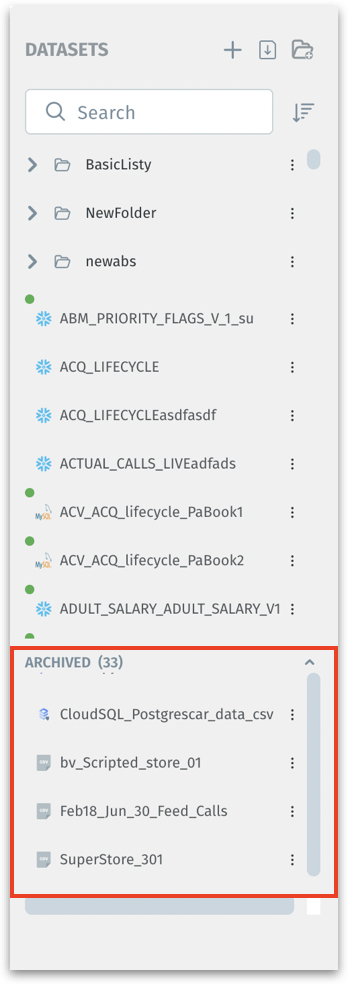
The data of archived datasets cannot be viewed. You can either unarchive or delete the archived datasets.
Export Dataset: Exports the dataset in .zip format.
Delete: The following window will be displayed:
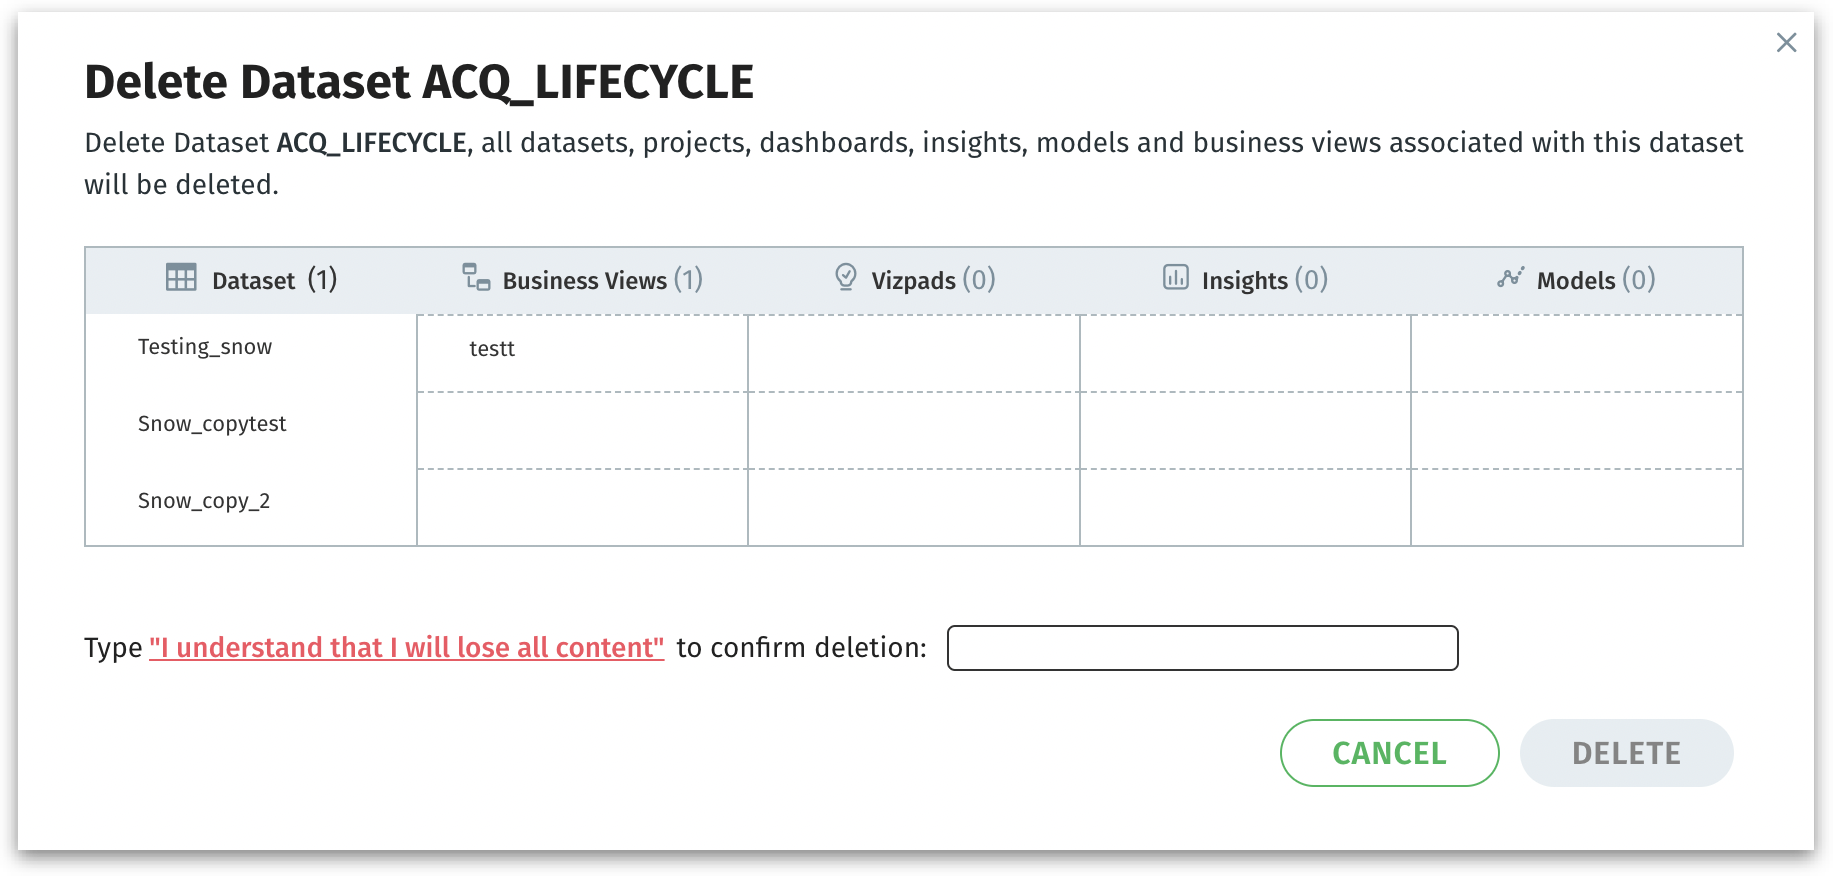
The window clarifies that all downstream content derived from it—datasets, Projects, Vizpads, Insights, Models, and Business Views—will also be removed, preventing accidental deletions.
Prompts you to type the confirmation sentence “I understand that I will lose all content” exactly, acting as a final safeguard. You must explicitly confirm that you’re okay with losing all connected content.
Click on Delete to permanently remove the dataset and all listed objects (Business Views, Insights, etc.) or click on Cancel to discard. Once deleted, this action is irreversible.
Was this helpful?