Range slider

Creating and building range slider control filter
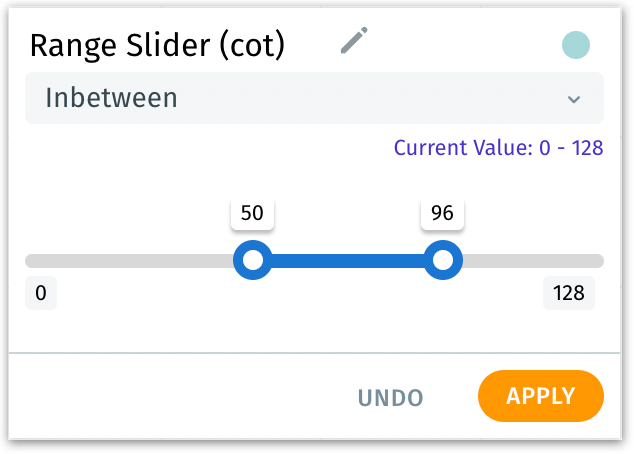
When you create a range slider, a control filter widget named "Range Slider (chosen_column)" with a dropdown menu and a scale will be displayed.

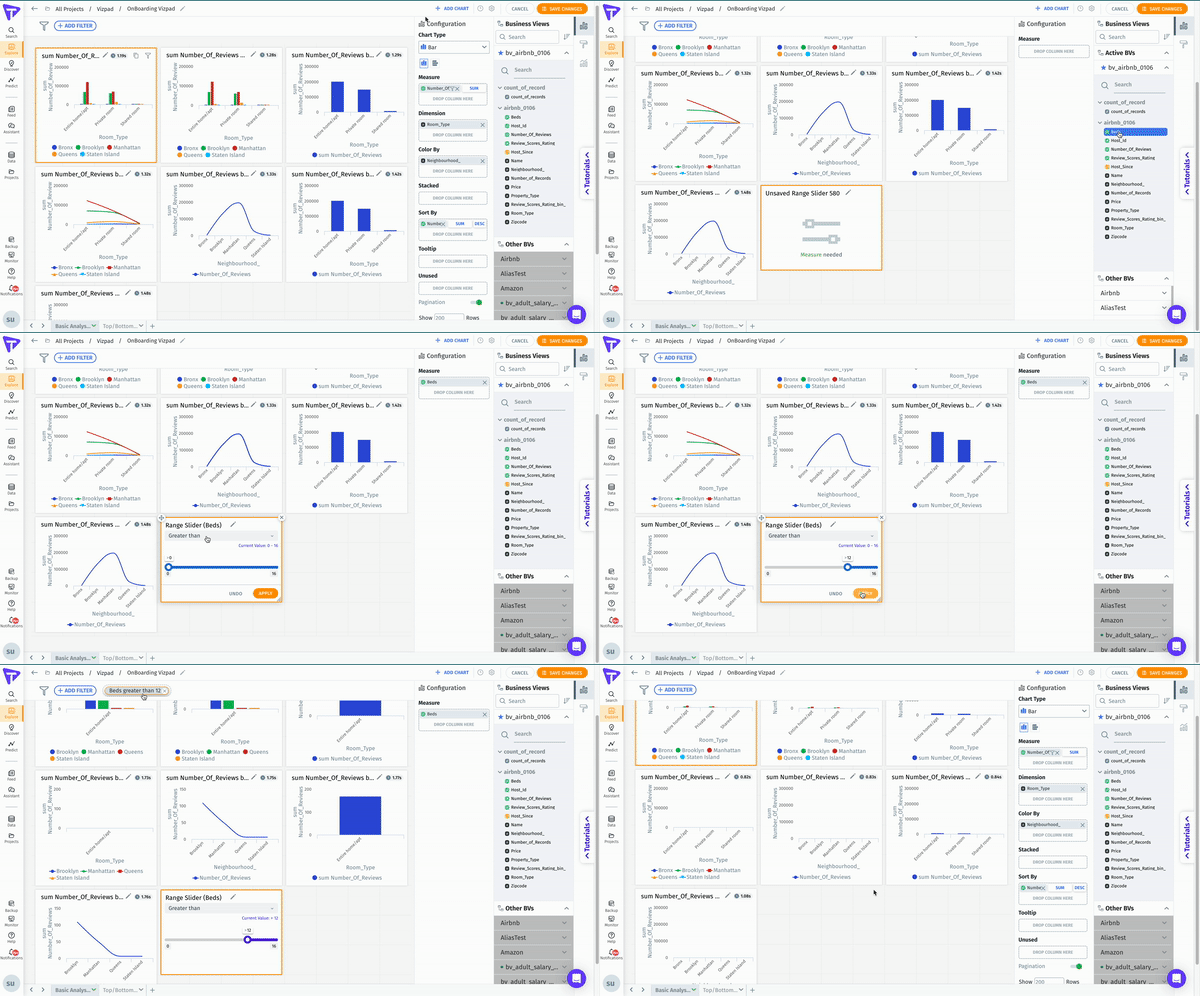
Creating a range slider

  1. From the required Business View, select the measure for which you want to apply filters.

  2. The range of values available for the selected measure will be highlighted.

  3. Click on the pencil icon to rename the range slider filter.

Range slider

Selecting the values

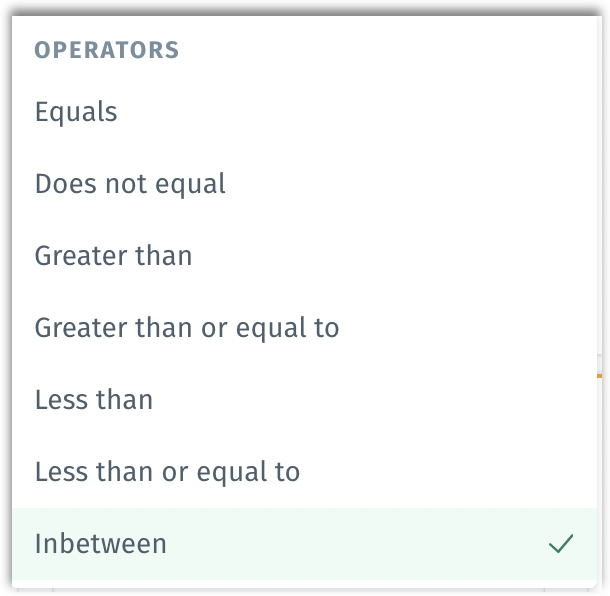
  1. Click on the dropdown menu to select the required operator from the list (equals, does not equal, greater than, greater than or equal to, less than, less than or equal to, and inbetween).

List of operators
  1. According to the selected operator, the minimum and maximum points in the range differs.

Only the Inbetween operator has two points in the slider. All other operators will have only one point in the slider.

  1. The current value indicates the previously selected range. Initially, the current value will be the range of available value for the selected measure.

  2. When the slider is moved, the color changes to blue. Once the value is set and clicked on Apply, the color changes to purple. Click on Undo to revert to the previously selected state.

Building a range slider

Formatting a range slider

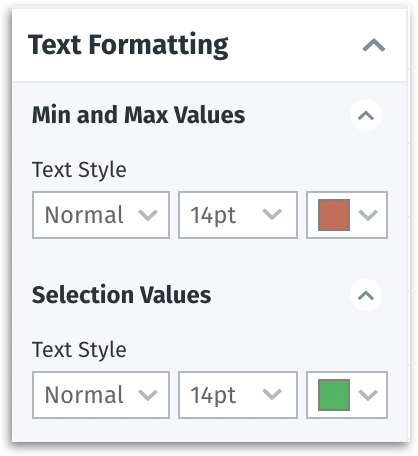
For the range slider, in addition to the title text formatting shown above, users can also format the color, size, and style for the min-max values and selected values.

Formatting a range slider

Last updated

Was this helpful?