Users & Groups
Manage Users & Groups in Tellius with tools to create accounts, assign roles, edit access, and safely transfer or delete user-owned assets for secure governance.
Users
Under Settings → Users & Groups → Users, the Users panel allows admins to view, manage, and configure access for users across Tellius. Here's a breakdown of what each column, button, and icon represents. You can search for any user by username and the list gets filtered.
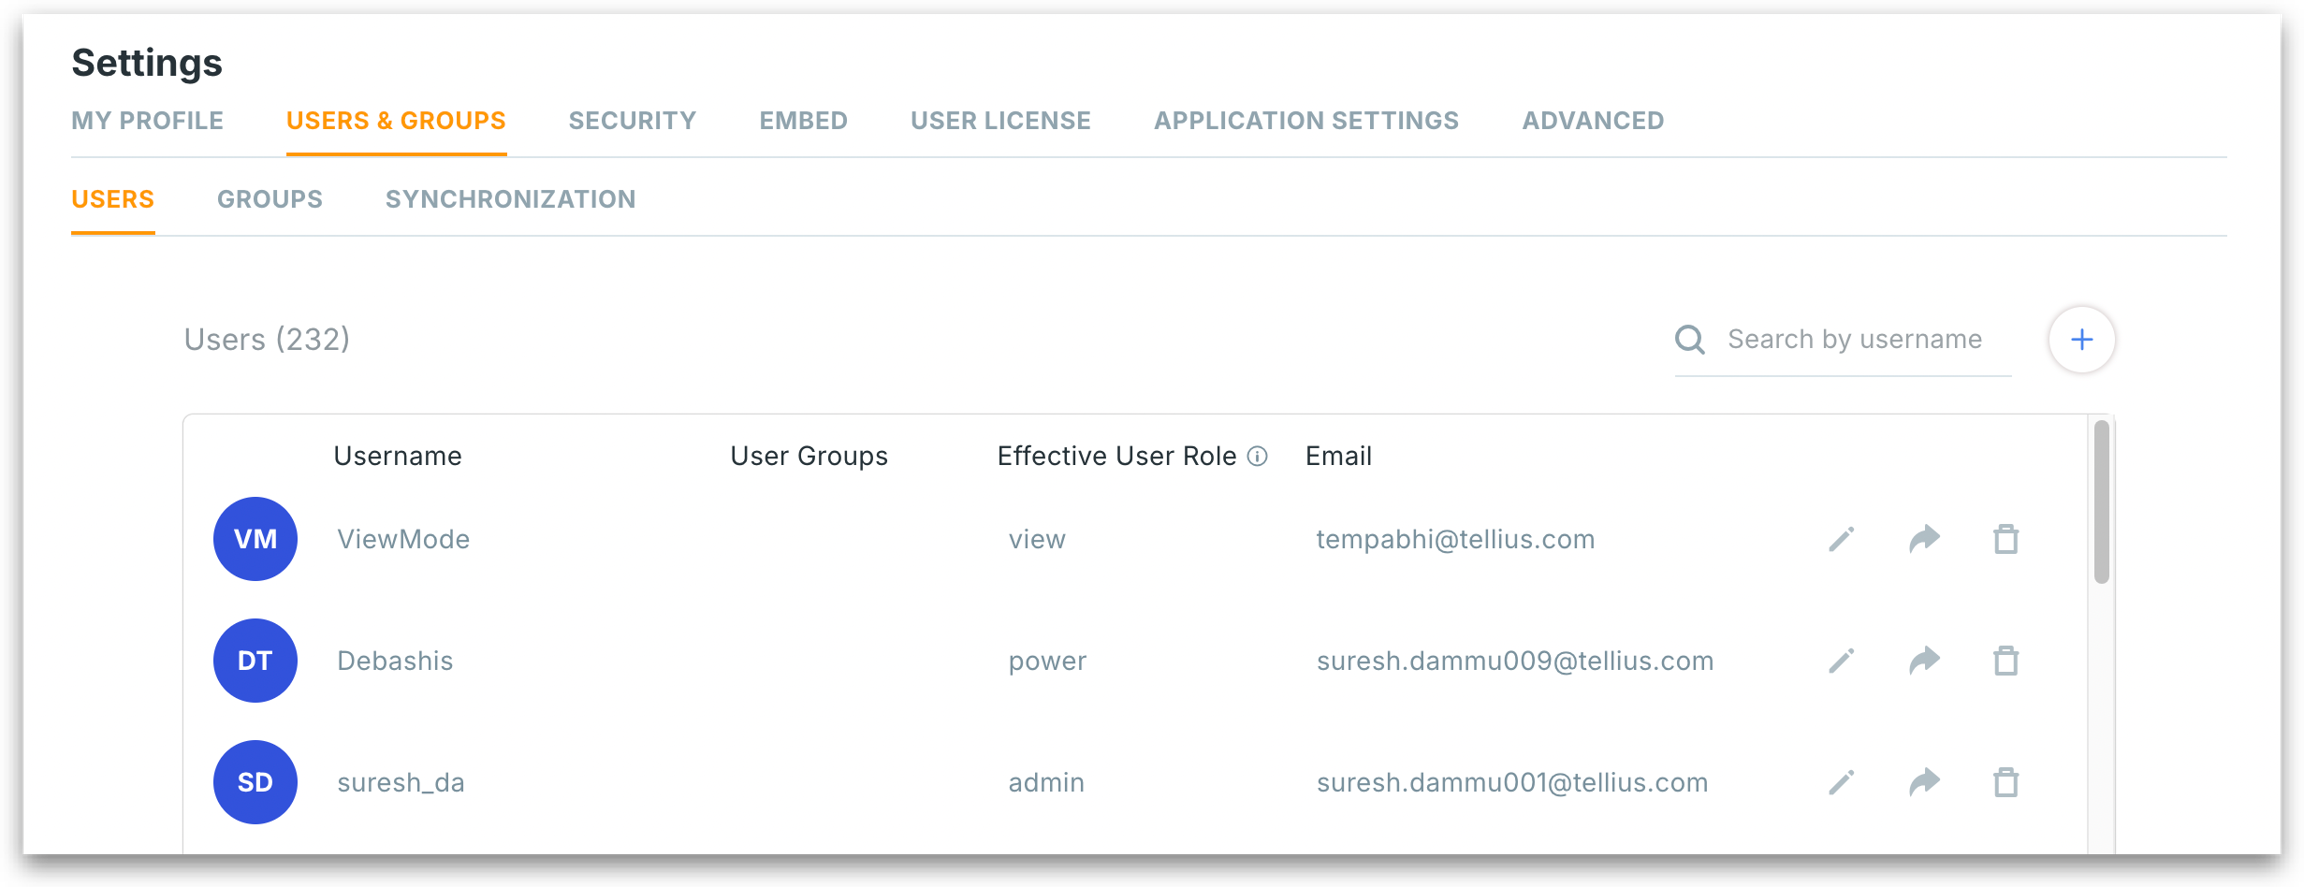
Username: Displays the user’s display name. The initials in the circular icon are present to the left.
User groups: Lists the group(s) the user belongs to. Groups help define shared permissions, data access, and roles.
Effective user role: Indicates the actual permissions the user has, based on group membership.
Email: Shows the registered email address used for login and notifications.
Edit user: Clicking the pencil icon next to the email address allows editing user details. The following window opens:
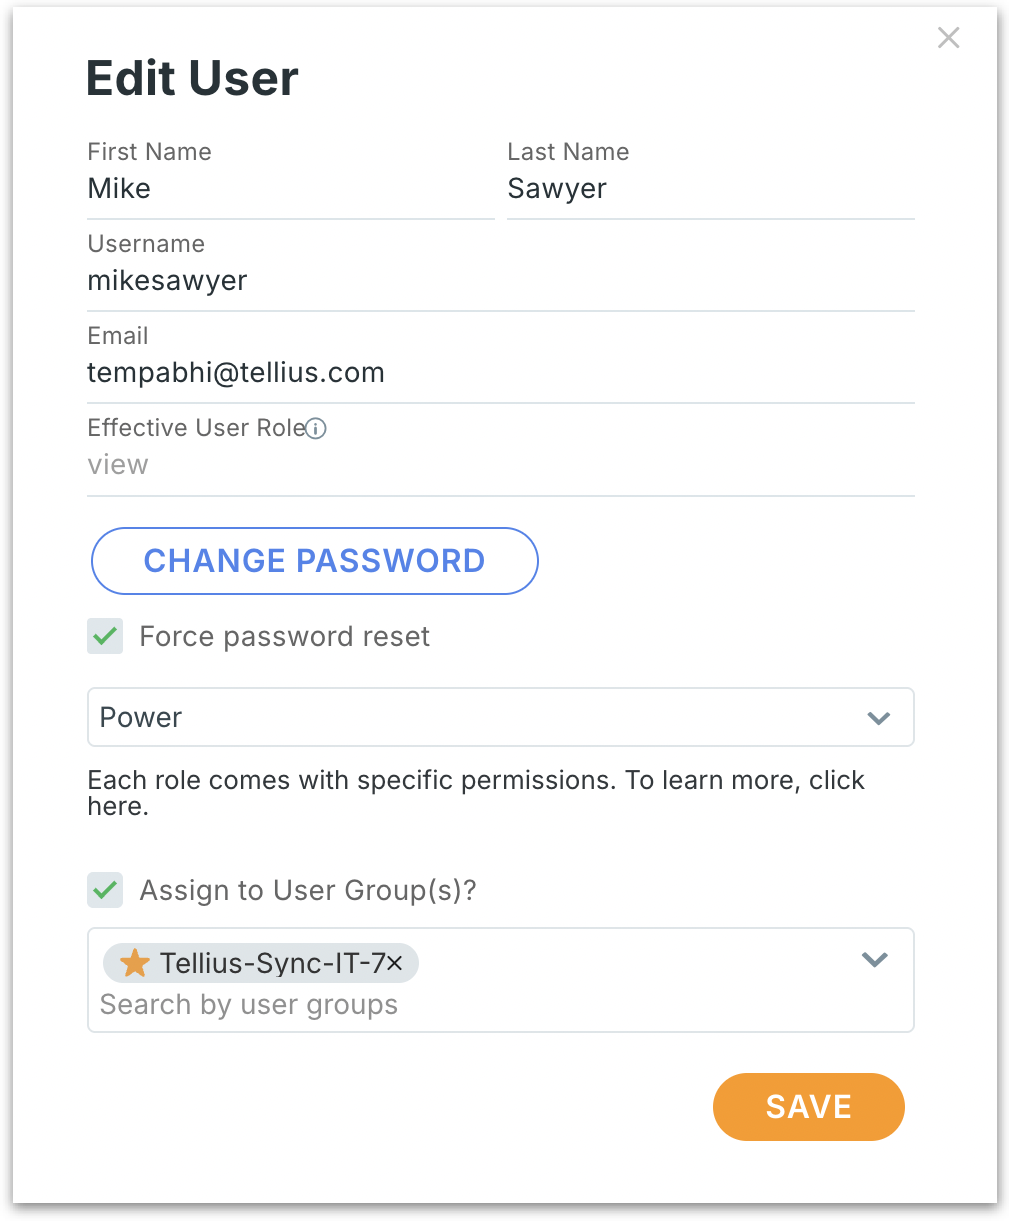
First Name / Last Name: Editable fields for the user’s display name.
Username: A unique identifier for the user’s login and internal reference.
Email: Used for login, notifications, password recovery, and system alerts.
Effective user role: A read-only field indicating the actual permissions the user has. Hover over the info icon for more context on role resolution.
Change Password: Opens a dialog to set or reset the user’s password.
Force password reset (checkbox): If checked, the user will be required to change their password the next time they log in.
Role: A dropdown that assigns a system role to the user. Each role includes a set of permissions. Click on the link to explain what each role can do.
Assign to user group(s): When checked, enables group assignment for the user. The group selector is a searchable dropdown for assigning one or more groups to the user.
Assign users to at least one group for proper access control.
Save: Click on Save to save all edits made to the user’s profile.
Assign user
The following window allows admins to transfer all owned content and data assets from one user to another. It's commonly used when deactivating a user or reassigning responsibilities.
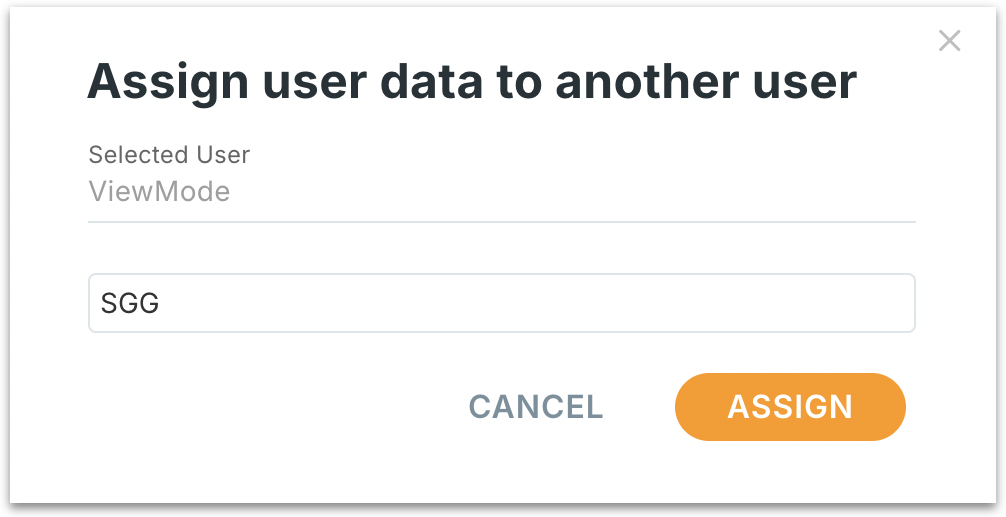
Selected User: A read-only field that displays the username of the person whose data is being reassigned.
Target User: Enter the username of the person who should receive the data.
Click on Assign to transfer the ownership from the selected user to the target user. Click on Cancel to close the dialog without making any changes.
This operation does not delete the selected user; it only transfers asset ownership. Once data is reassigned, it may no longer be visible or accessible from the original owner’s profile.
Delete user
The following window will be displayed when permanently removing a user from Tellius. It provides visibility into the content owned by the user and allows safe reassignment to prevent accidental data loss.
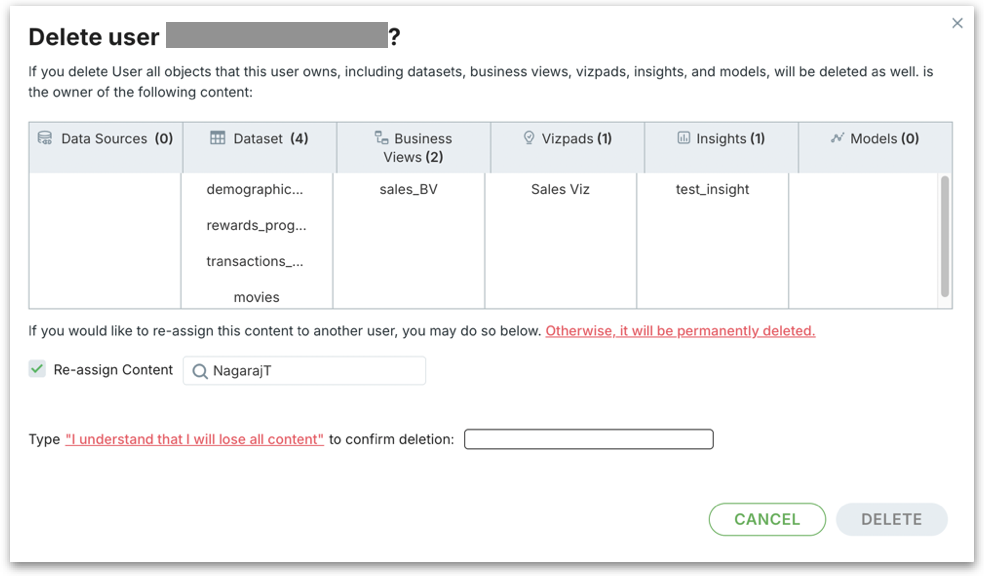
When you delete a user, all assets owned by them—including datasets, Business Views, Vizpads, Insights, and Models—will be removed unless you reassign them to another user beforehand.
Re-assign Content: If enabled (checked), you can transfer all user-owned content to another user before deletion. Search and select the new owner (e.g., NagarajT).
All assets will be reassigned to this user upon deletion.
If left unchecked, all listed content will be permanently deleted along with the user.
To prevent accidental deletion, you must manually confirm your intent by typing: "I understand that I will lose all content".
Only after entering this exact phrase will the Delete button become active. Click on Delete to finalize the deletion or click on Cancel to dismiss.
Create user
Click on the "+" icon next to the search field to view the following window. This allows admins to add a new user to Tellius. Use this panel to set up login credentials, assign roles, and link the user to relevant groups.
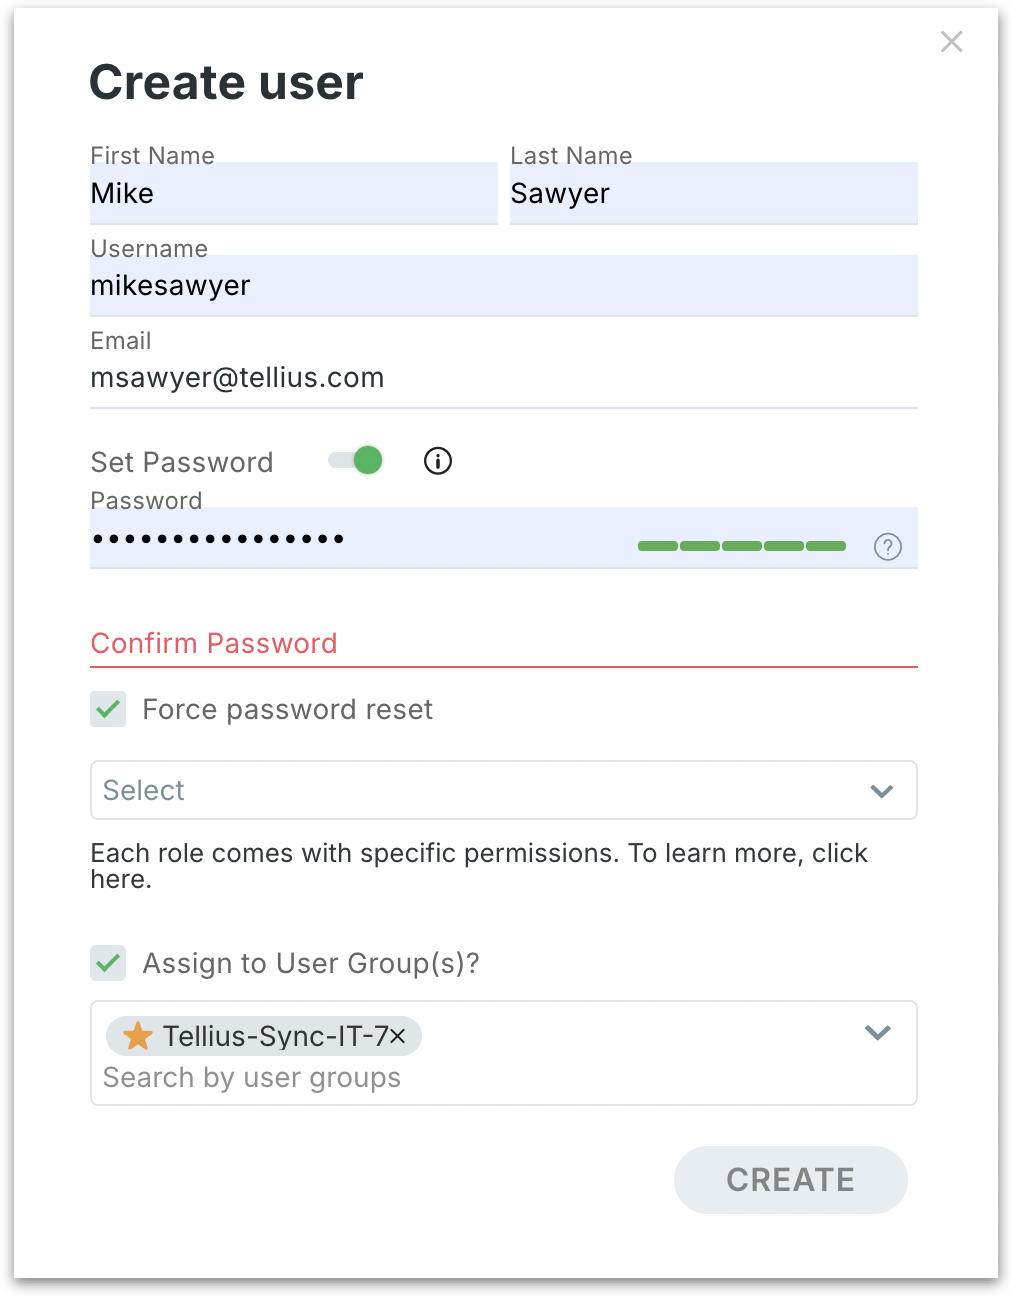
First Name / Last Name: Enter the user's full name.
Username: A unique identifier for the user.
Email: Provide a valid, unique email address for login, notifications, and password recovery.
When enabled (green), allows you to define a starting password.
If disabled, the user will be restricted to SSO authentication methods only.
Password: Enter a secure password. A strength meter will indicate if the password meets security standards. The password should be 8 characters long, including 1 uppercase letter, 1 special character and alphanumeric characters.
Confirm Password: Re-enter the password to confirm accuracy.
Force password reset: If checked, the user will be required to change their password upon first login.
Role selection: Choose a predefined role from the dropdown. Each role comes with a preset set of permissions.
Assign to user group(s): Enable this to assign the user to specific groups. Search and select from available groups.
Click on Create to create the new user. On success, the user will be added and can log in based on the credentials provided.
Was this helpful?