Connecting to Azure Blob Storage
Connect Tellius to Azure Blob Storage using secure credentials to load, query, and prepare blob files for analysis with support for schema setup, SQL, and advanced settings.
Azure Blob Storage is Microsoft’s object storage solution for the cloud, enabling scalable storage of massive datasets, including CSVs, text files, images, and more. In Tellius, you can create a direct connection to your Azure Blob Storage account by providing the account credentials, container information, and file details. Once connected, you can query, analyze, and visualize your blob data through Tellius’s analytics platform.
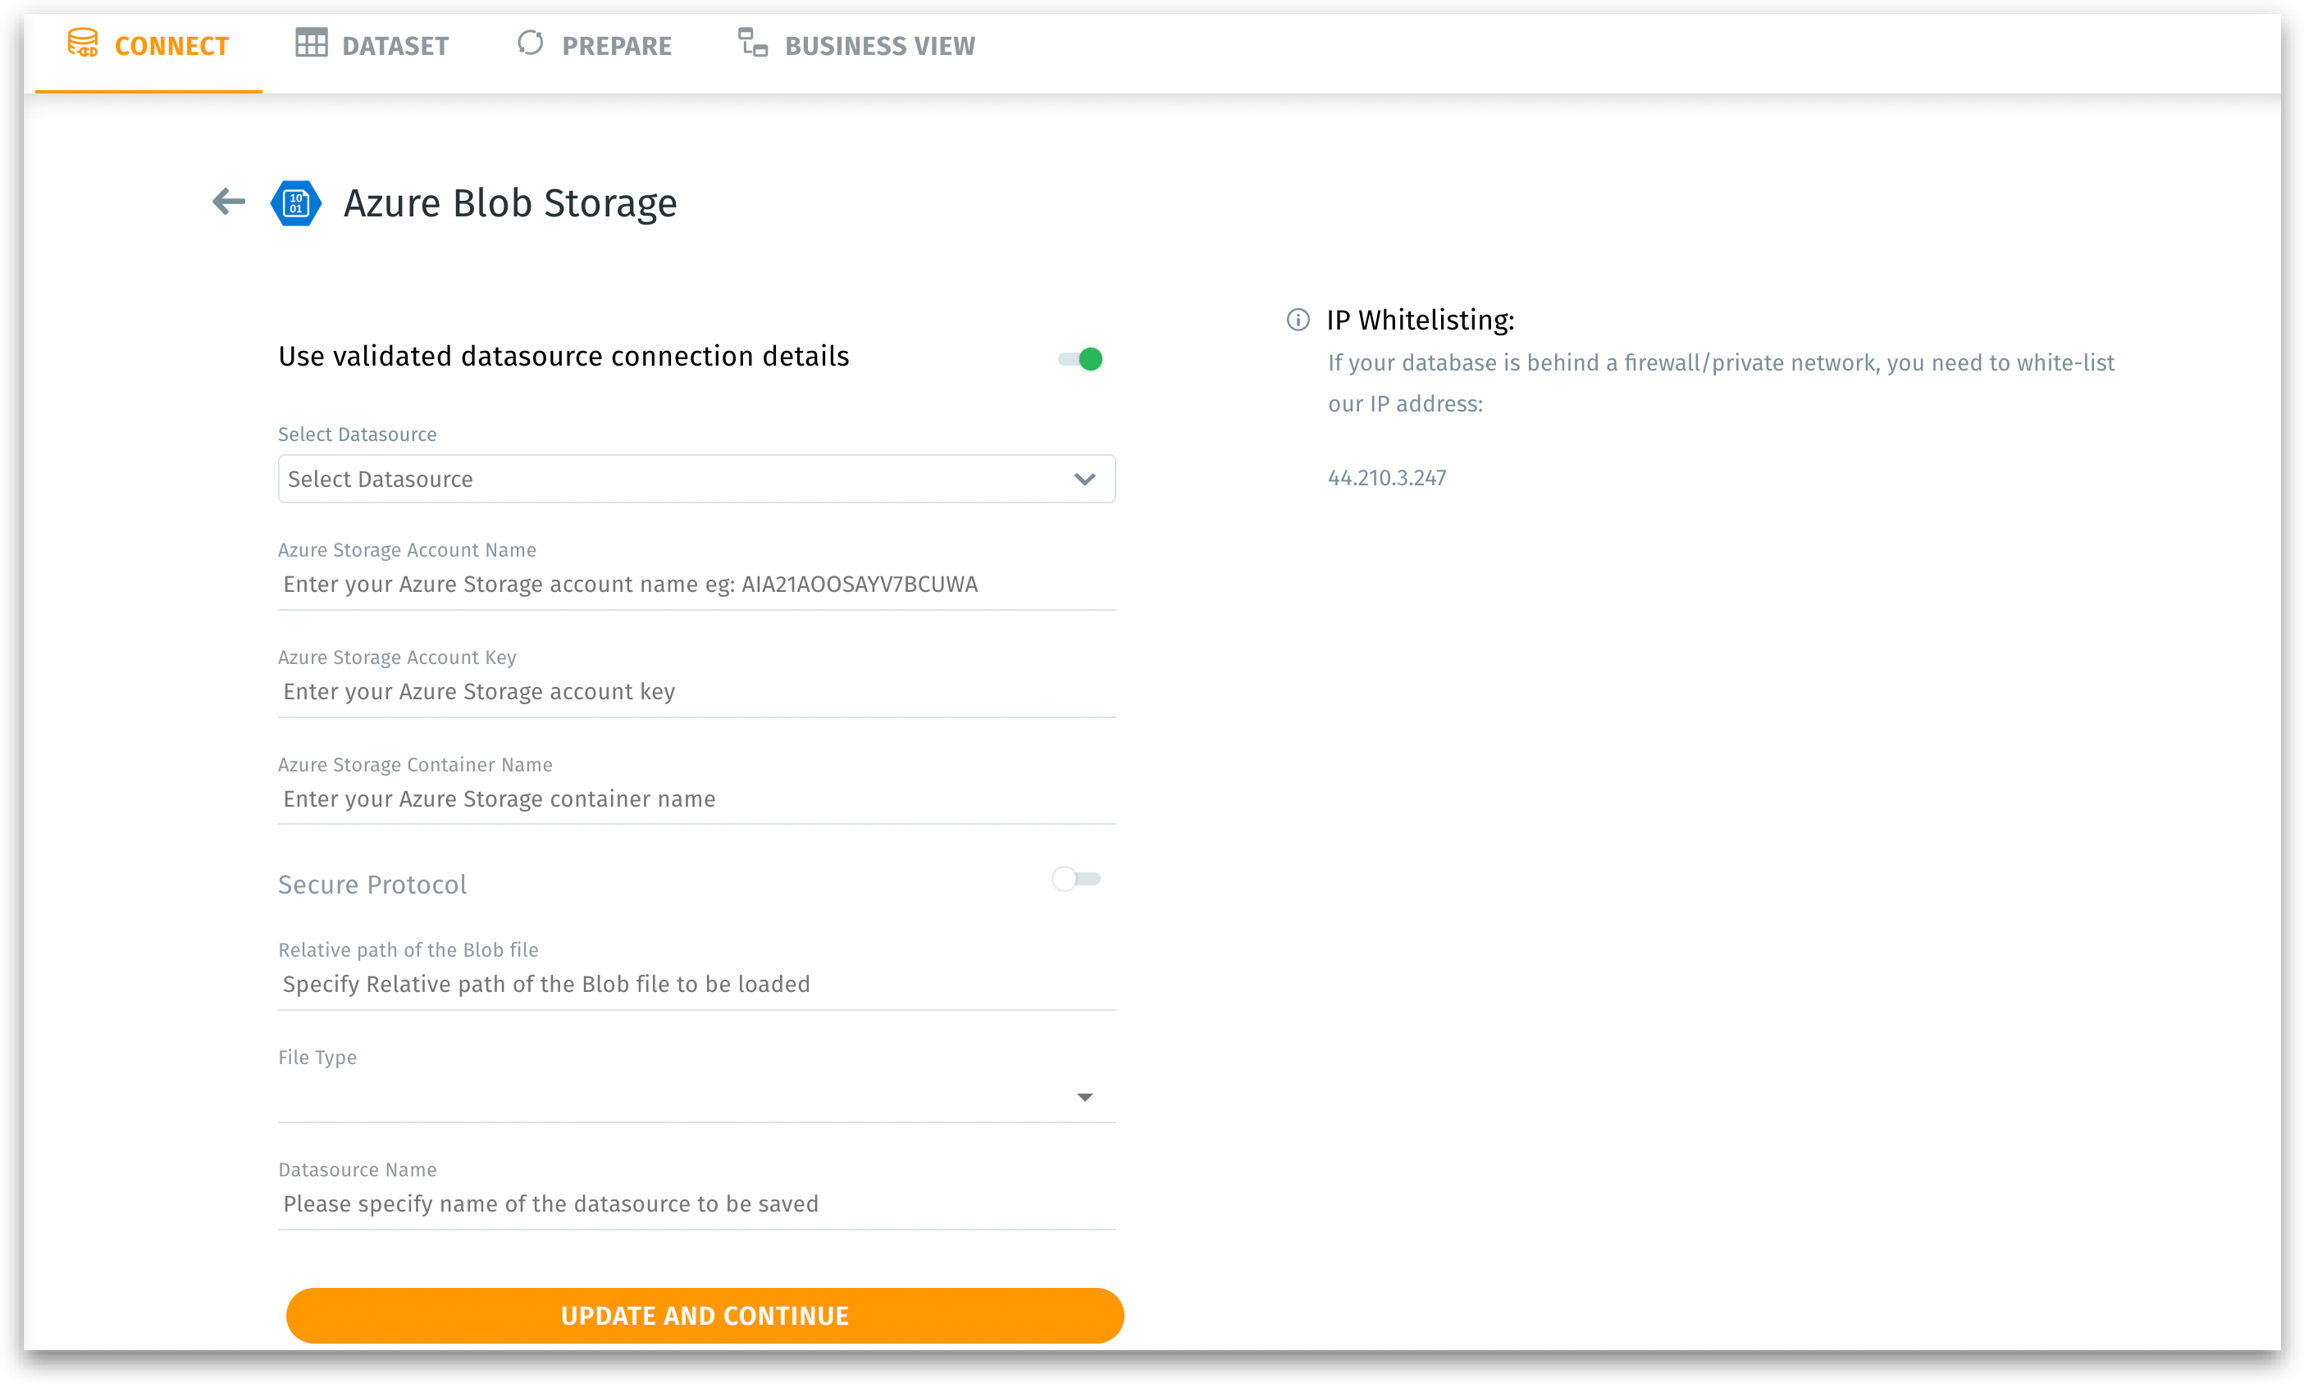
Select Datasource: A dropdown listing previously validated datasources of the same type (Azure Blob) so that if you’ve already configured an Azure Blob connection, you can reuse it.
Azure Storage Account Name: Provide a name for your Azure storage account. This identifies the specific storage account on Azure where your blob container resides.
Azure Storage Account Key: The secret key (like a password) associated with your Azure Storage account. This key grants programmatic access to the account.
Azure Storage Container Name: Azure Storage organizes data into containers; you must specify the correct container so Tellius knows where to look for your files.
Secure Protocol: A toggle (ON/OFF) to indicate whether you want to use HTTPS (secure protocol) to enable secure data transfer.
Enable Secure Protocol to encrypt data transfers from Azure to Tellius, especially in production or public networks.
Relative Path of the Blob File: The file path inside the container to the specific blob(s) you want to load. (e.g.,
folder/subfolder/data.csv)File Type: Specify the format of the blob file (e.g., CSV, Parquet, JSON) to parse the file correctly.
Datasource Name: Provide a name to save and reference this data source in Tellius.
Update and Continue: Once clicked, Tellius will validate the credentials, container path, and file format. If successful, you can then configure schema details or begin data ingestion.
If your Azure Storage is behind a firewall or private network, you must whitelist the listed IP address (44.210.3.247) so Tellius can access your container.
Loading tables
After establishing a connection, you will see options to load data from Azure Storage.
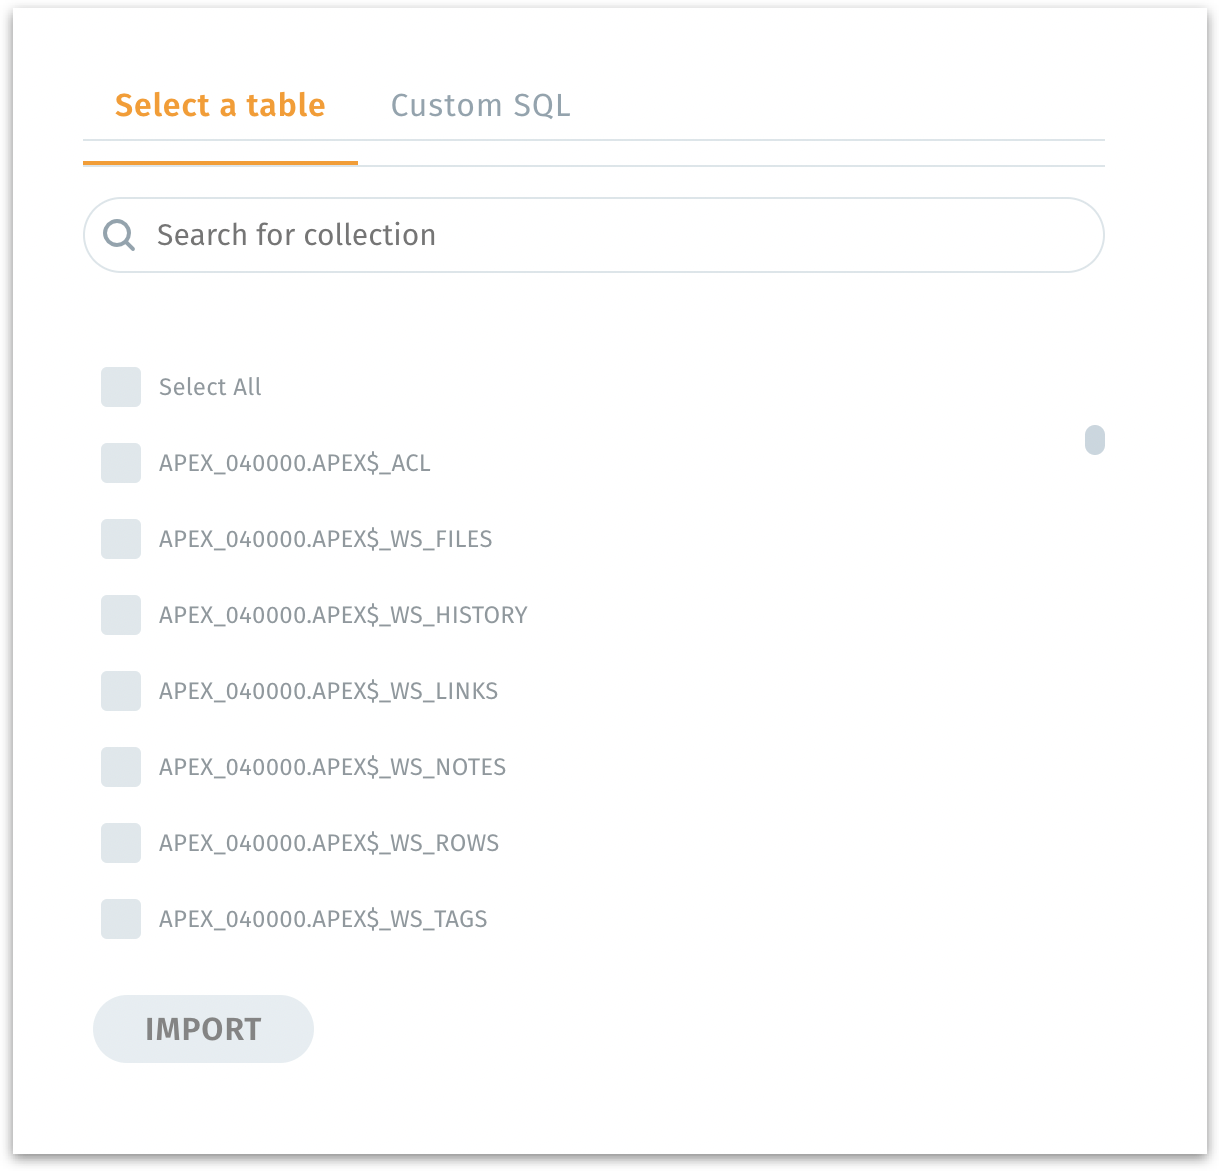
Select a table: Displays all available tables under the chosen Azure schema. Pick the tables you need for analysis. If there are many tables, you can narrow down your selection.
Search for table: Filters the displayed tables based on your search term.
Import: Imports the selected table(s) into Tellius.
Using Custom SQL
If you prefer more granular control or want to write your own SQL queries to load precisely the data you need, switch to "Custom SQL" tab.
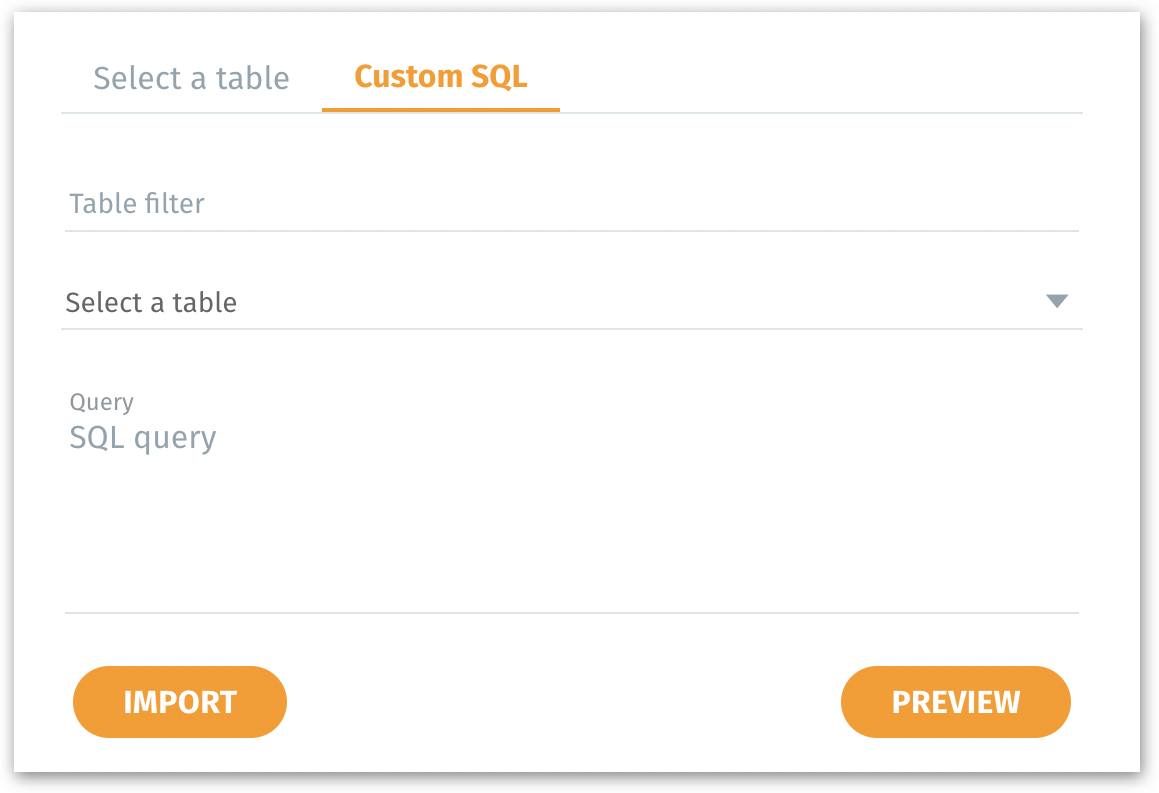
Table filter: Helps locate a particular table by name before writing your SQL.
Select a table: Choose a table name to use in your custom query.
Query: A field for your custom SQL statement (e.g.,
SELECT * FROM SYS.WRI$_DBU_CPU_USAGE).Preview: Executes the SQL query and displays a few sample rows of the data you’re about to import in the “Dataset Preview” area. Allows you to validate that the query returns the correct data before fully importing it. This helps catch syntax errors or incorrect filters early.
Import: Once satisfied with the preview, click Import to load the data returned by the SQL query into Tellius.
Advanced Settings
Once you import, you’ll have the option to refine how the dataset is handled:
Dataset name: Assign a valid name to your new dataset (e.g.,
XYZ_THRESHOLD). Names should follow the allowed naming conventions (letters, numbers, underscores, no leading underscores/numbers, no special chars/spaces).Connection Mode When the Live checkbox is selected, the queries will be fetched from the database each time, and the data will not be copied to Tellius. Live mode ensures the most up-to-date data at the cost of potential query latency.
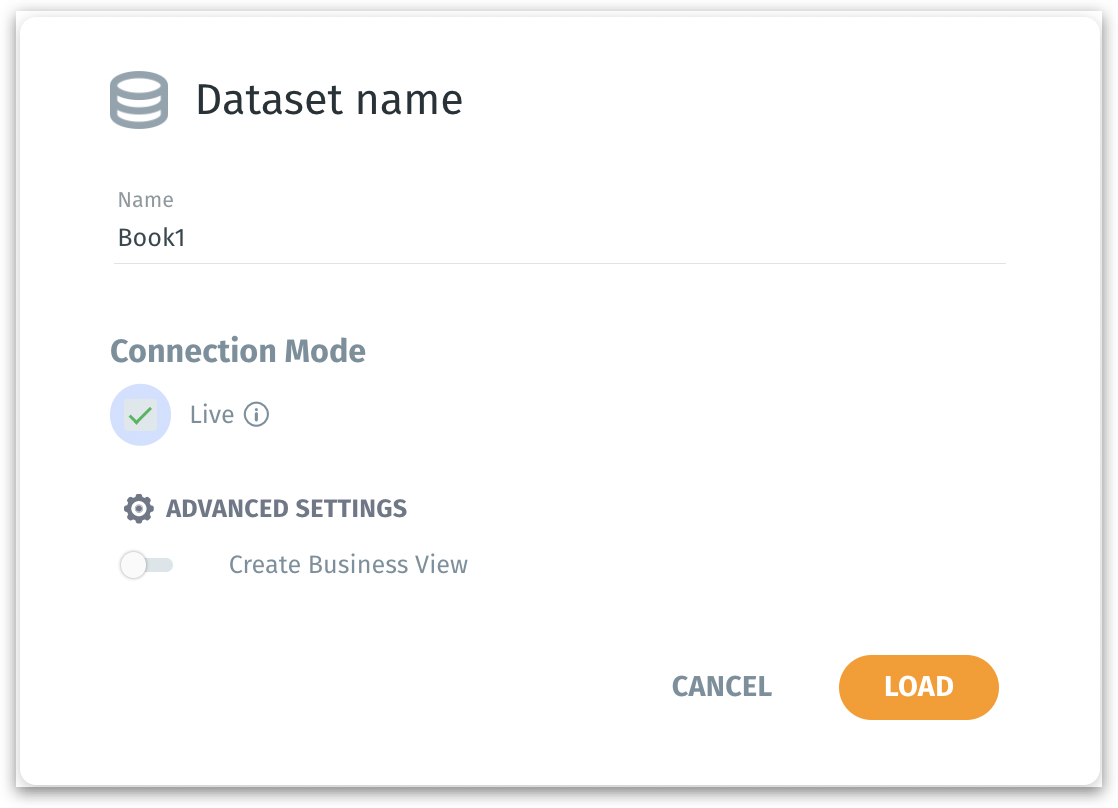
When Live mode is enabled, then only Create Business View option will be displayed.
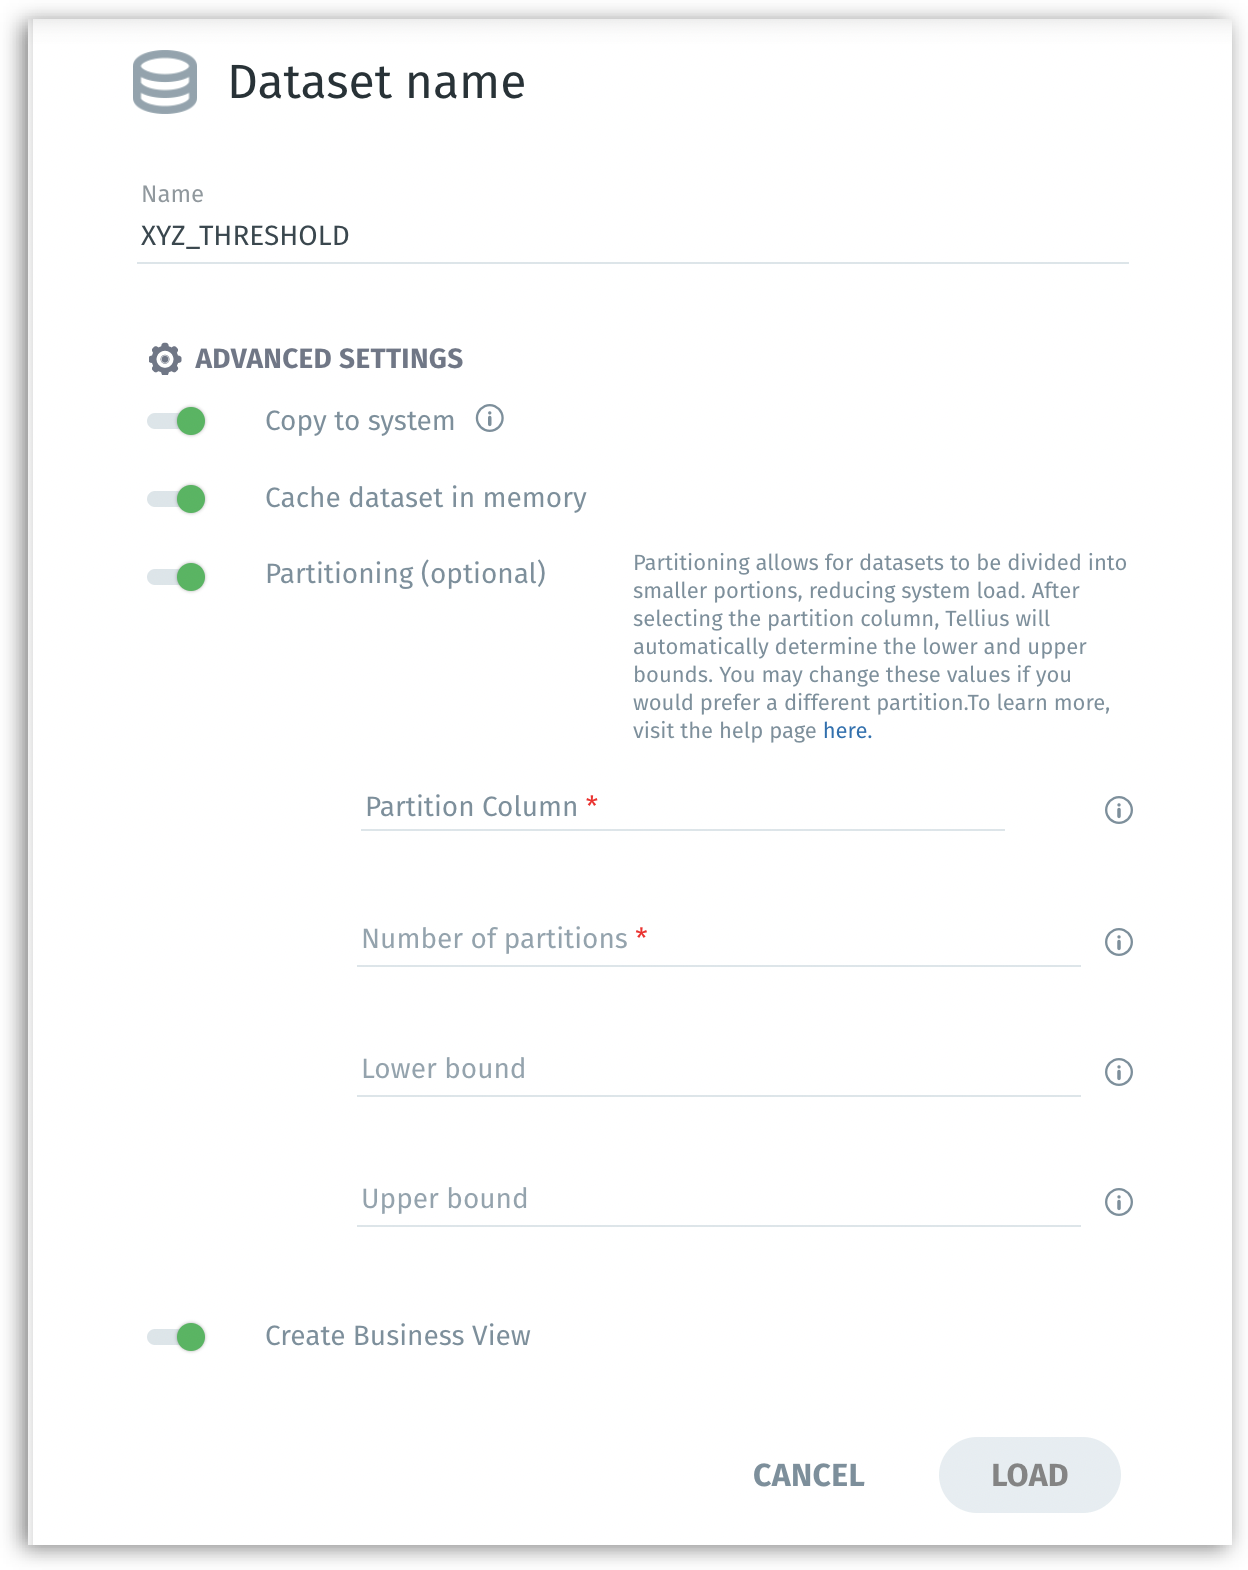
Copy to system: If enabled, copies the imported data onto Tellius’s internal storage for faster performance. Reduces dependency on the source database’s speed and network latency. Good for frequently queried datasets.
Cache dataset in memory: If enabled, keeps a cached copy of the dataset in memory (RAM) for even faster query responses. Memory caching dramatically reduces query time, beneficial for dashboards and frequently accessed data.
When only one table is imported, the following options will also be displayed:
Partitioning: If enabled, it splits a large dataset into smaller logical chunks (partitions). Improves performance on large tables, enabling parallel processing and faster load times. For more details, check out this dedicated page on Partitioning.
Partition column: The column used as a basis for partitioning.
Number of partitions: How many segments to break the data into. (e.g., 5 partitions)
Lower bound/Upper bound: Approximate value range in the partition column to evenly distribute data.
Create Business View: If enabled, after loading data, you will be guided into the Business View creation stage.
Click on Load to finalize the process. After clicking Load, your dataset appears under Data → Dataset, ready for exploration, preparation, or business view configuration. Else, click on Cancel to discard the current importing process without creating the dataset.
After the dataset is created, you can navigate to "Dataset", where you can review and further refine your newly created dataset. Apply transformations, joins, or filters in the Prepare module.
Was this helpful?