Azure AD
Last updated
Was this helpful?
Last updated
Was this helpful?
Follow the steps below to configure Azure Active Directory (Azure AD) as an authentication provider for your Tellius instance.
Start by signing in to using your administrator credentials.
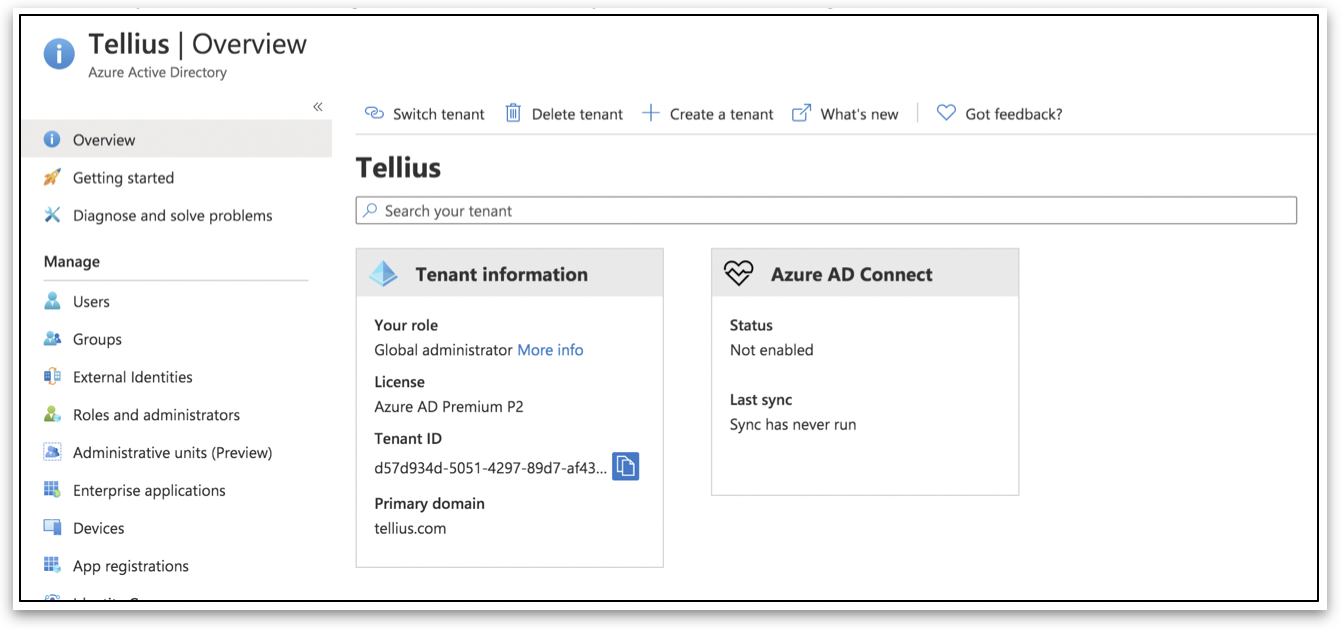
In the search bar at the top, type "Azure Active Directory" and select it from the search results.
Make sure you are in the correct active Azure AD tenant where you want to configure Tellius authentication. You can check and switch tenants using the tenant selector in the upper-right corner.
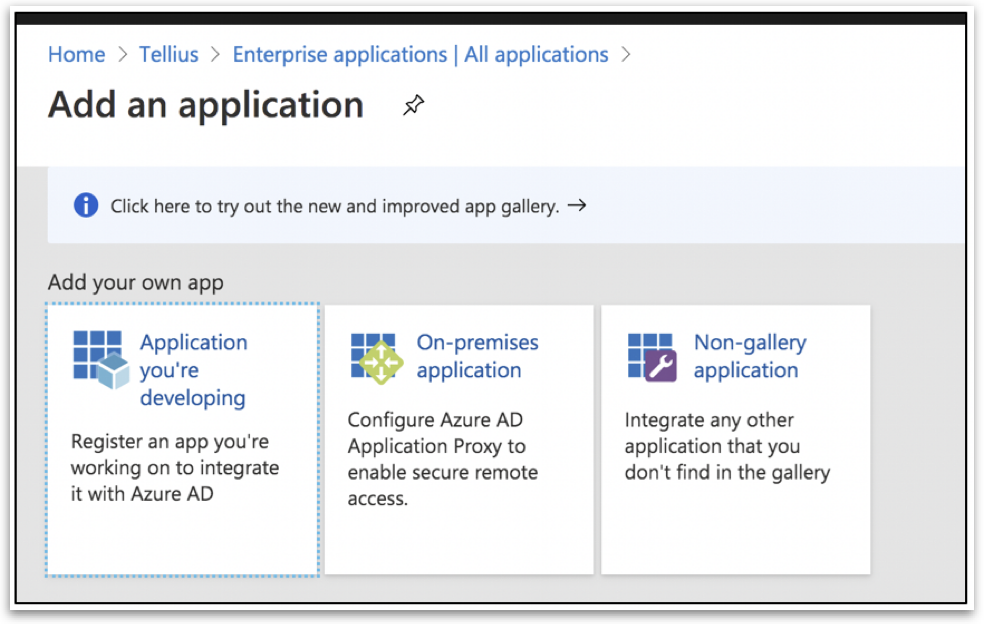
In the left-hand menu, click on Enterprise → + New application.
Click on the Non-gallery application tile.
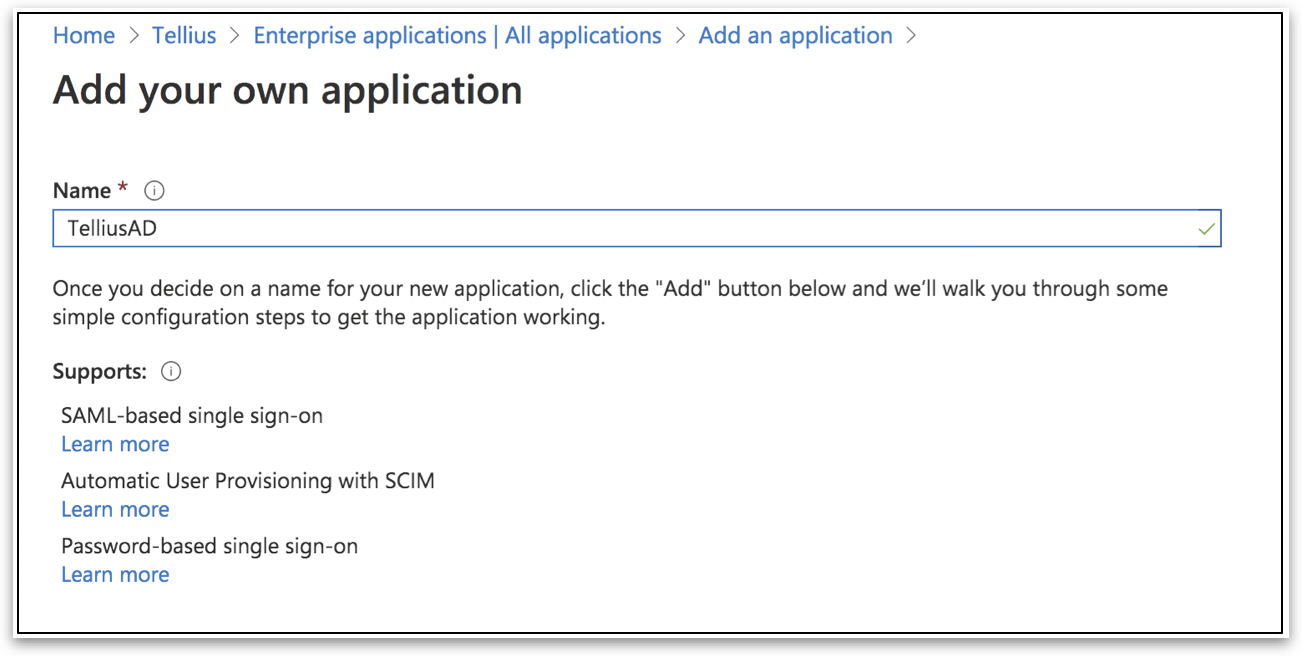
Provide a suitable name and click on Add.
A notification will be displayed once the application is created successfully. You can track progress in the Notifications panel at the top of the screen.
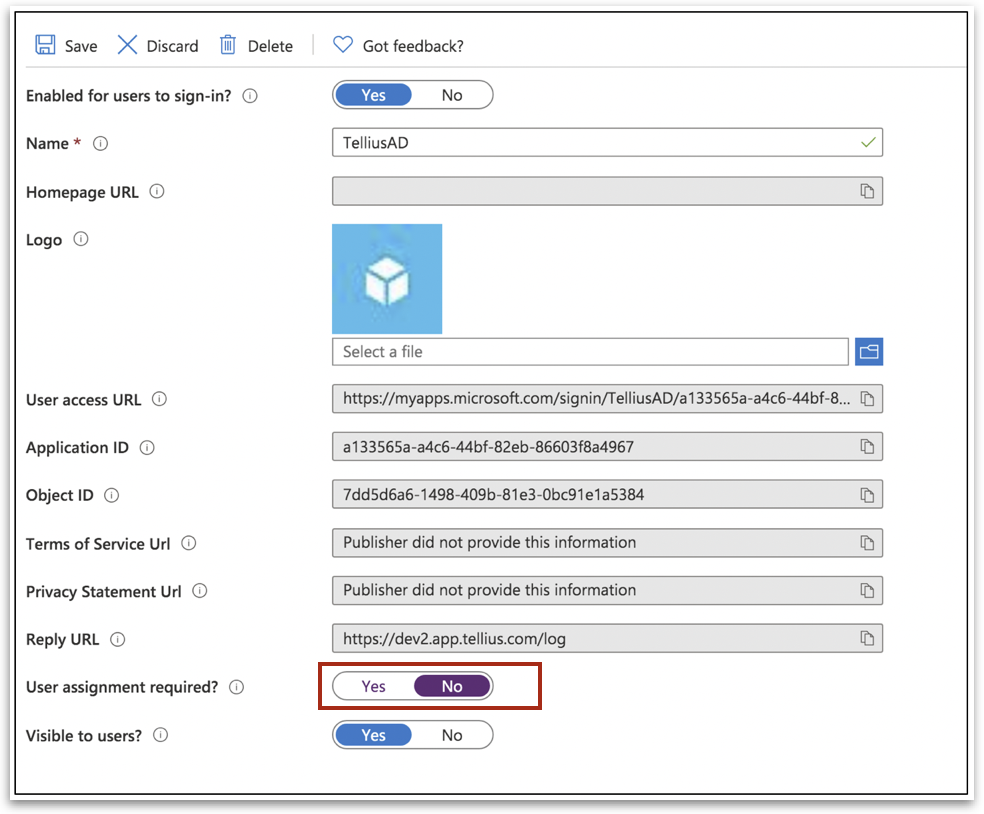
After the application is created, go to its Overview page. From the left-hand menu, select Properties.
Set User assignment required to No to allow all users in the directory to access Tellius. If you prefer to grant access only to specific users or groups, leave this setting as Yes.
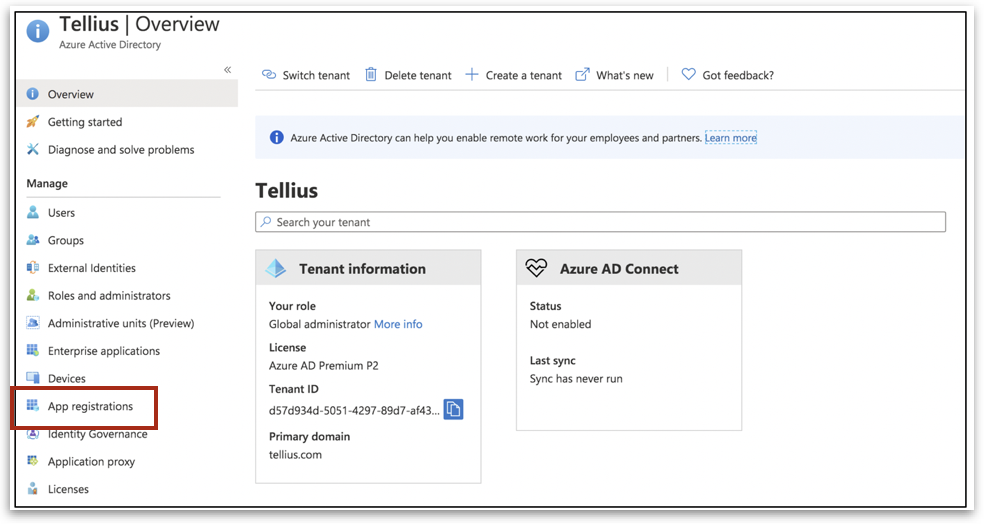
Navigate back to the Azure Active Directory Overview page. In the left menu, select App registrations.
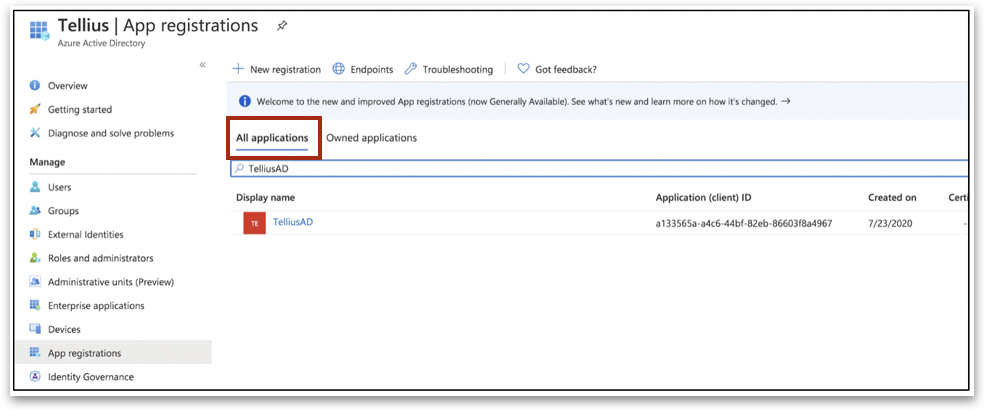
Go to the All Applications tab and search for the application you just created (in this case, it's "TelliusAD"). Click on it to open its configuration page.
From the application overview page, copy the following for later use in Tellius. These values are required to complete the configuration in Tellius.
Application (Client) ID
Directory (Tenant) ID
On the app’s overview page, click on Add a Redirect URI.
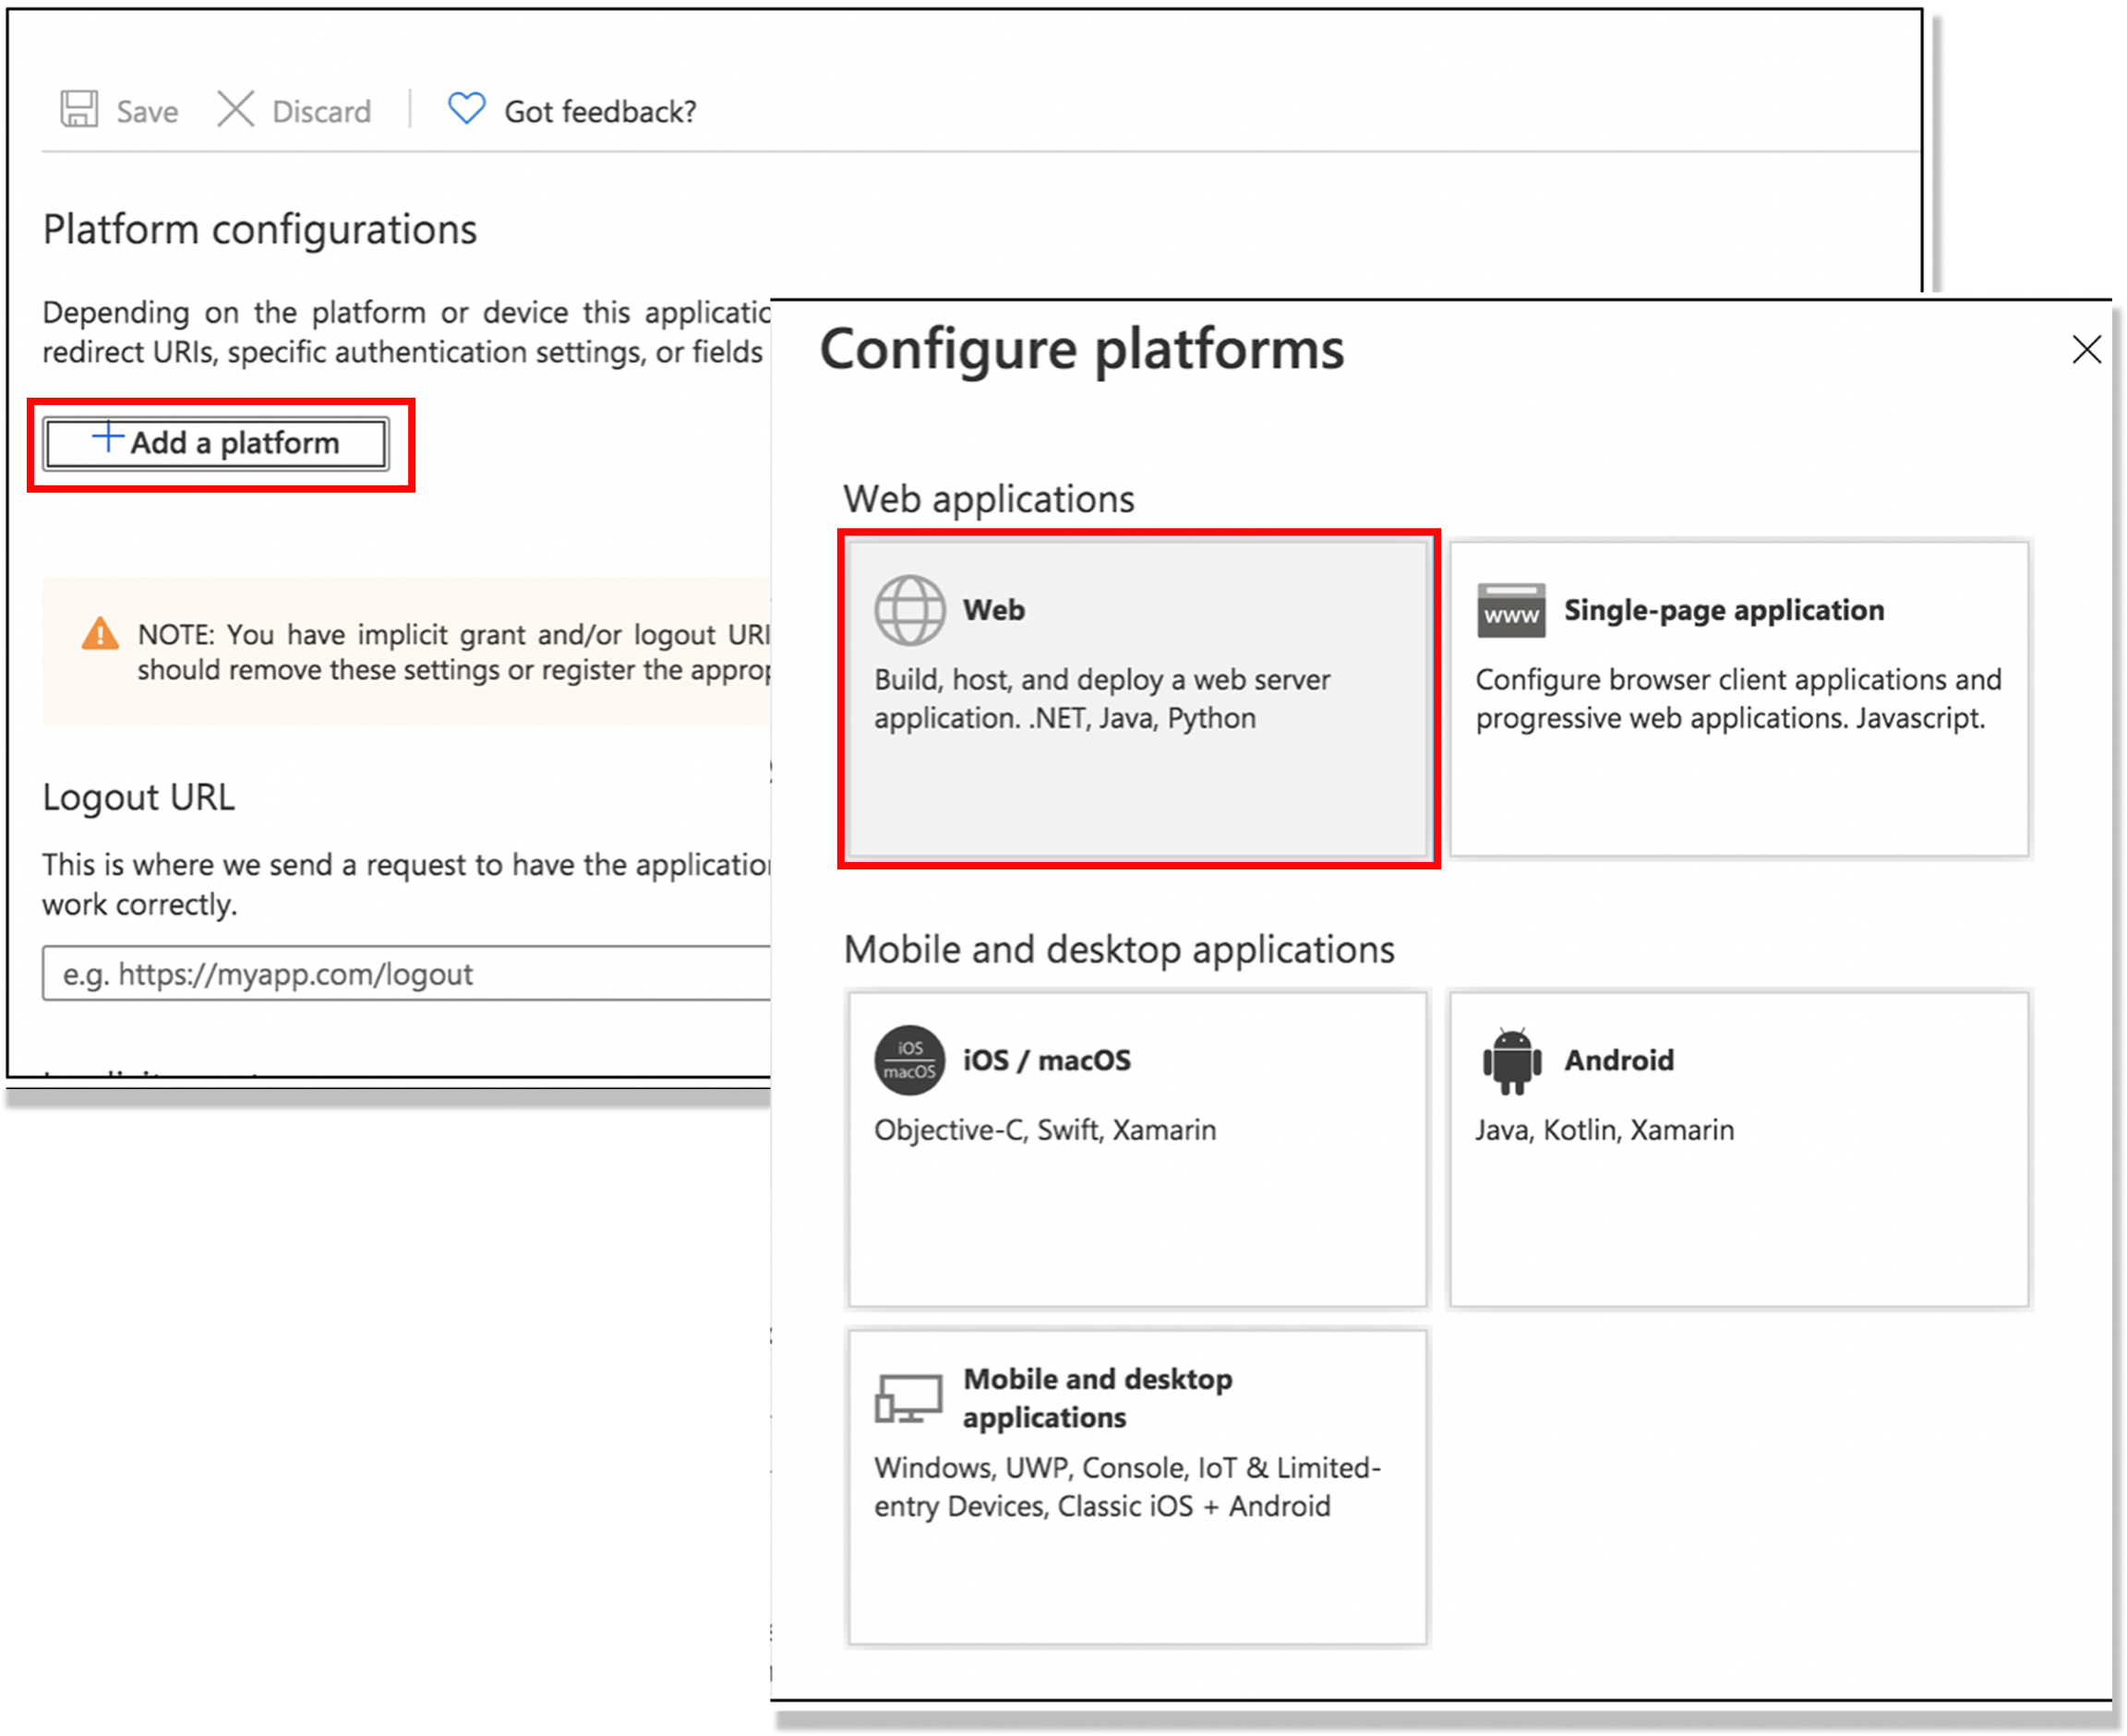
Select + Add a platform, then choose Web.
Enter the following URL in the redirect field. Replace <your-tellius-hostname>
with your actual Tellius domain (e.g., tellius.company.com
).
Click Configure to save the changes.
Once this setup is complete in Azure, proceed to Tellius to enter the copied Client ID, Tenant ID, and Redirect URI.
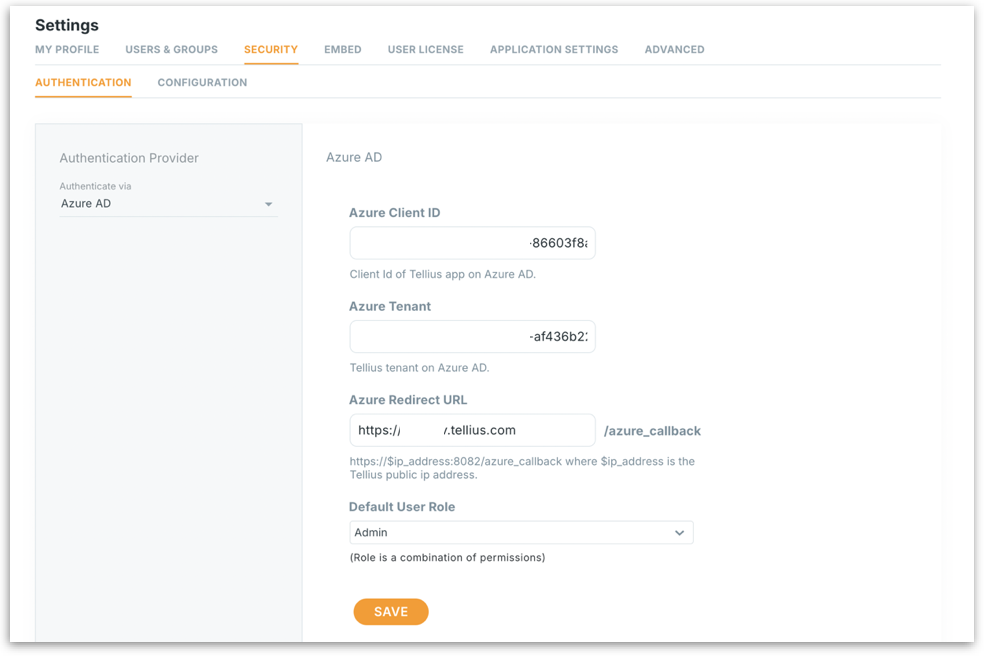
Under Settings → Security → Authentication → Azure AD, provide the following details.
Azure Client ID: Paste the Application (Client) ID you copied from Azure.
Azure Tenant: Paste the Directory (Tenant) ID from Azure.
Azure Redirect URL: Enter your Tellius login URL.
Default User Role: Sets initial permissions for users authenticating via Azure AD.
Click on Save button to apply the Azure AD authentication settings.
Once saved, Tellius will use Azure AD for login authentication. You and other users in the configured Azure AD environment can now sign in securely using your organization’s credentials.