👯Creating Comparison Insights
Step-by-step guide to creating Comparison Insights in Tellius—compare periods, apply filters, set data ranges, and generate actionable analysis.
Navigate to the Discover tab and click on the plus button.
A list of all available Business Views will be displayed.
Sort or search the list and choose the required Business View.
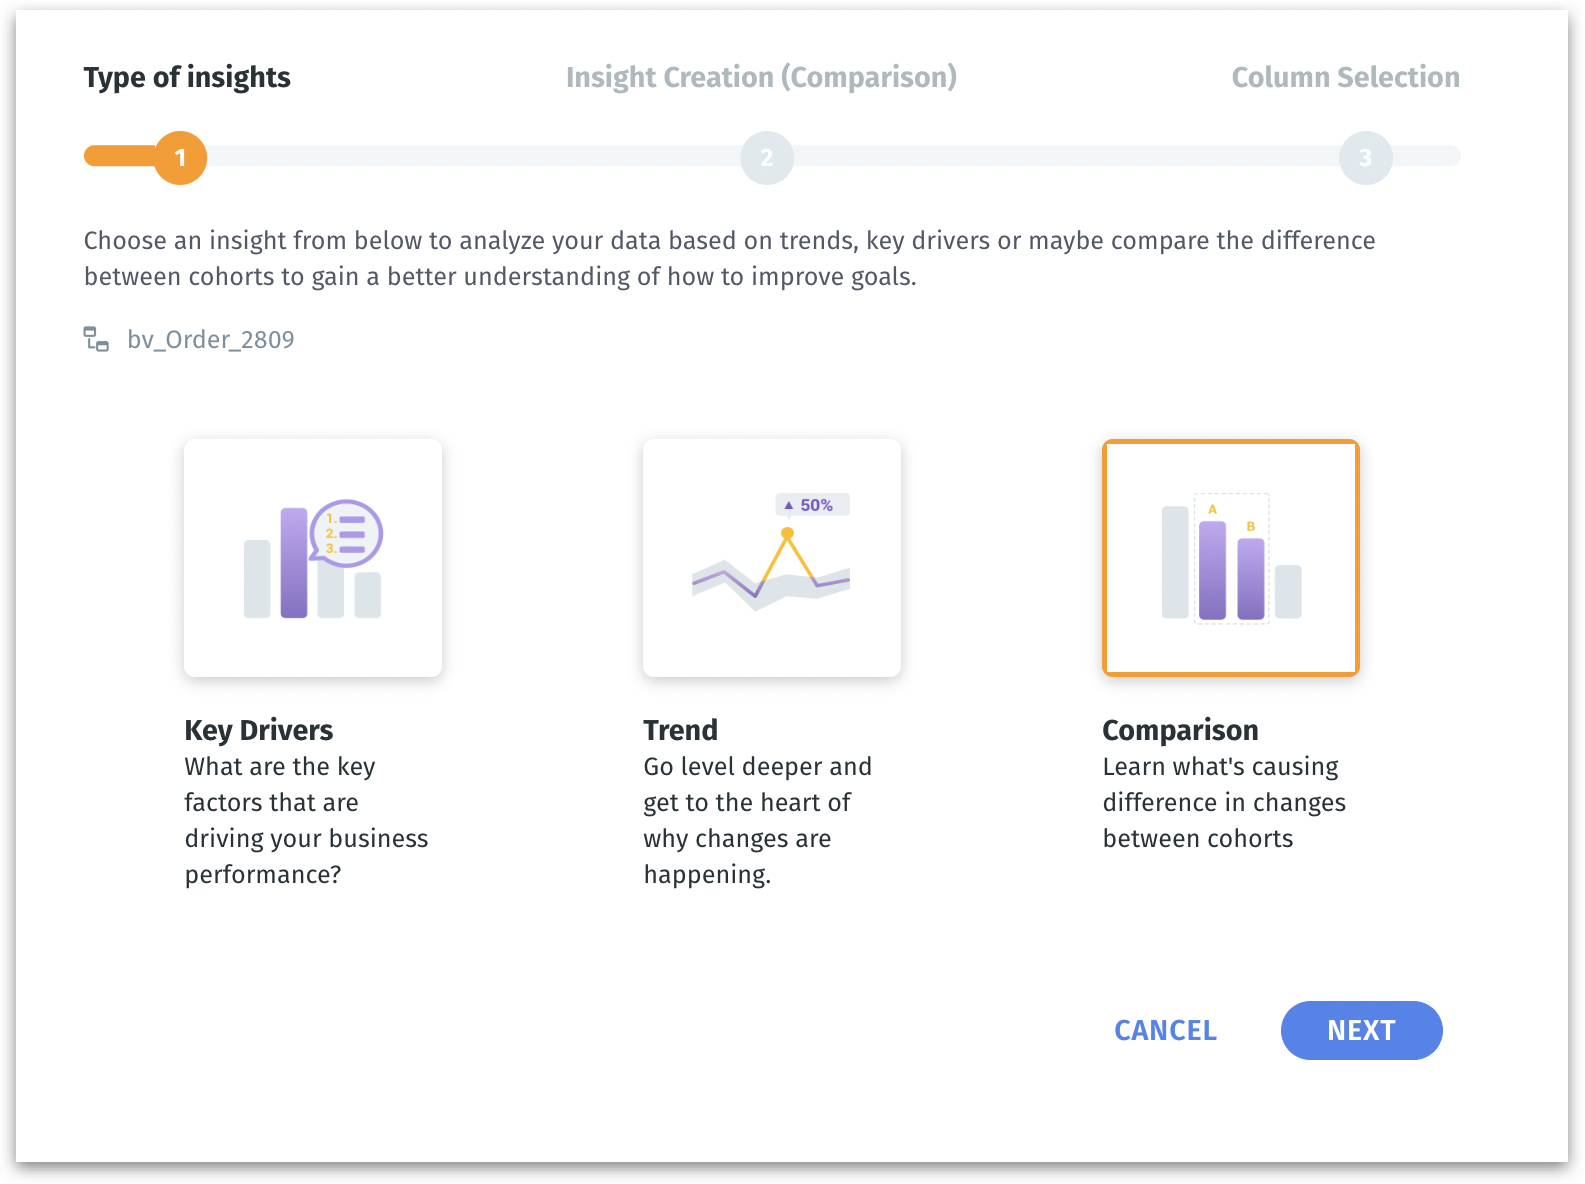
As a first step, choose Comparison as the type of Insight you want to generate. Click on Next.

To know more about the differences between the three types of Insights and to choose the best Insight type as per your needs, check out this page.
Creating Comparison Insight
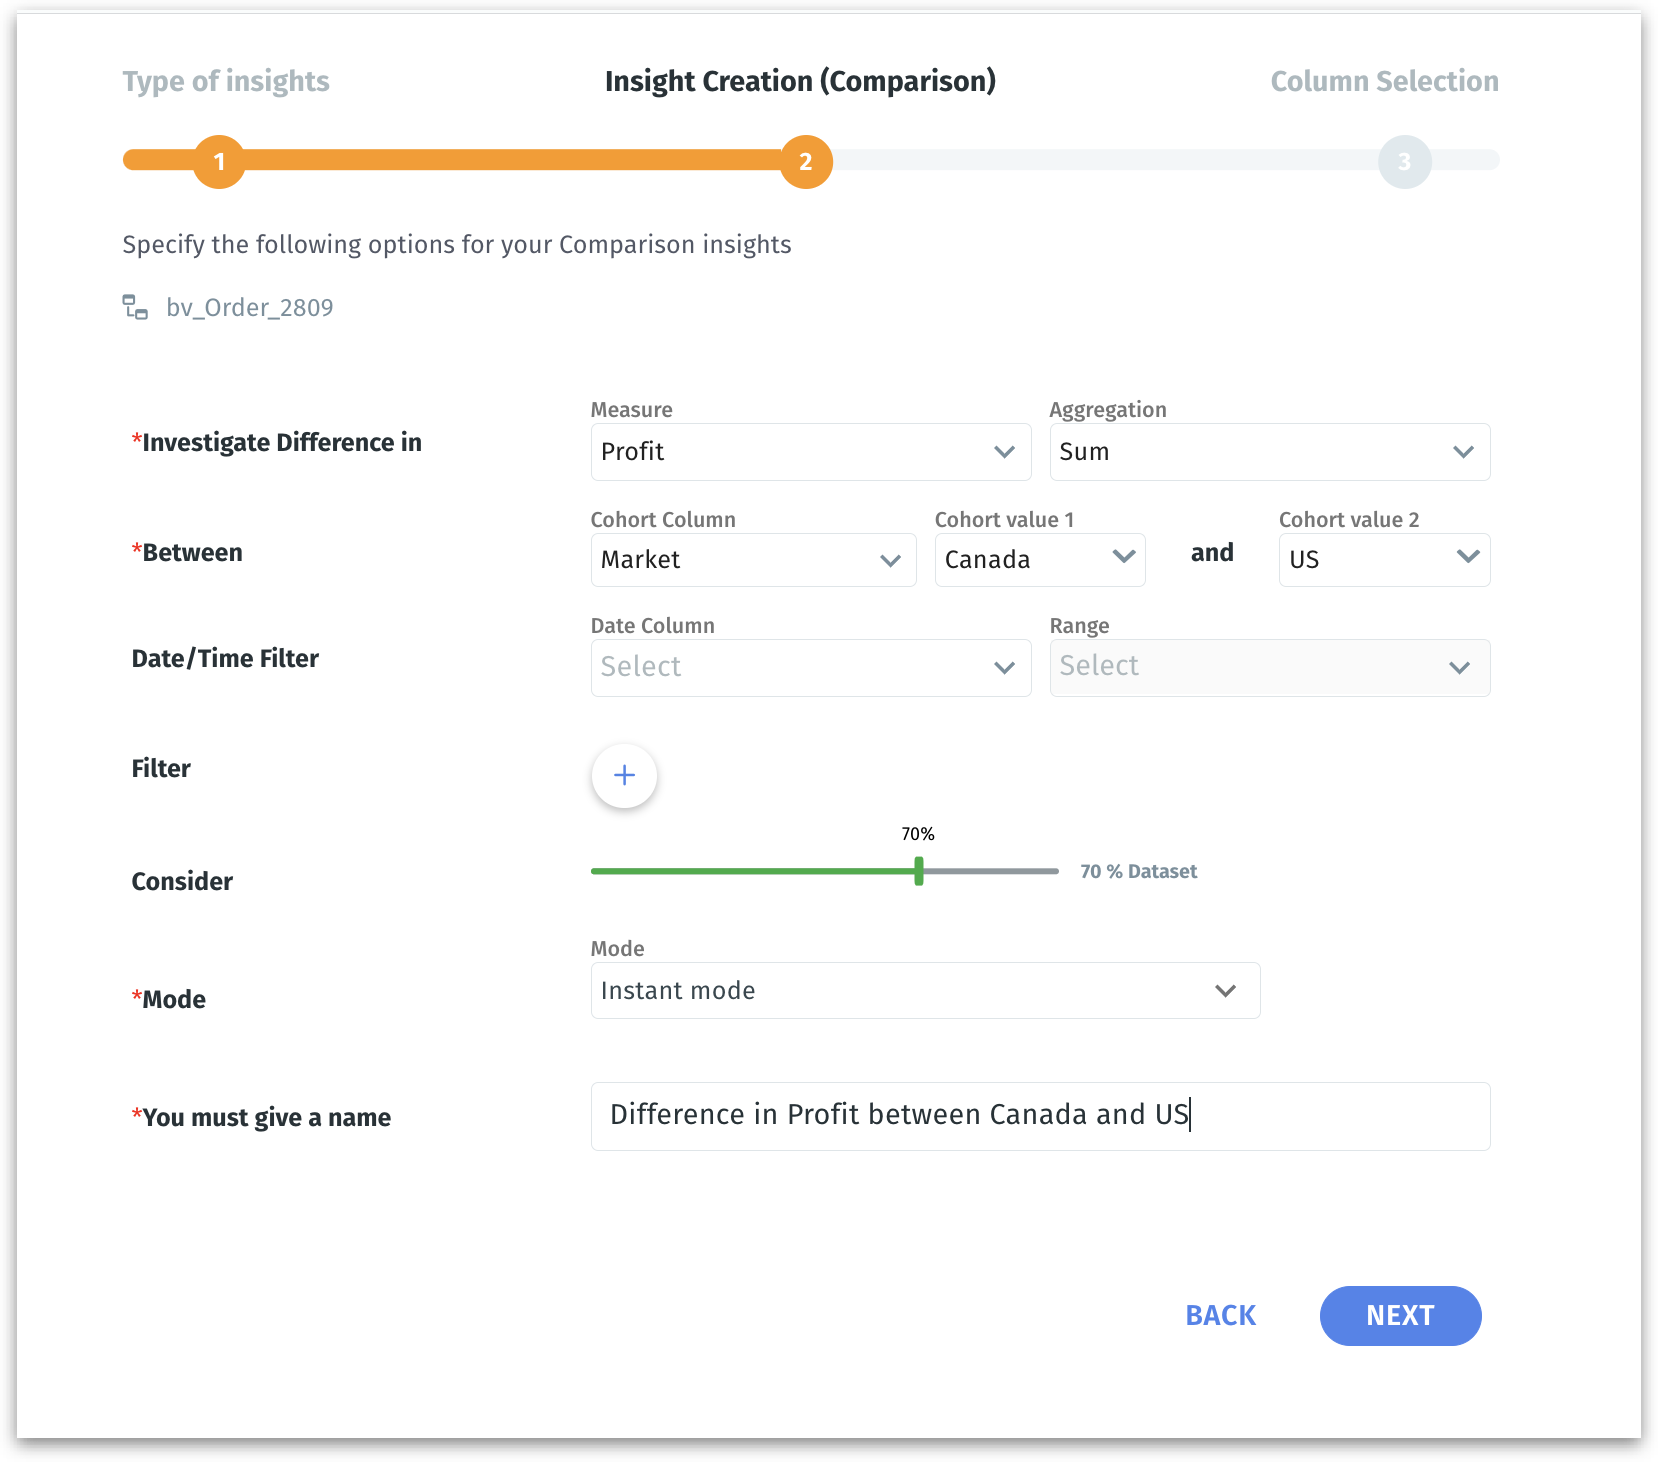
If you choose Comparison Insight, then the next step will be displayed as follows:

1. Investigate change in
Select the specific measure you want to analyze over time, such as "Profit." This sets the focus of the Trend Insight, guiding on which metric to assess for changes.
2. By
The "By" field lets you choose the dimension (e.g., "Order_Date") against which the measure will be analyzed. Specifying a dimension gives a structured context to your trend analysis, such as assessing changes day by day.
It contextualizes the measure within a certain framework, such as time, allowing you to see how "Profit" trends over days, months, or years.
3. Between
Define the time periods you want to compare. This comparison reveals how the chosen measure has changed from one period to the next.
4. Filter
Apply filters to narrow down the analysis. This fine-tunes the analysis by focusing on the most relevant data for your inquiry, such as a particular product line or customer segment.
For example, if you want to focus on transactions over $500 to identify what drives these high-value sales, you can set the filter condition: Transaction Value > $500.
Click on the "+" sign to view the filter condition fields. Select the required column, operator, and value. To apply more filters, click on the "+" sign again. Click on the "x" sign to remove the filter.

5. Consider
Defines the data scope of your analysis. Adjust the range selector to select the portion of the dataset that Insight should consider.
For example, if you set the "Consider" field to "50%", half of your entire dataset will be selected for the analysis. This can be particularly useful for analyzing a sample of your data when the full dataset is too large to analyze efficiently.
6. Mode
Choose the depth of analysis, from "Instant mode" for a quick overview to "DeepDive mode" for an in-depth analysis. The mode determines how detailed the insight will be and influences the complexity and granularity of the results.
You must give a name
Assign a unique and descriptive name to your Trend Insight for easy identification and future reference.
Importance: Naming your insight provides clarity, especially when you have multiple analyses running concurrently or when sharing insights with team members.
Each field contributes to customizing the Trend Insight to your specific needs, ensuring that the resulting analysis is not only precise but also actionable, based on the changes over time within the context you’ve defined.
3. Filter
By adding filters, you can include or exclude certain data points based on predefined criteria. This fine-tunes the analysis by focusing on the most relevant data for your inquiry, such as a particular product line or customer segment.
For example, if you want to focus on transactions over $500 to identify what drives these high-value sales, you can set the filter condition: Transaction Value > $500.
Click on the "+" sign to view the filter condition fields. Select the required column, operator, and value. To apply more filters, click on the "+" sign again. Click on the "x" sign to remove the filter.

4. Consider (Range Selector)
Defines the data scope of your analysis. Adjust the range selector to select the portion of the dataset that Insight should consider.
For example, if you set the "Consider" field to "50%", half of your entire dataset will be selected for the analysis. This can be particularly useful for analyzing a sample of your data when the full dataset is too large to analyze efficiently.
5. Name
Give a meaningful name to your Insight and click on Next.
To know more about the next step, where you want to include/exclude columns, please check out this section.
Was this helpful?