Creating calculated columns
Create custom row-level or aggregated calculated columns in Tellius to extend datasets with business metrics, KPIs, and reusable formulas—all without altering source data.
Calculated Columns are a powerful feature that allows you to create custom columns within your dataset by applying formulas or calculations. This feature is especially useful for extending your raw data with new metrics or business-specific values without altering the original source data.
Create columns tailored to your needs, such as profit margins, customer lifetime value, or custom KPIs, directly within your BV.
Instead of repeatedly performing calculations in external tools like Excel, you can define them once and reuse them seamlessly within Tellius.
Calculated columns extend your dataset without altering the original data, ensuring the integrity of your source remains intact.
With calculated columns, you can preprocess data to prepare it for deeper analysis.

You can search for the required calculated column and each column displayed in the table can be sorted in ascending or descending order. In Edit mode, you will get Undo and Redo buttons left to the search bar for reverting or reapplying changes made to the calculated columns, ensuring flexibility and control over your edits. Each row in this table shows the following:
Column Name: Name of the calculated column
Display Name: A user-friendly label for the column
Synonyms: Alternate names for natural-language search
Formula: The actual expression or calculation.
Calculation Type: Choose whether Column-level or Row-level.
Data format: Represents how numeric or date values are displayed (e.g., Decimal, Percentage, Currency).
Hidden: A flag controlling whether this column is visible to end-users or in search queries. Allows you to hide intermediate fields that are only used for further calculations, or sensitive columns not meant for broad consumption.
Description: Describing the purpose and logic of calculated columns when they hover over or view the column in Tellius
Status: Indicates whether the column is Published (visible and usable in analyses) or in Not Published draft state. If any changes are made to the existing calculated columns, then the Status will be changed to Edited before publishing.
Row-level vs. Column-level calculations
For example, max(Discount) is an aggregate (column-level), whereas Price * Quantity might be a row-level expression.
Row Level: Applies the expression to each individual row in your data. You get a result per row (like total cost of a single order line).
Examples:
Price * Quantity
Cost - Expense
Cost / Transactions
Use row-level when:
You need a per-row calculation in the dataset (e.g., extended price of an order line).
The formula references only non-aggregated fields (e.g., Order_Price, Discount_Rate).
Results appear as a new unaggregated column, meaning each row has its own calculated value.
Column Level: An aggregate calculation applied across rows, resulting in a single value or grouped values.
Examples:
sum(Sales) / sum(Leads) * 100
sum(Sales) / count(Order)
max(Discount)
Use column-level when:
You want an aggregated metric (like a ratio, average, or max) that’s computed at the group or entire dataset level.
You're looking to create KPI calculations such as conversion rates, total sums, or highest discount.
Creating a new calculated column
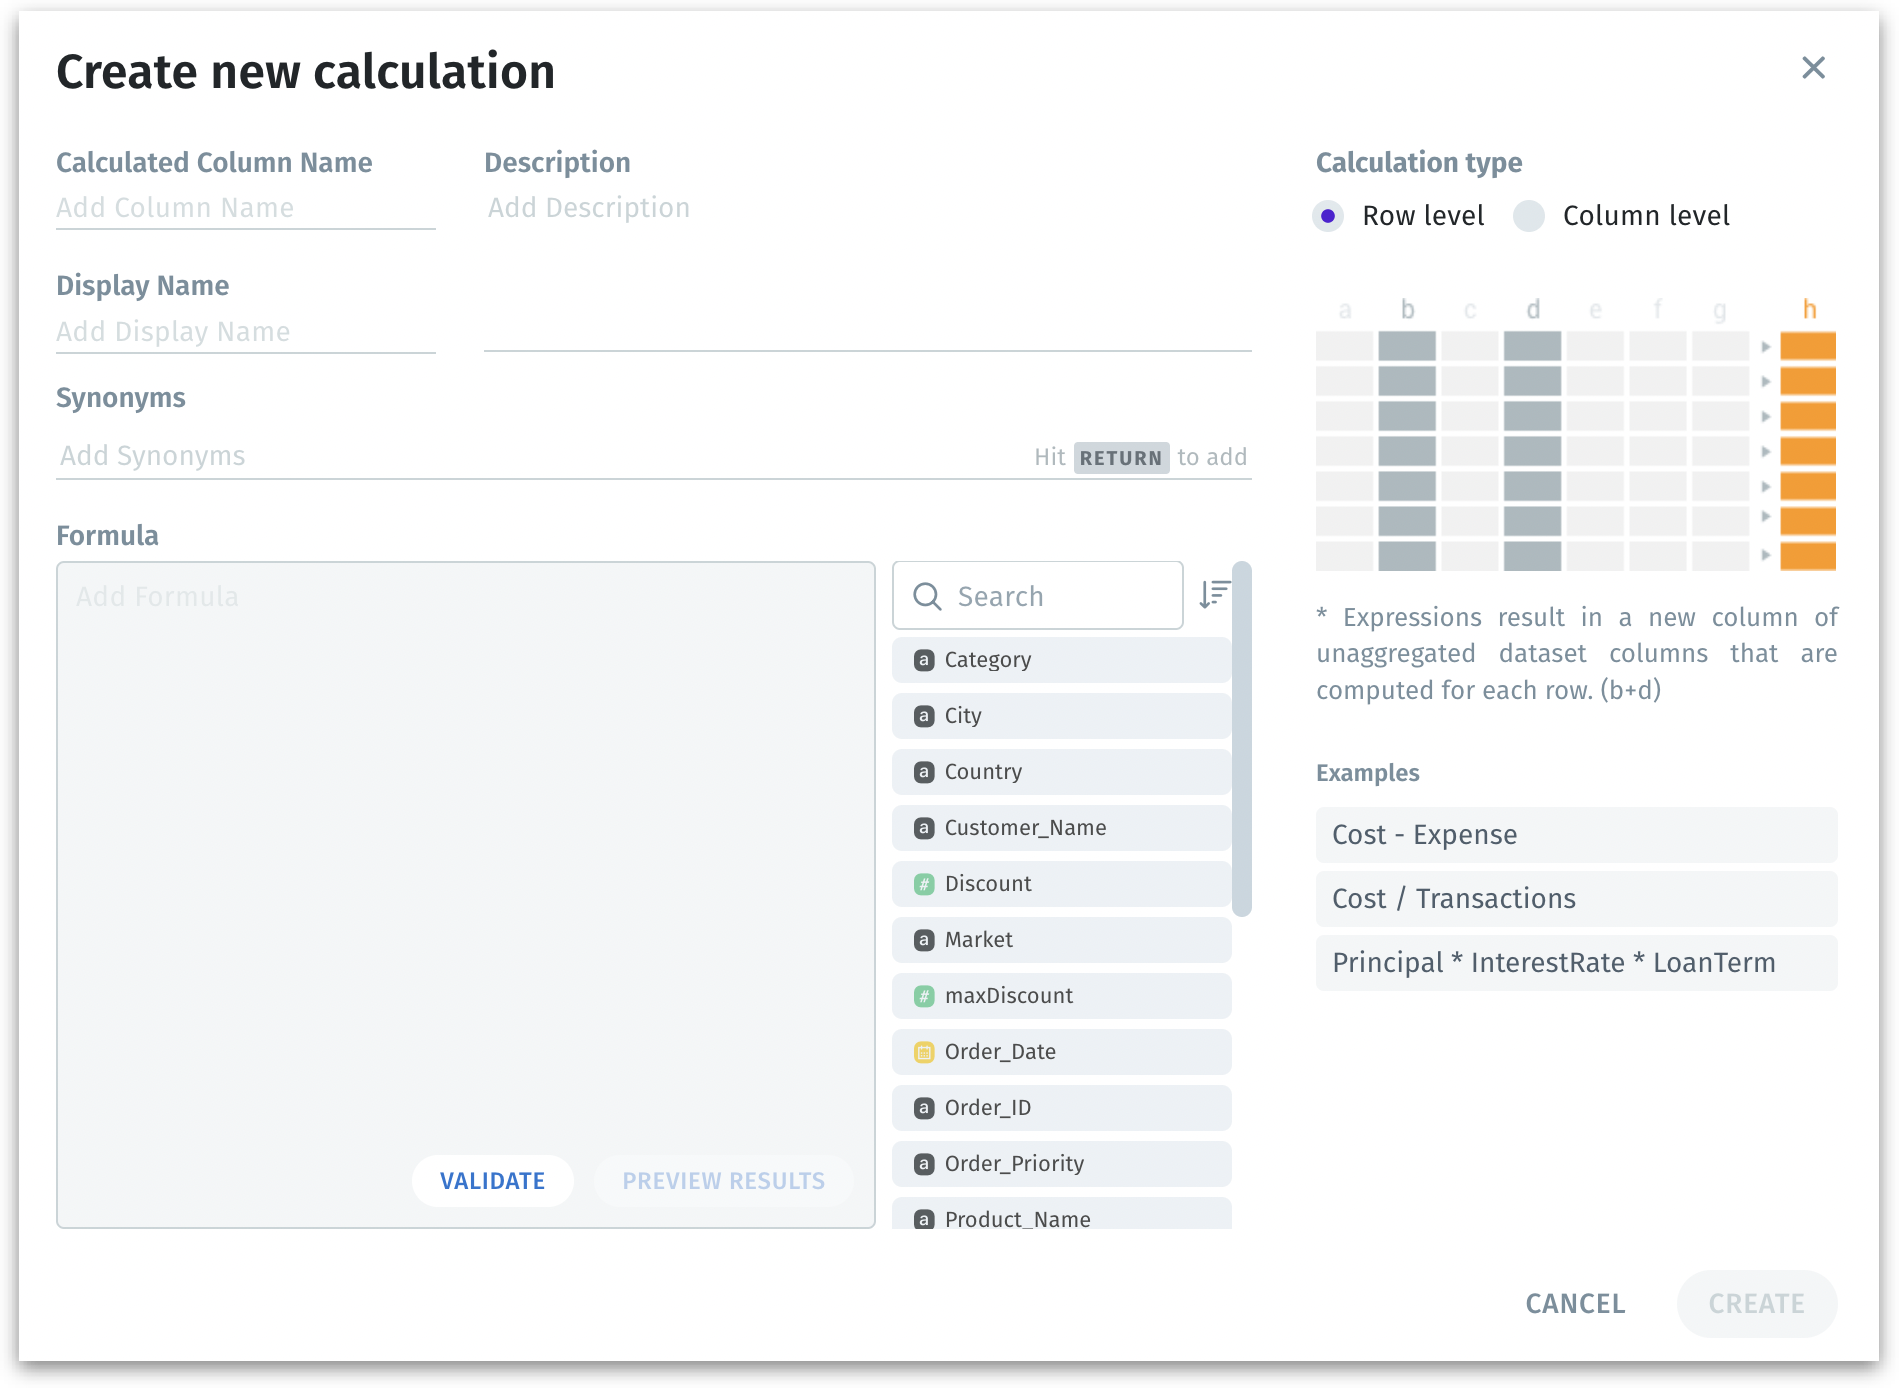
Under Data → Business Views → Calculated Column, click on Edit → Create new calculation, and the following window will be displayed:

Calculated Column Name: A name for the new calculated column (e.g., gross_margin).
Description: A short text detailing the column’s purpose or formula logic.
Display Name: The user-friendly label that appears in charts and searches (e.g., Gross Margin instead of gross_margin).
Synonyms: Alternate names or phrases for natural language search (e.g., “profit margin,” “gross margin %”). Press Return (or Enter) to add each synonym.
Formula: A text area to define your expression—e.g., Price * Quantity or max(Discount). The columns of the selected Business View will be displayed in the right pane for your reference.
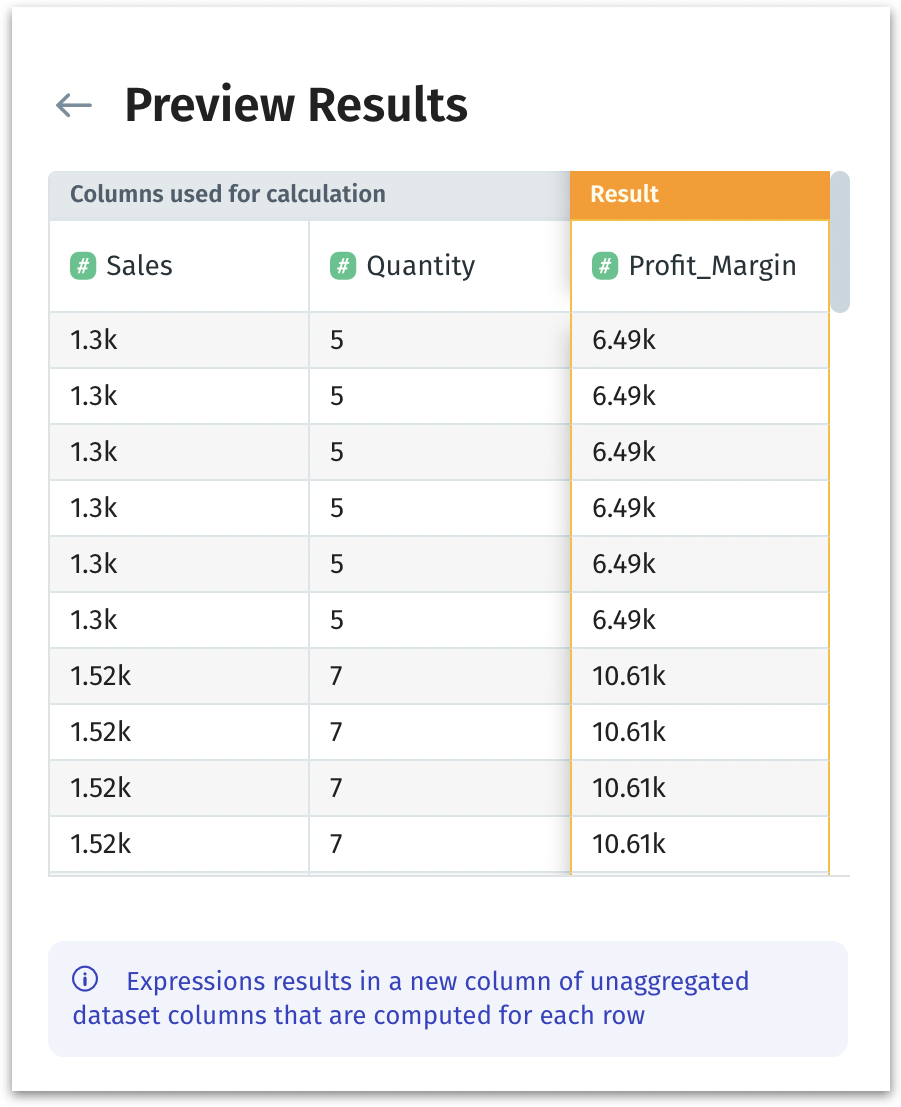
Validate / Preview Results: Validate your formula syntax and click on Preview Results to view the sample output before saving.

After providing all the required details, click on Create, and the calculated column will be added to the table in "Not Published" state.
Click on Publish to save the BV with the newly created calculated columns.
Was this helpful?