Groups
Manage user groups in Tellius—create, edit, and assign roles, apply row-level security, and control data access policies for users and teams.
Under Settings → Users & Groups → Groups, the Groups section allows admins to manage user groups, assign users to groups, and define data access policies like row-level security.
Group Directory
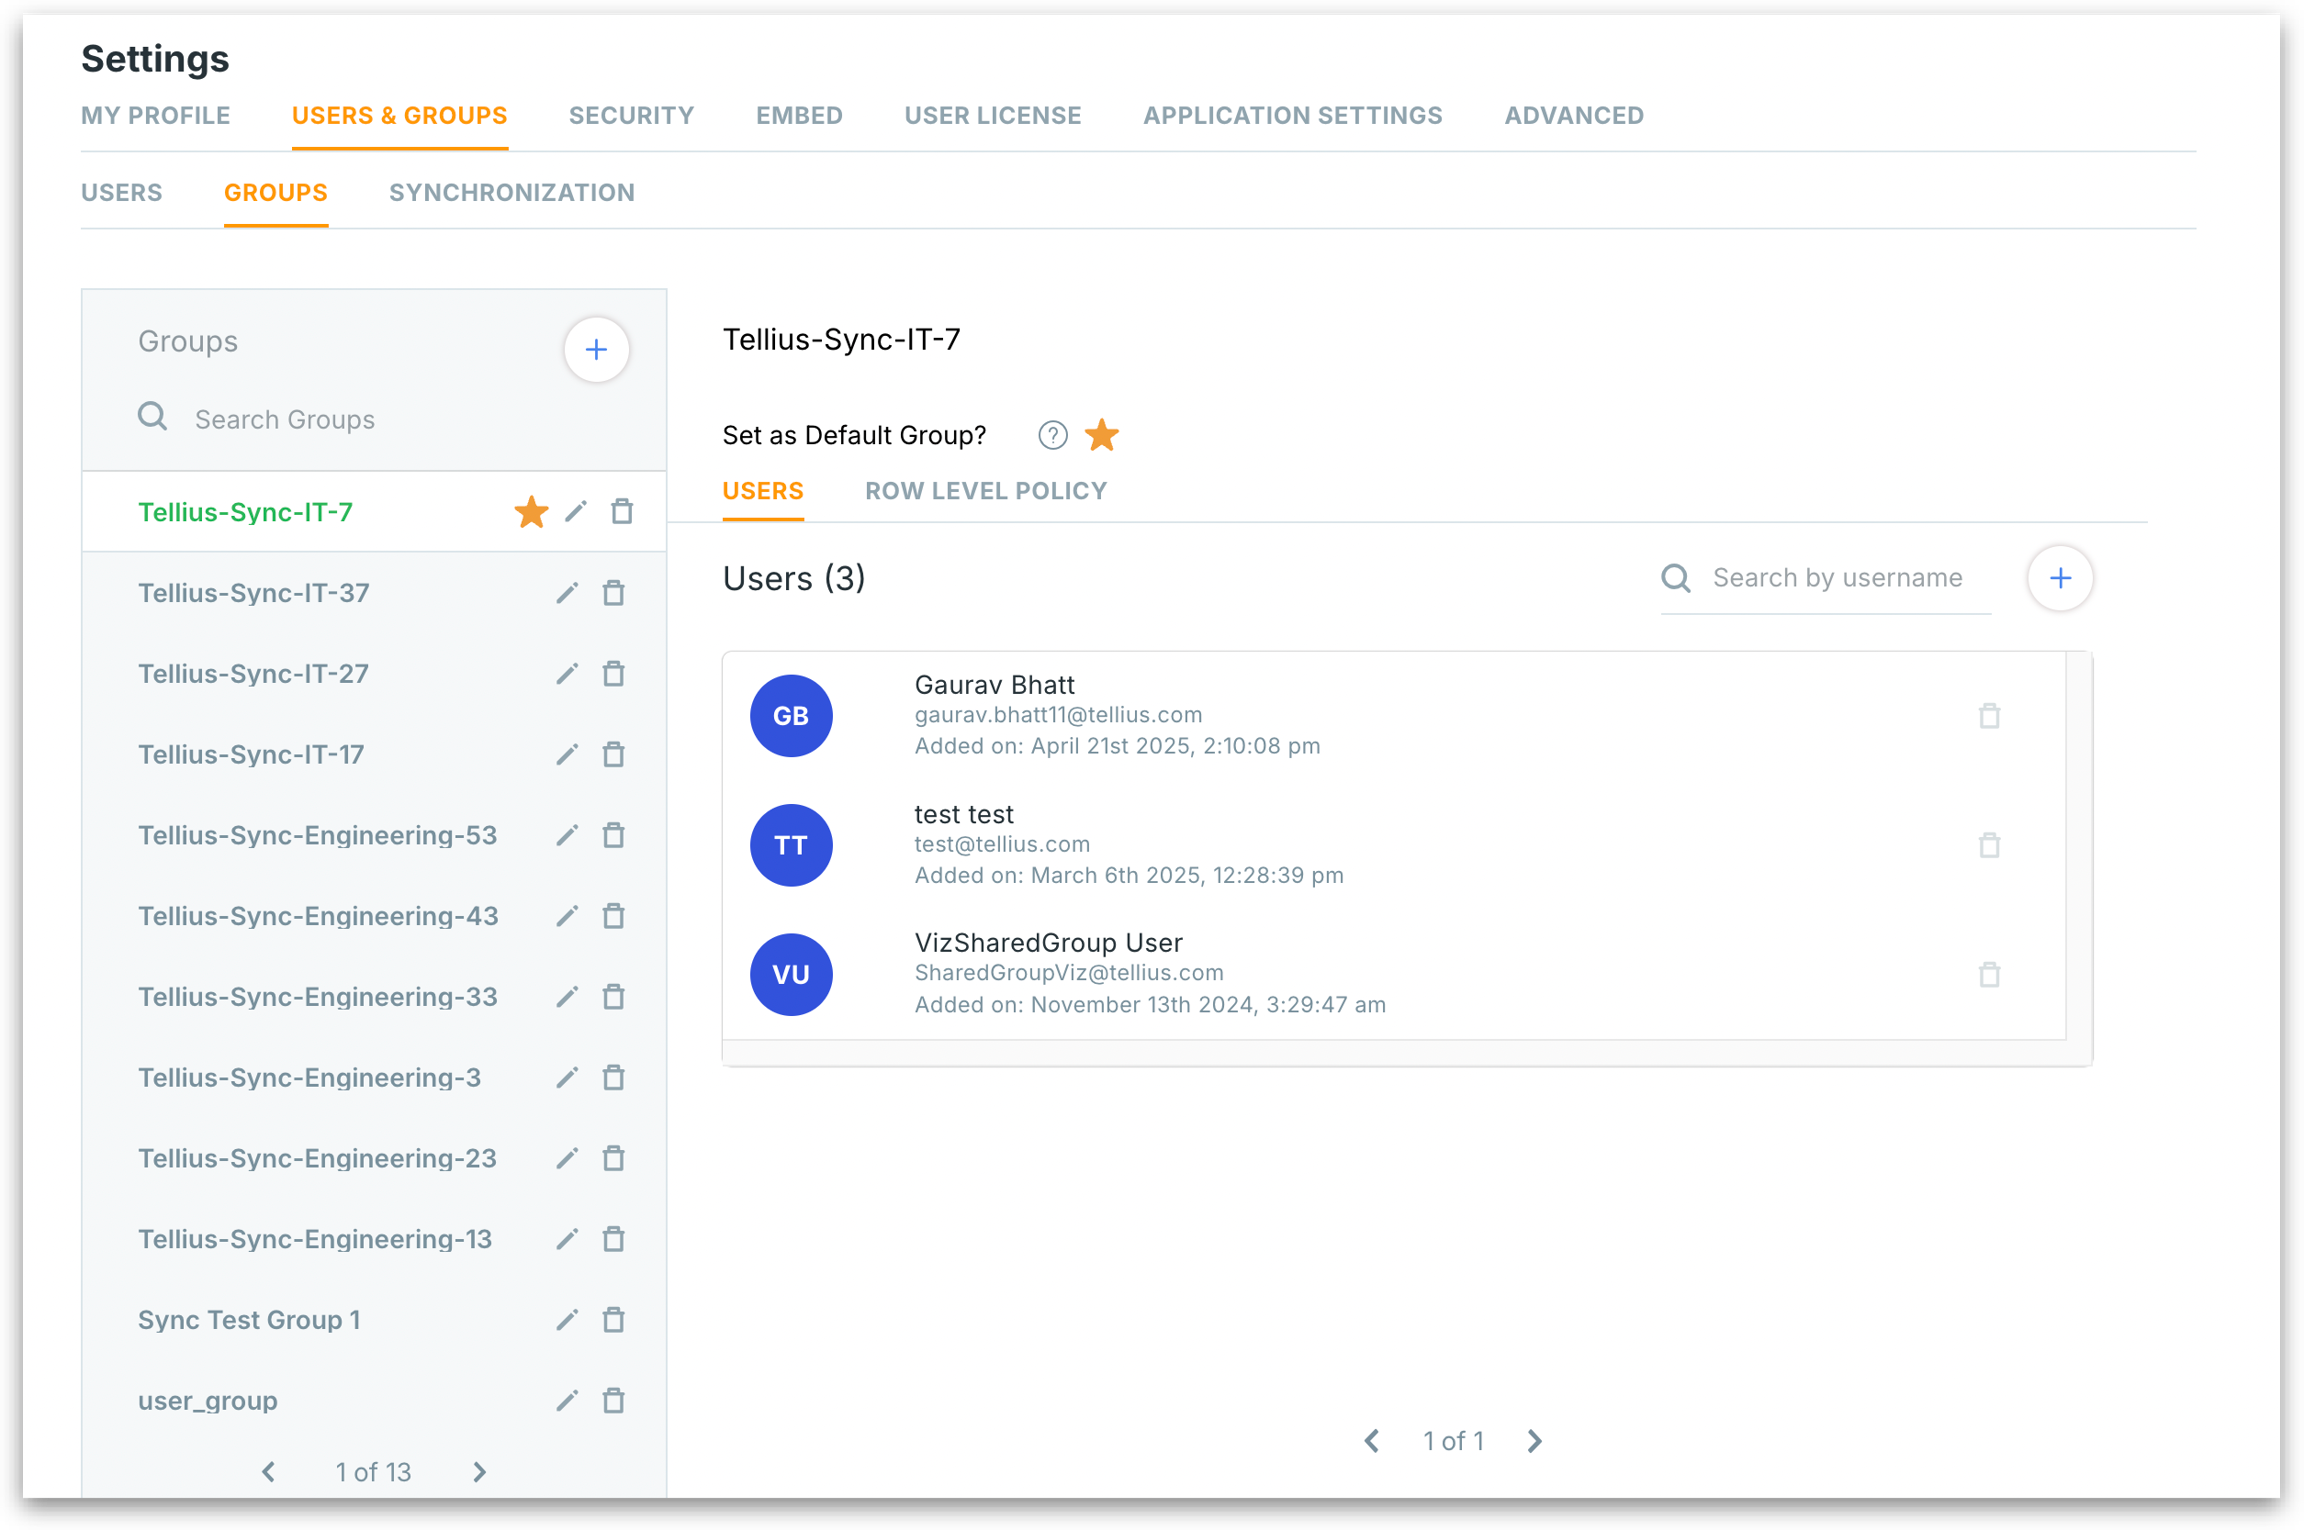
The list of existing user groups is displayed. Located at the top of the left pane, you can search for the required group to instantly filter the list of existing groups by name.
The group selected as the default will be marked with a ⭐ next to its name. For more details about the default group, check out this page.
Creating a new group
Click on the "+" button next to the search field to create a new user group. Use the following window to define the new group, assign it as the default group for new users, and optionally apply it to existing users.
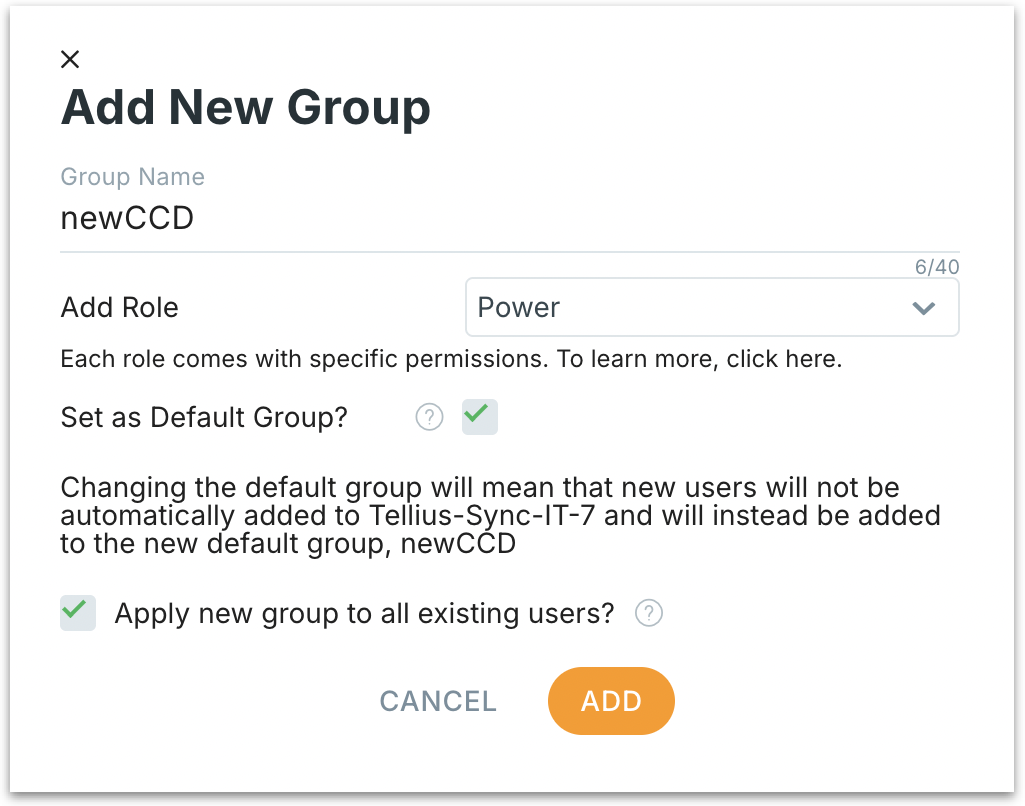
Group Name: Enter a unique name (with a limit of 40 characters) for the new group.
Add Role: Assign a default role to all users in this group.
This role determines the baseline access level for all users in the group. It can still be overridden at the individual user level if needed.
Set as Default Group: When checked, this group becomes the default group for all newly created users. This overrides the current default group and new users will automatically be added to this group.
Apply new group to all existing users? When enabled, this option assigns the new group to all current users in the system. Existing group memberships (if any) are retained—this is an additional group assignment, not a replacement. Helpful when introducing a new governance layer, shared role, or global policy.
Click on Add to finalize the creation of the new group or click on Cancel to dismiss.
Users assigned to a group
For each selected group, you can view the list of users associated with that particular group under Users tab in the right side. The search field can be used to filter for the required users. The following details will be displayed for each user:
Name of the user
Email ID
Date and time of addition to the group
To remove a user from the group, click on the Delete icon next to each user. This action does not delete the user from the system—only from this group.
Adding users to an existing group
The following window allows admins to add users to groups or the system via two simple methods: selecting from existing users or manually creating a new user.
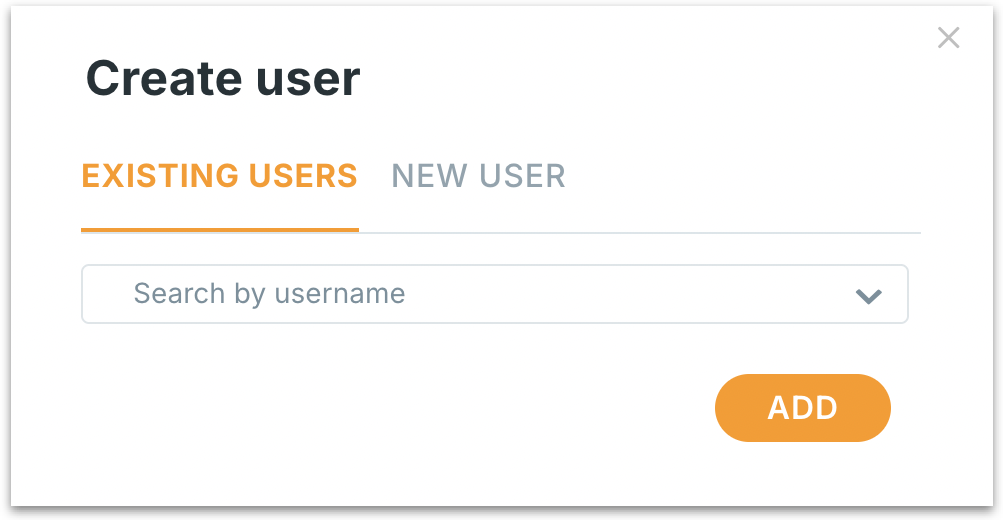
Existing users: Use this tab to search for users who already exist in your system. Use the dropdown to find and select an existing user from the list of all registered users. If the user doesn’t show up, use the New User tab to create them.
New user: Switch to this tab to create a new user account if they don’t already exist in the system. Check out this page to create a new user.
Click on Add to add the selected user(s) to the group.
Row level policy
Row-Level Security enables admins to restrict data visibility for specific user groups by defining filters that apply at the row level of a Business View.
For example, you can:
Limit users in this group to see only data from their region, business unit, or product line. Users in the “Sales-West” group can only see rows where
Region = 'West'Apply SQL-like conditions or filters to restrict access based on user attributes.
This ensures users only see the data they're allowed to access, based on their group membership.
Create a new row level policy
Click on the + Row Level Policies button to define your policy.
The configuration panel is displayed as shown below:
Business View: Select the Business View
Filter Column: Pick the column to filter on.
Filter Action: Pick how the filter is applied.
Value: Enter the filter value to restrict access.
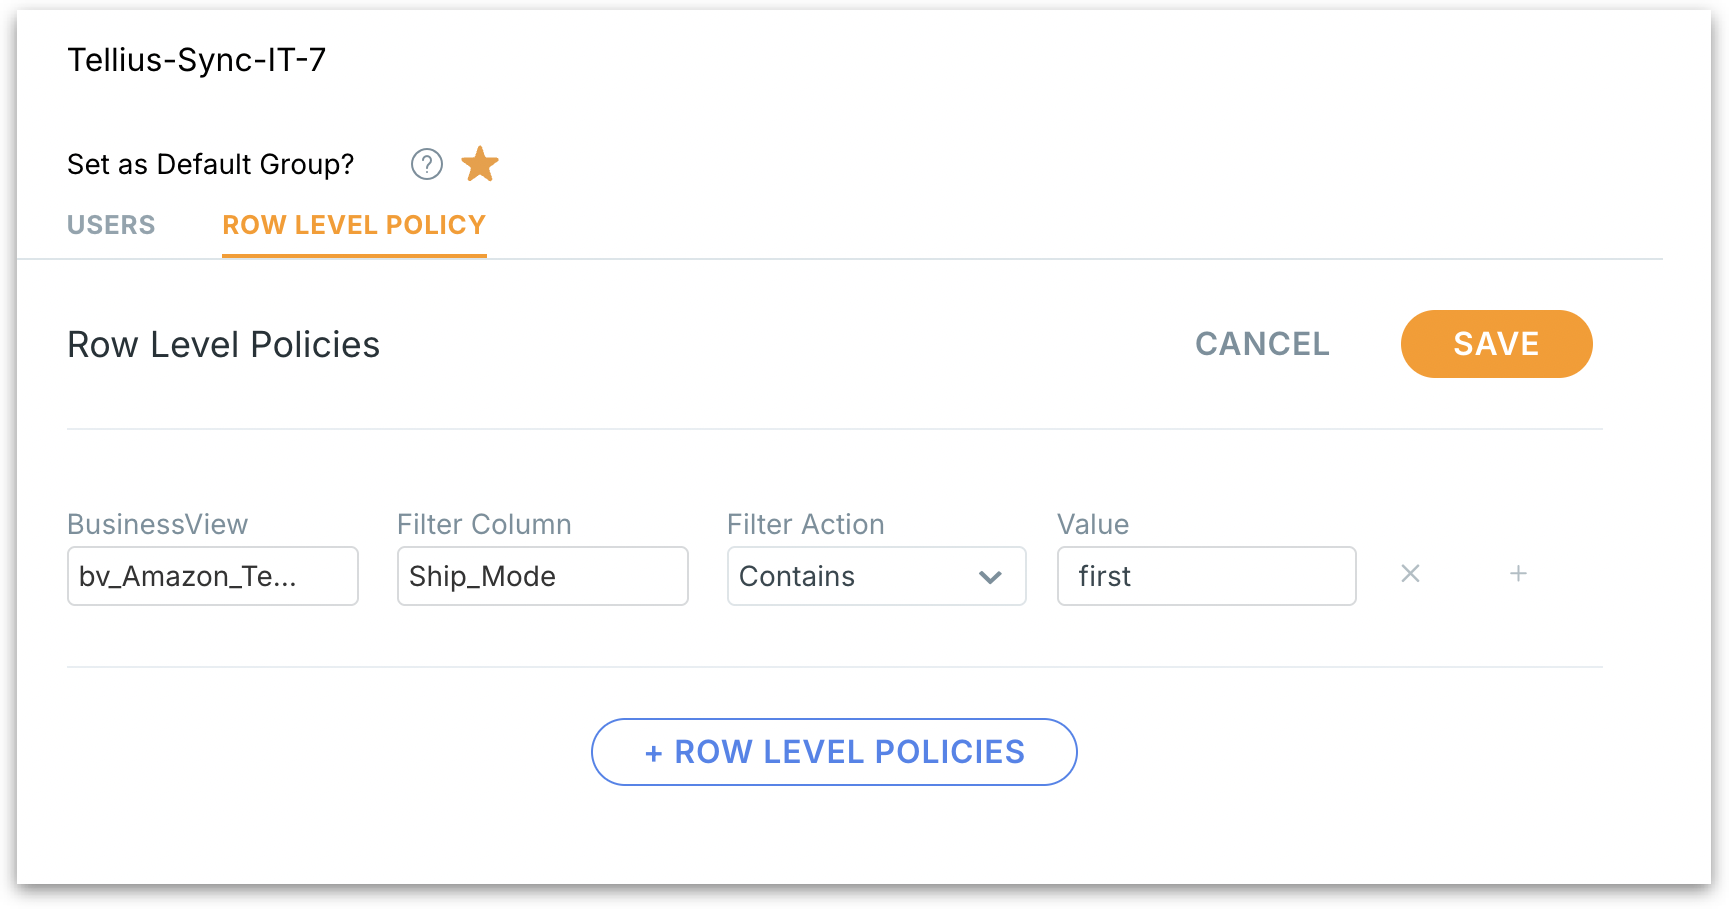
Click the "+" button in the right to add additional filters within the same policy.
Each added filter further restricts the data (logical AND or OR).
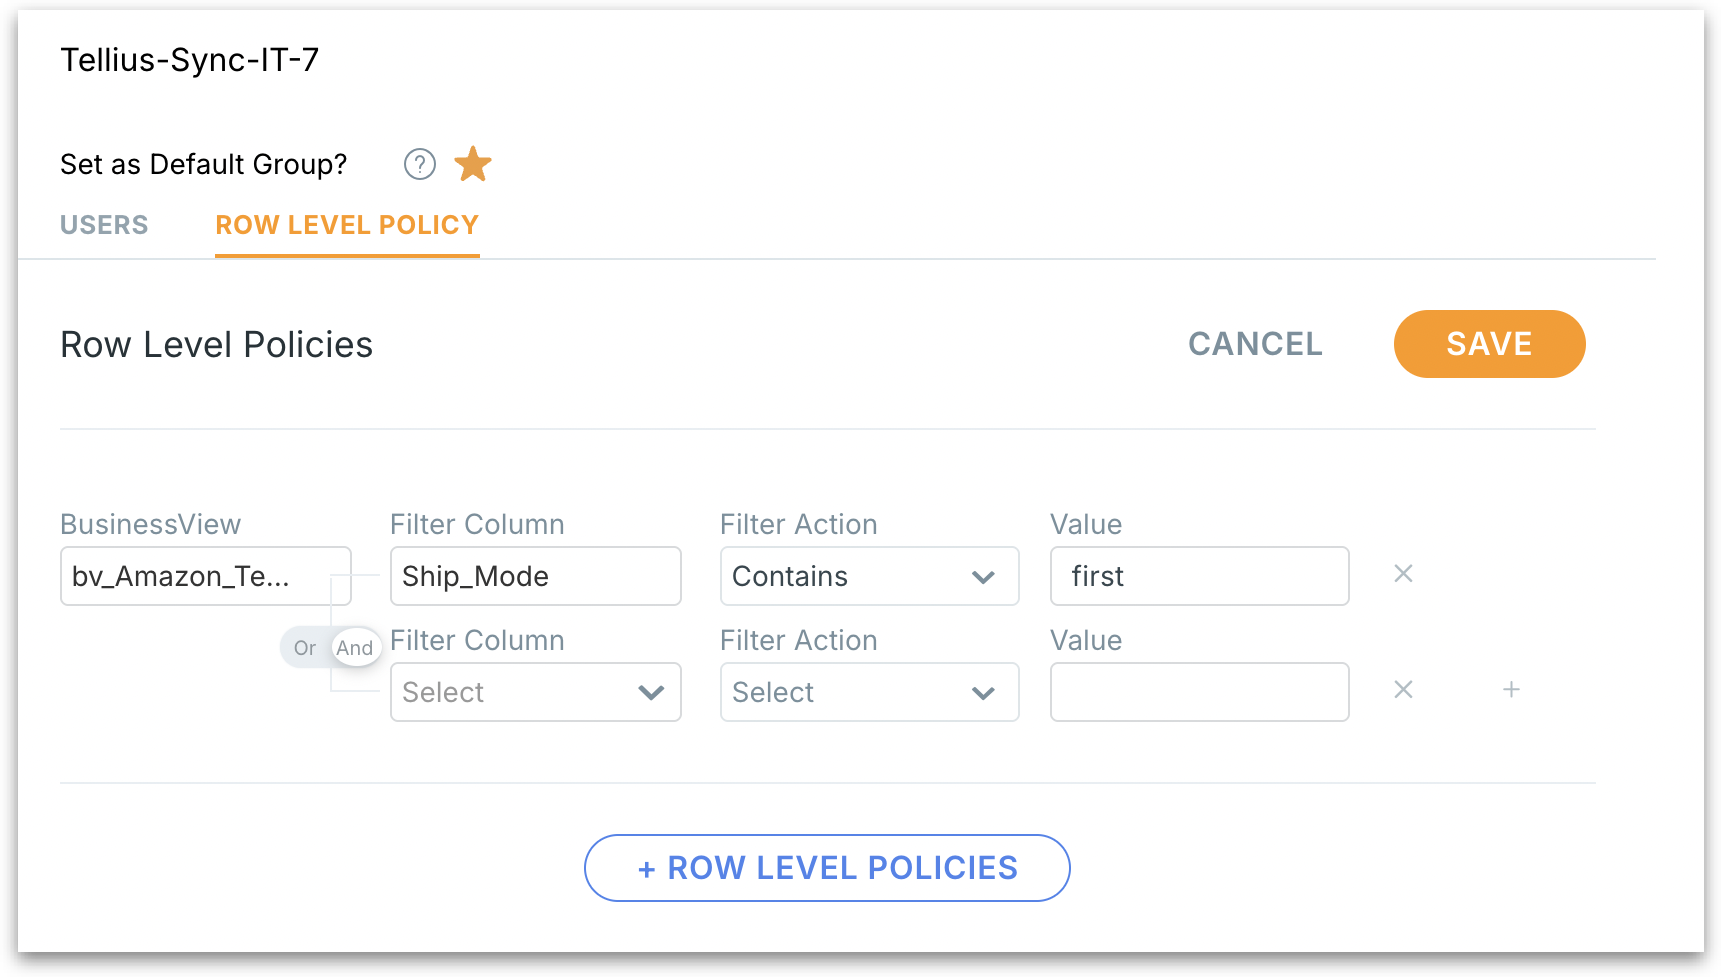
Click the X next to a row to delete that specific policy rule.
Click on the + Row Level Policies button to add another policy block for a different Business View or different set of rules.
Click on Save to commits all policy changes. Once saved, all users in this group will only see rows of data as per the defined filters.
Click on Cancel to discard all unsaved changes.
If no Row-Level Policy is applied to a group, users in that group will see all rows of the associated datasets. Leverage row-level security to meet compliance, privacy, and business partitioning requirements.
Was this helpful?