Integrating Snowflake with Okta via OAuth

Learn how to integrate Okta with Tellius for Snowflake using OIDC. This step-by-step guide covers app setup, scopes, claims, Snowflake configuration, and OAuth connection settings.

This guide will walk you through the steps to integrate Okta with Tellius for Snowflake.

1. Navigating to the Okta Admin Page

Start by navigating to your Okta Admin page.

2. Creating a New Application

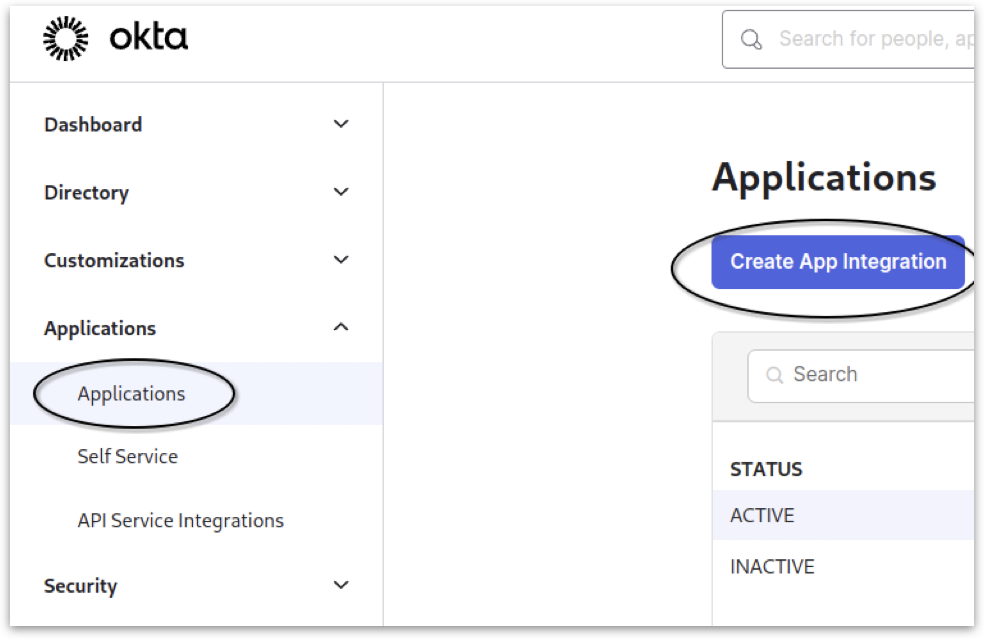
  • Navigate to Applications from the main menu.

  • Select Applications from the dropdown and click on Create App Integration.

Creating a new application

3. Configuring Application Settings
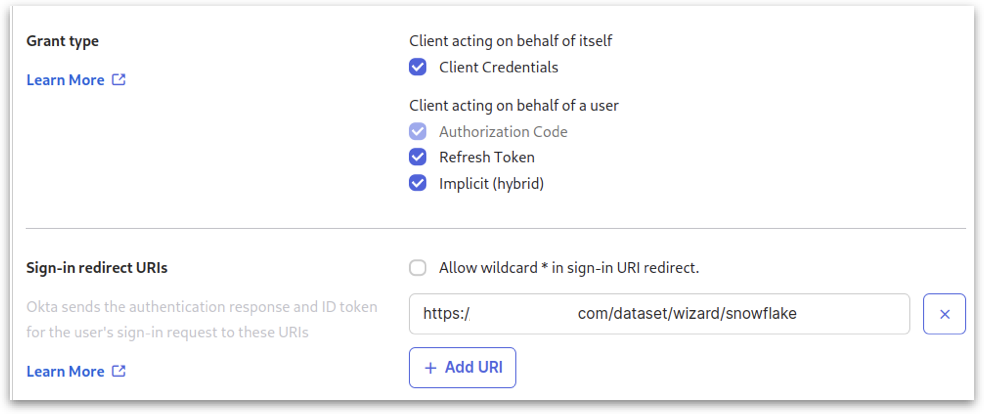
  • From the available options, choose OIDC - OpenID Connect --> Web Application.

  • In the Grant type options, click on all the available checkboxes and specify the necessary redirect URL(s). More than one URL can be specified.

Configuring application settings

4. Assignments and Saving

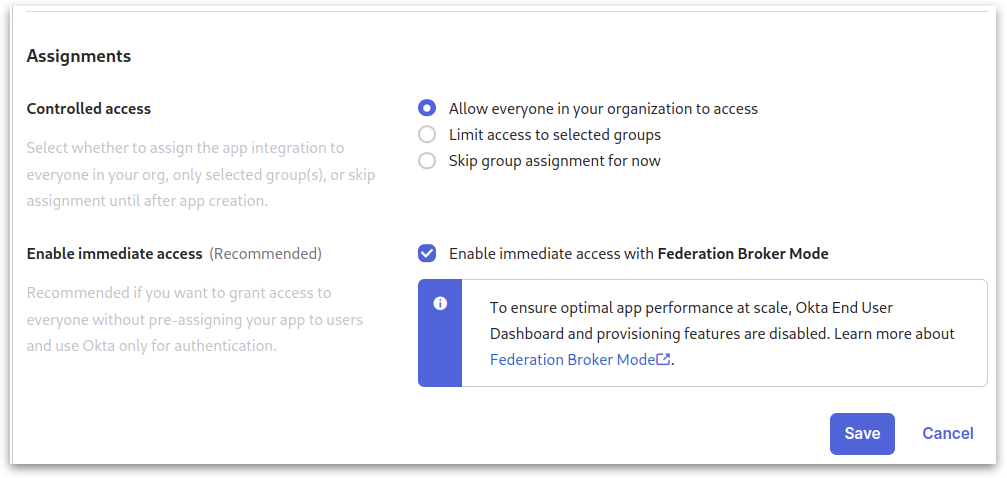
  • Under Assignments, click on Allow everyone in your organization to access option.

  • Click on Save.

Assignments

5. Getting Client ID and Secret

  • After saving, open the application you just created.

  • Note down the Client ID and Client Secret for future reference.

6. Setting Up Security API

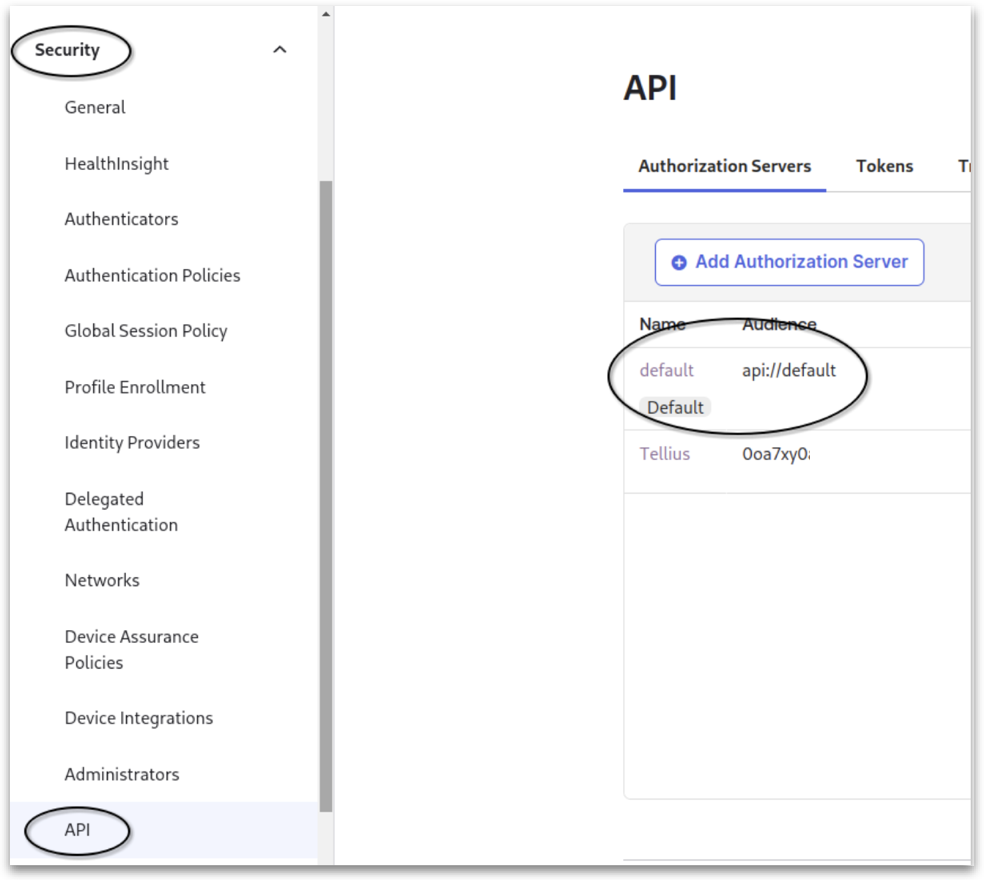
  • Navigate to Security from the main menu.

  • Select API -> default.

Security API
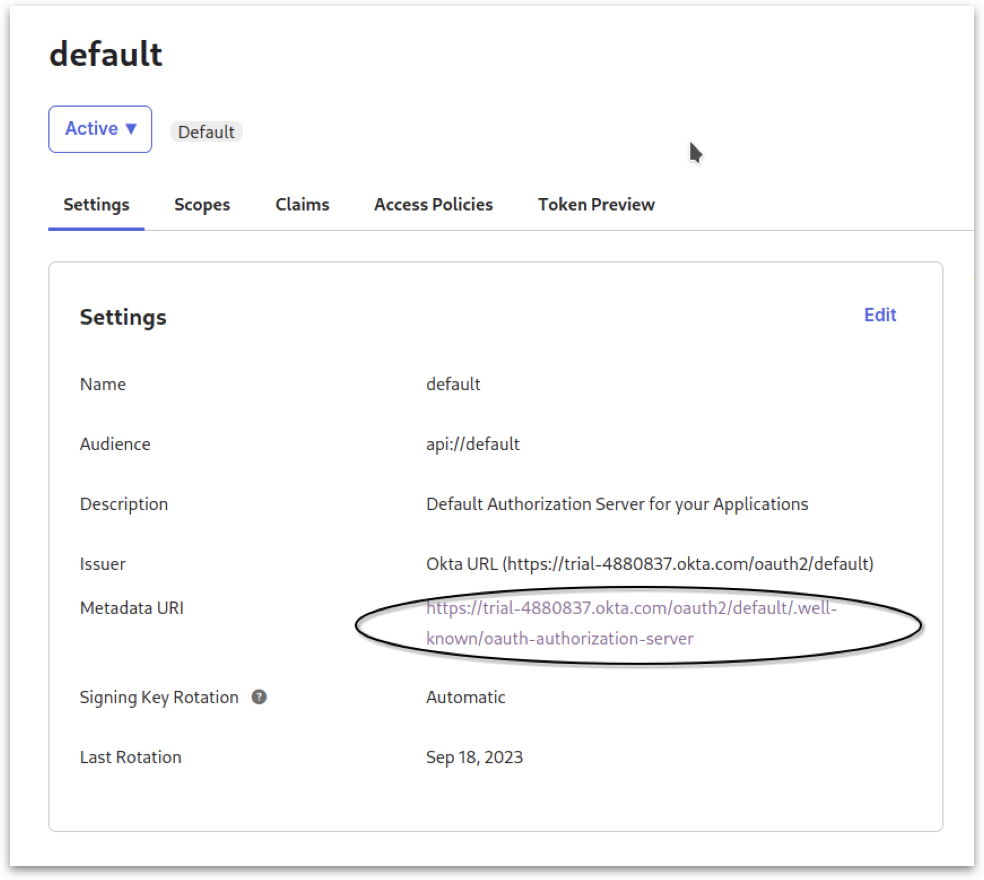
  • Click on Metadata URI. A new window will pop up.

Metadata URI
  • Note down the following details from the output and close the window:

    • issuer

    • authorization_endpoint

    • token_endpoint

    • jwks_uri

7. Configuring Scopes and Claims

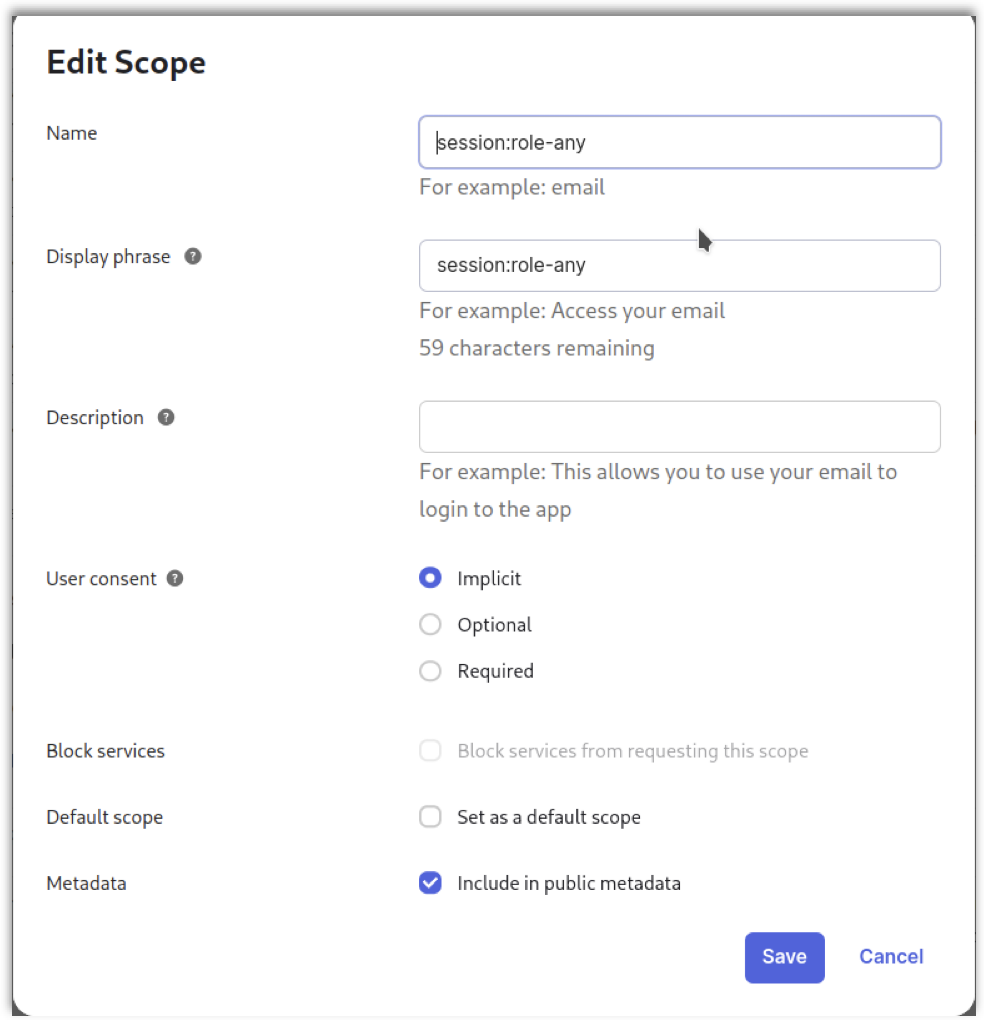
  • Go to the Scopes tab and create a new scope named session:role-any.

  • Click on Implicit for User consent.

  • Under Metadata, click on the Include in public metadata

Editing scope
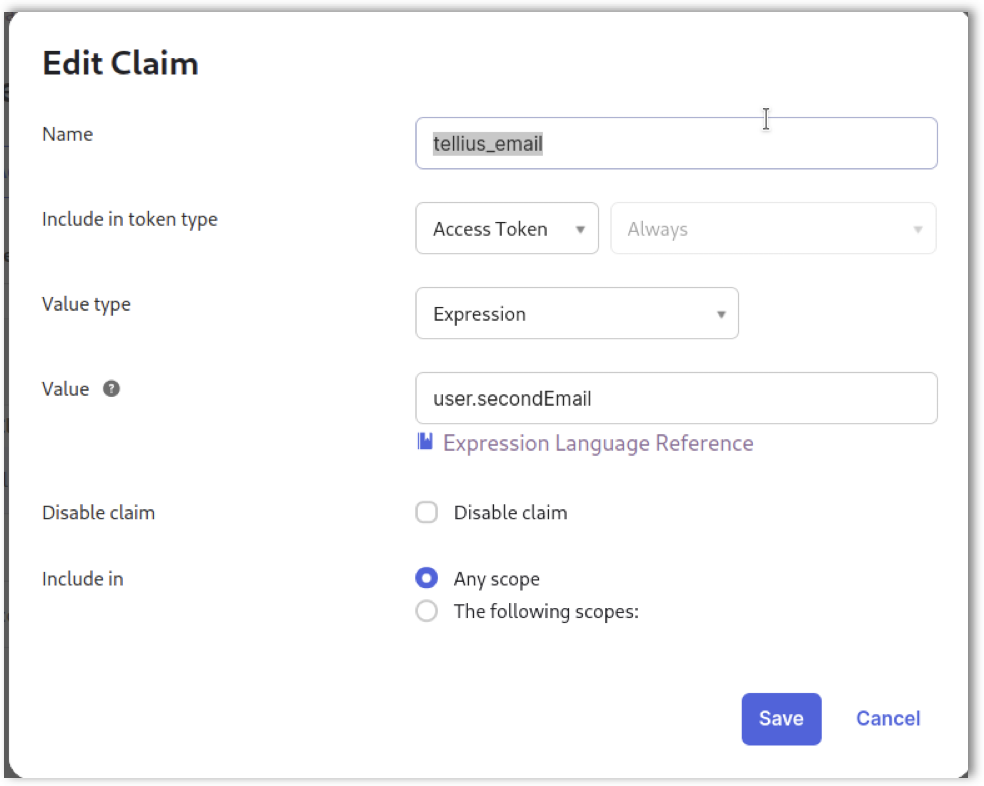
  • Navigate to Claims and add a new claim called tellius_email.

Editing claims

8. Updating User Settings

  • Open a new browser tab and access the User Settings.

  • Update the secondary email to [email protected].

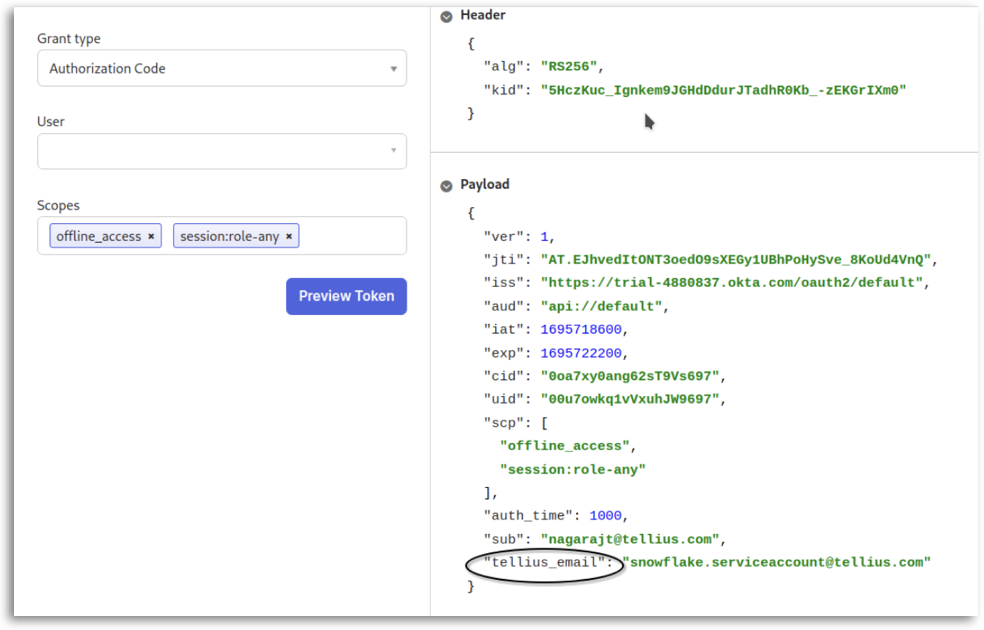
  • Return to the previous browser tab and navigate to Token Preview. Validate the token to ensure it contains the tellius_email value set as the secondary email.

Updating user settings

9. Configuring Snowflake Console

Switch to your Snowflake console and execute the following commands:

create security integration external_oauth_okta
    type = external_oauth
    enabled = true
    external_oauth_type = okta
    external_oauth_any_role_mode = 'ENABLE'
    external_oauth_issuer = '<OAUTH_ISSUER>'
    external_oauth_jws_keys_url = '<KEYS_URI>'
    external_oauth_audience_list = ('api://default')
    external_oauth_token_user_mapping_claim = 'tellius_email'
    external_oauth_snowflake_user_mapping_attribute = 'EMAIL_ADDRESS';

Replace <OAUTH_ISSUER> and <KEYS_URI> with the values you noted down earlier.

10. Connecting to Tellius

  1. With the above configurations completed, you're all set to connect to Tellius.

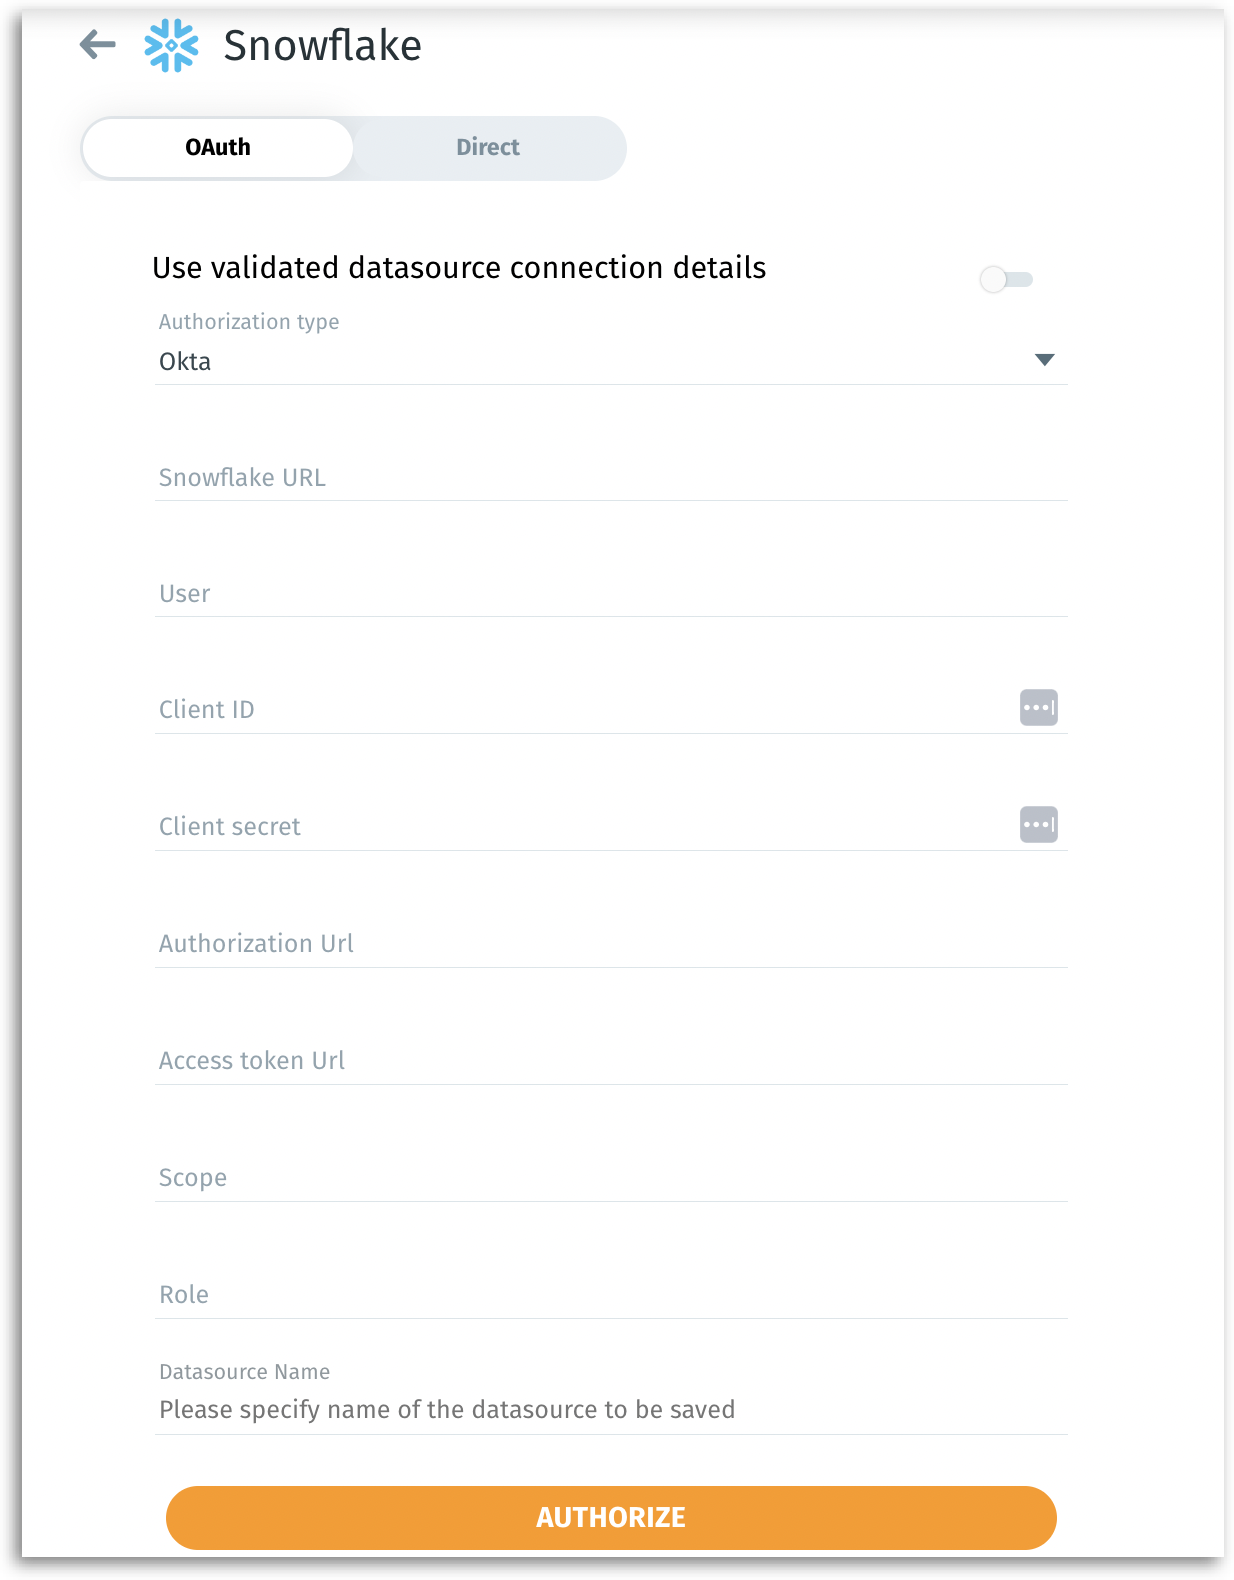
  2. In Tellius, navigate to Data --> Connect --> Create new --> Snowflake --> OAuth.

  3. Select Okta as the Authorization type from the dropdown.

  4. For the remaining fields, enter the details as follows:

Configuring Snowflake in Tellius
  • Snowflake URL: telliuspartner.snowflakecomputing.com

  • User: TELLIUS_PROD_TESTING

  • Client ID: (Use the Client ID from this section)

  • Client Secret: (Use the Client Secret from this section)

  • Authorization URL: (Use the authorization_endpoint from this section)

  • Access Token URL: (Use the token_endpoint from this section)

  • Scope: offline_access session:role-any

Last updated

Was this helpful?